Approveit Guide: Accounts Payable automation
Approveit allows you to automate your AP management completely and provides an unchangeable “audit”paper” trail for your EOTY or compliance audits.
Let’s look into the way it works.
Accounts Payable section of Approveit app includes:
- Vendor approval and management
- Bill management
- Purchase order management
- Budgeting (expense control)
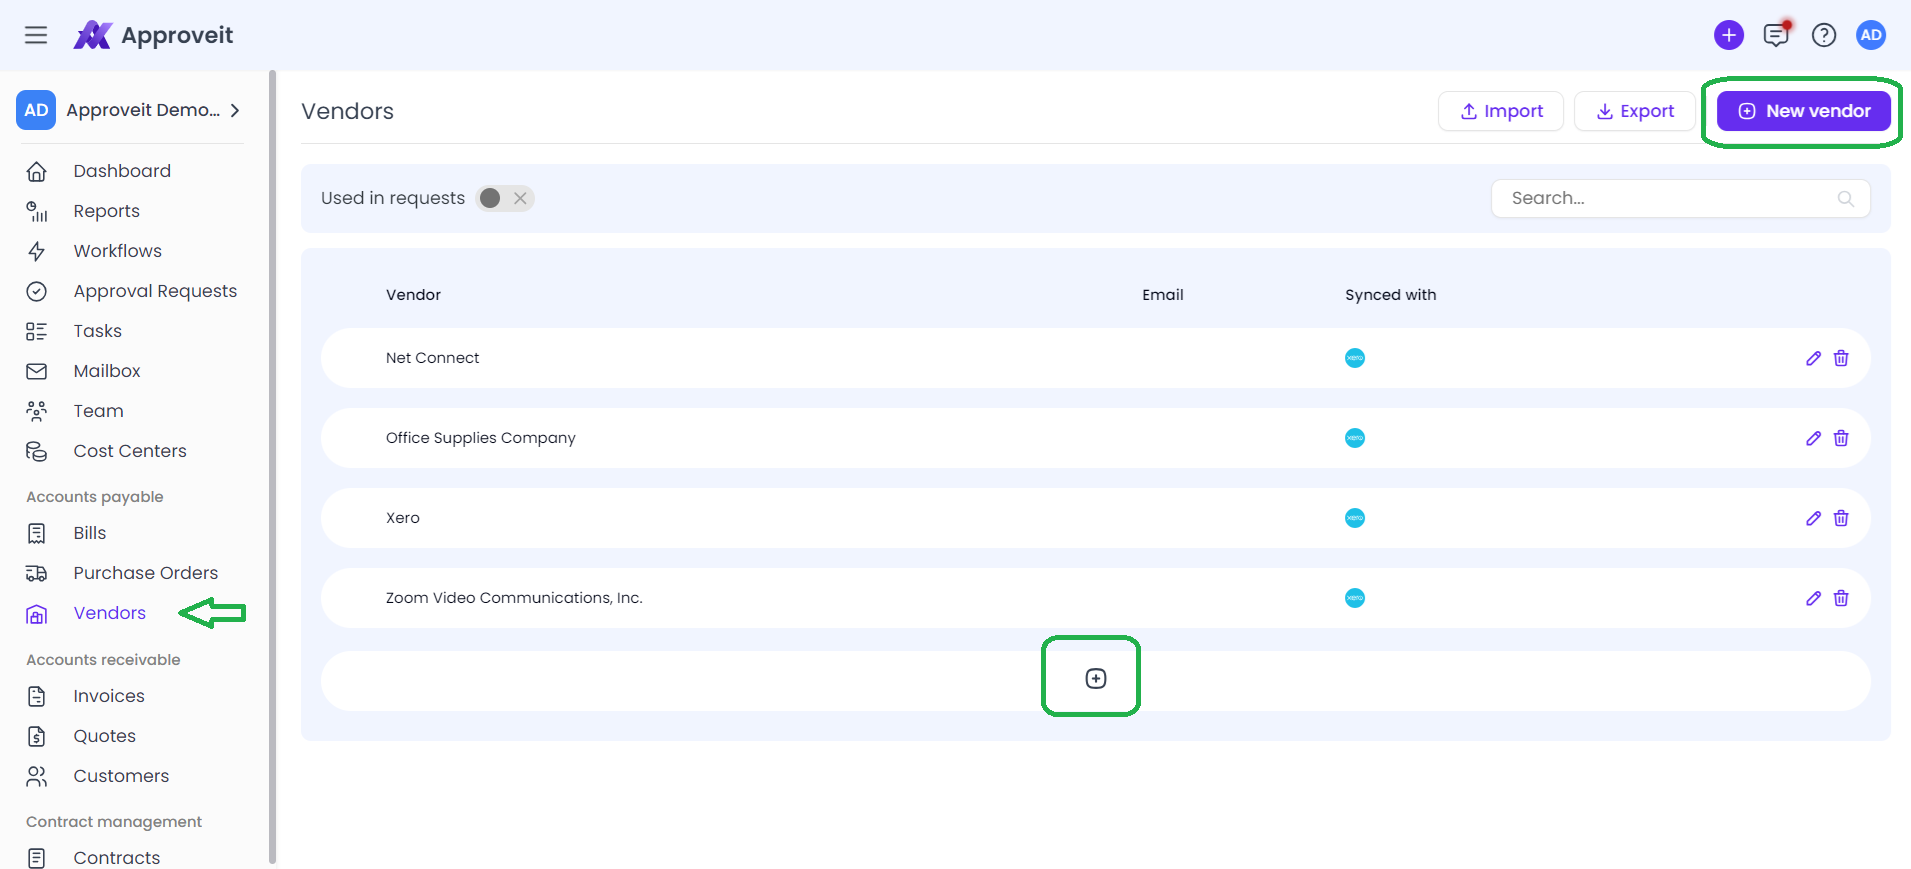
Adding Vendors
First thing you want to do is make sure your vendors are all safely imported into Approveit.
There are several ways to add vendors: manually one by one, import from a third-party system you already use, or import in bulk using a CSV file.
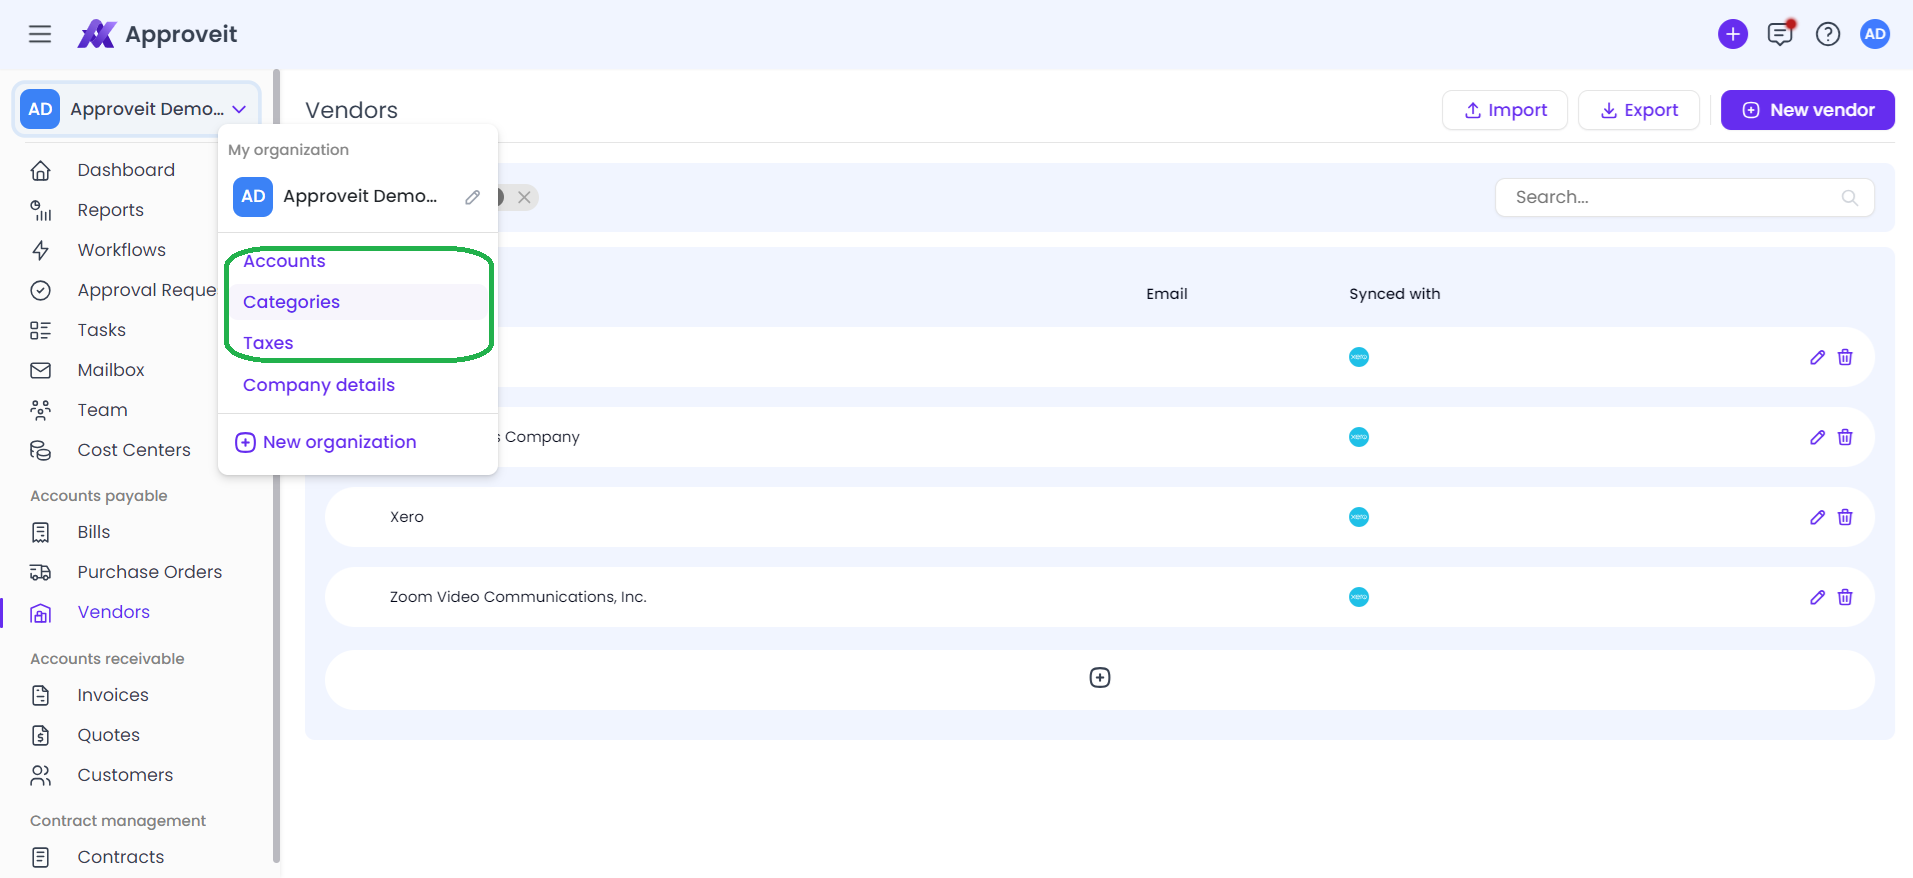
To add your vendors manually, go to the Vendors tab and hit “New Vendor” or a “+” icon
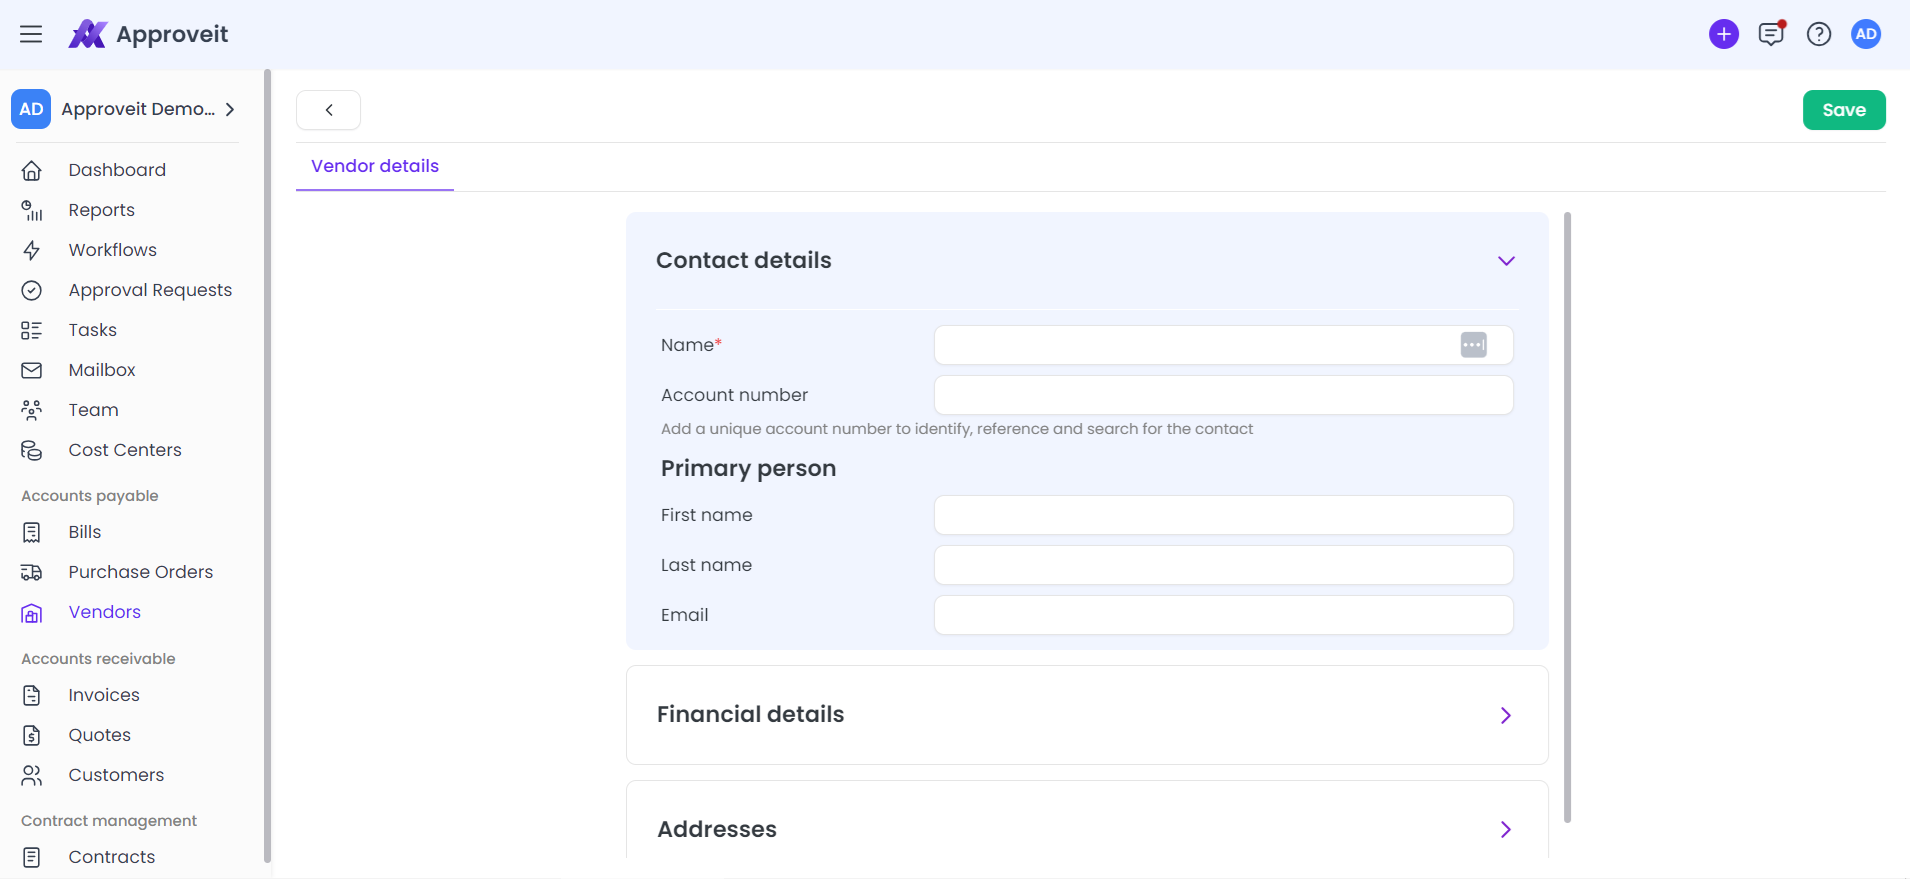
You’ll get the window where you’d need to fill in all the vendor details you consider necessary for collaboration. The only field Approveit marks as required by default is Vendor name. Once you’ve filled in all the vendor details, hit Save.
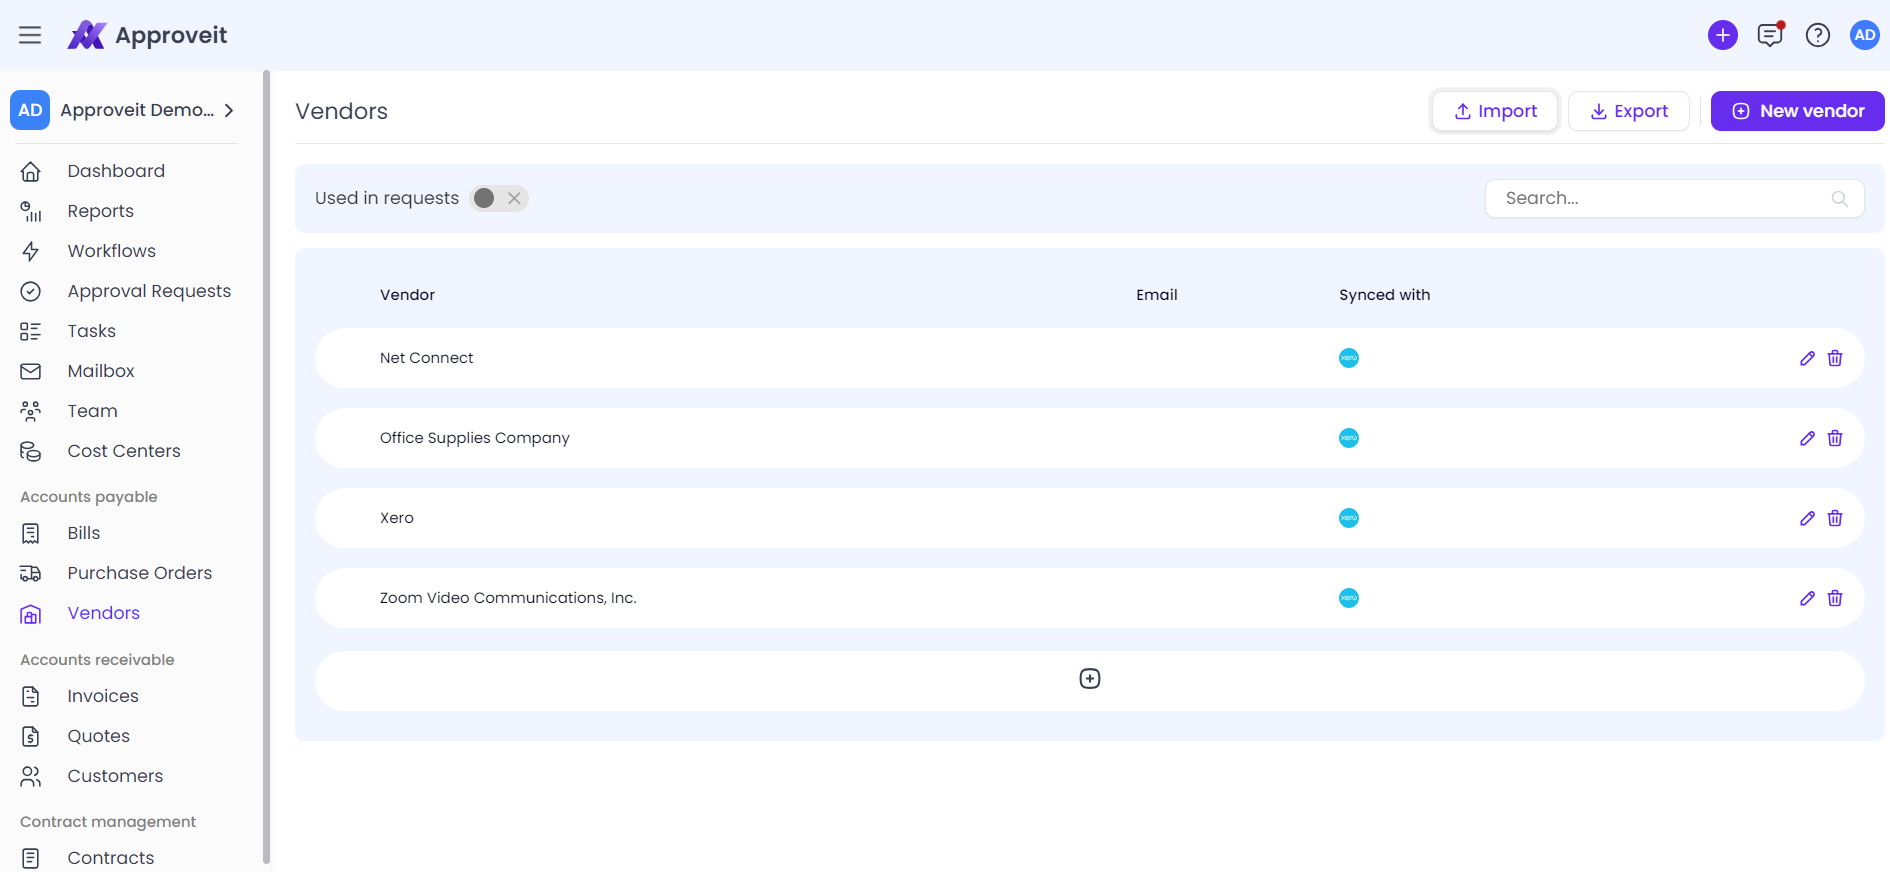
Another way you can add vendors to Approveit is bulk import. On your Vendors page, click “Import”
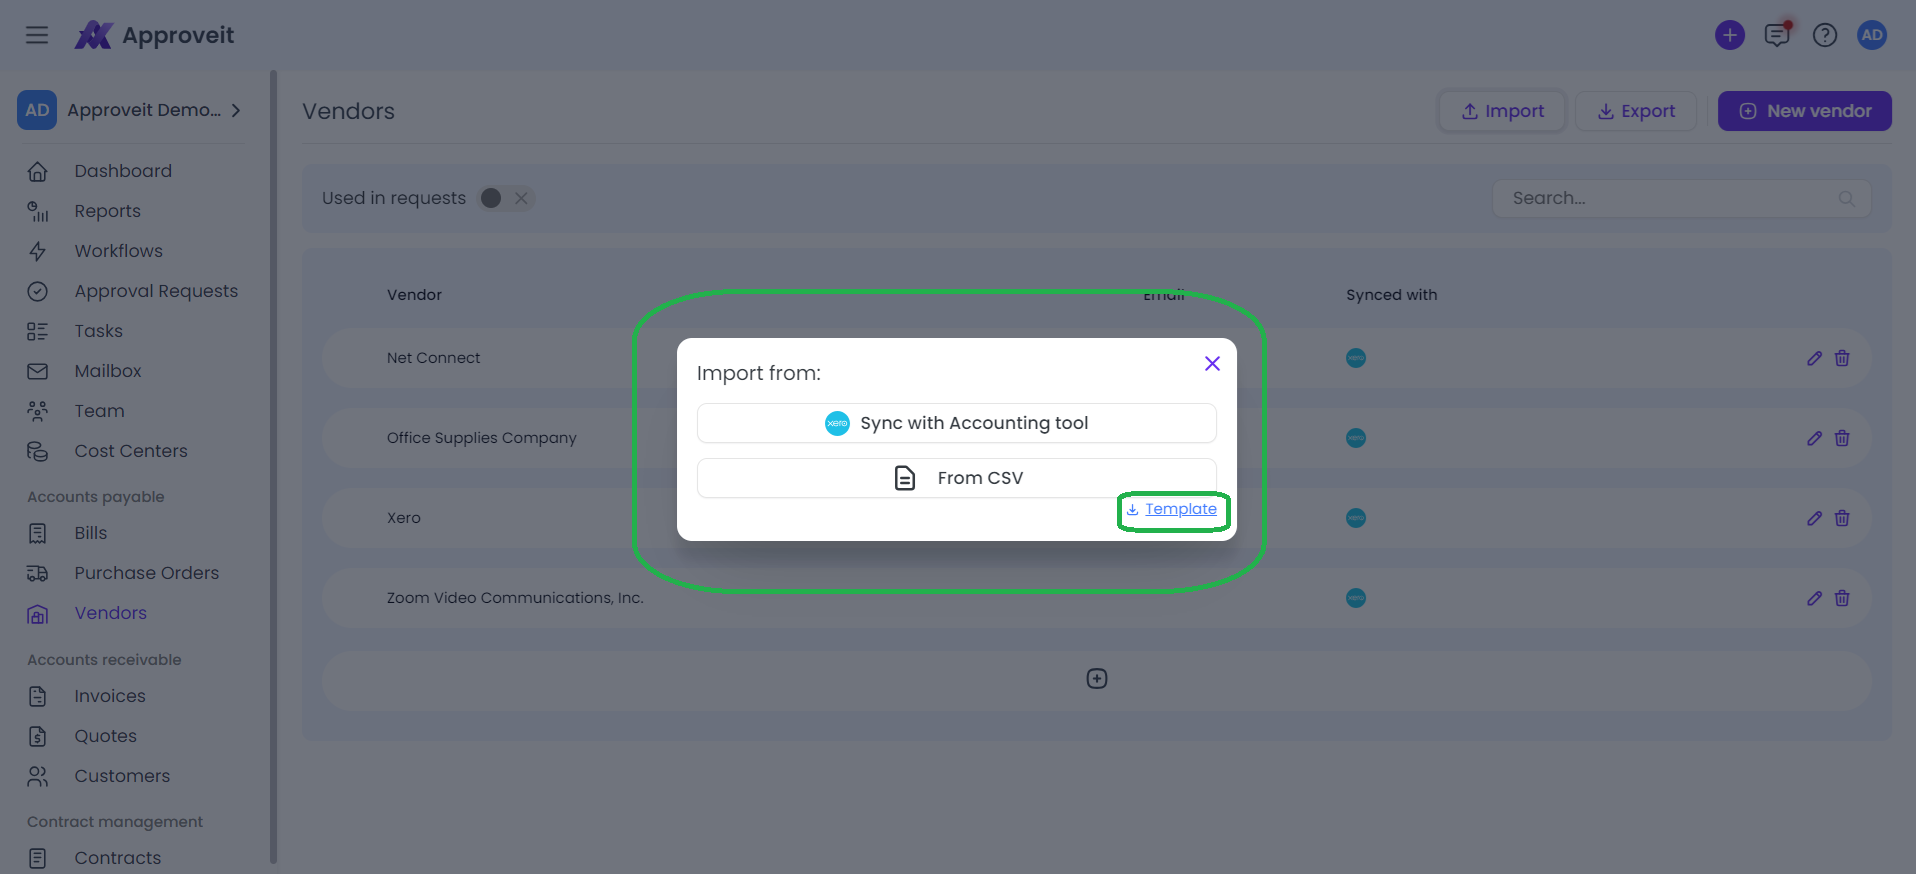
If you have set an integration with the accounting system, Approveit will offer you to import your vendors from there or use the CSV import option. The template of the CSV Approveit accepts can be downloaded from here as well.
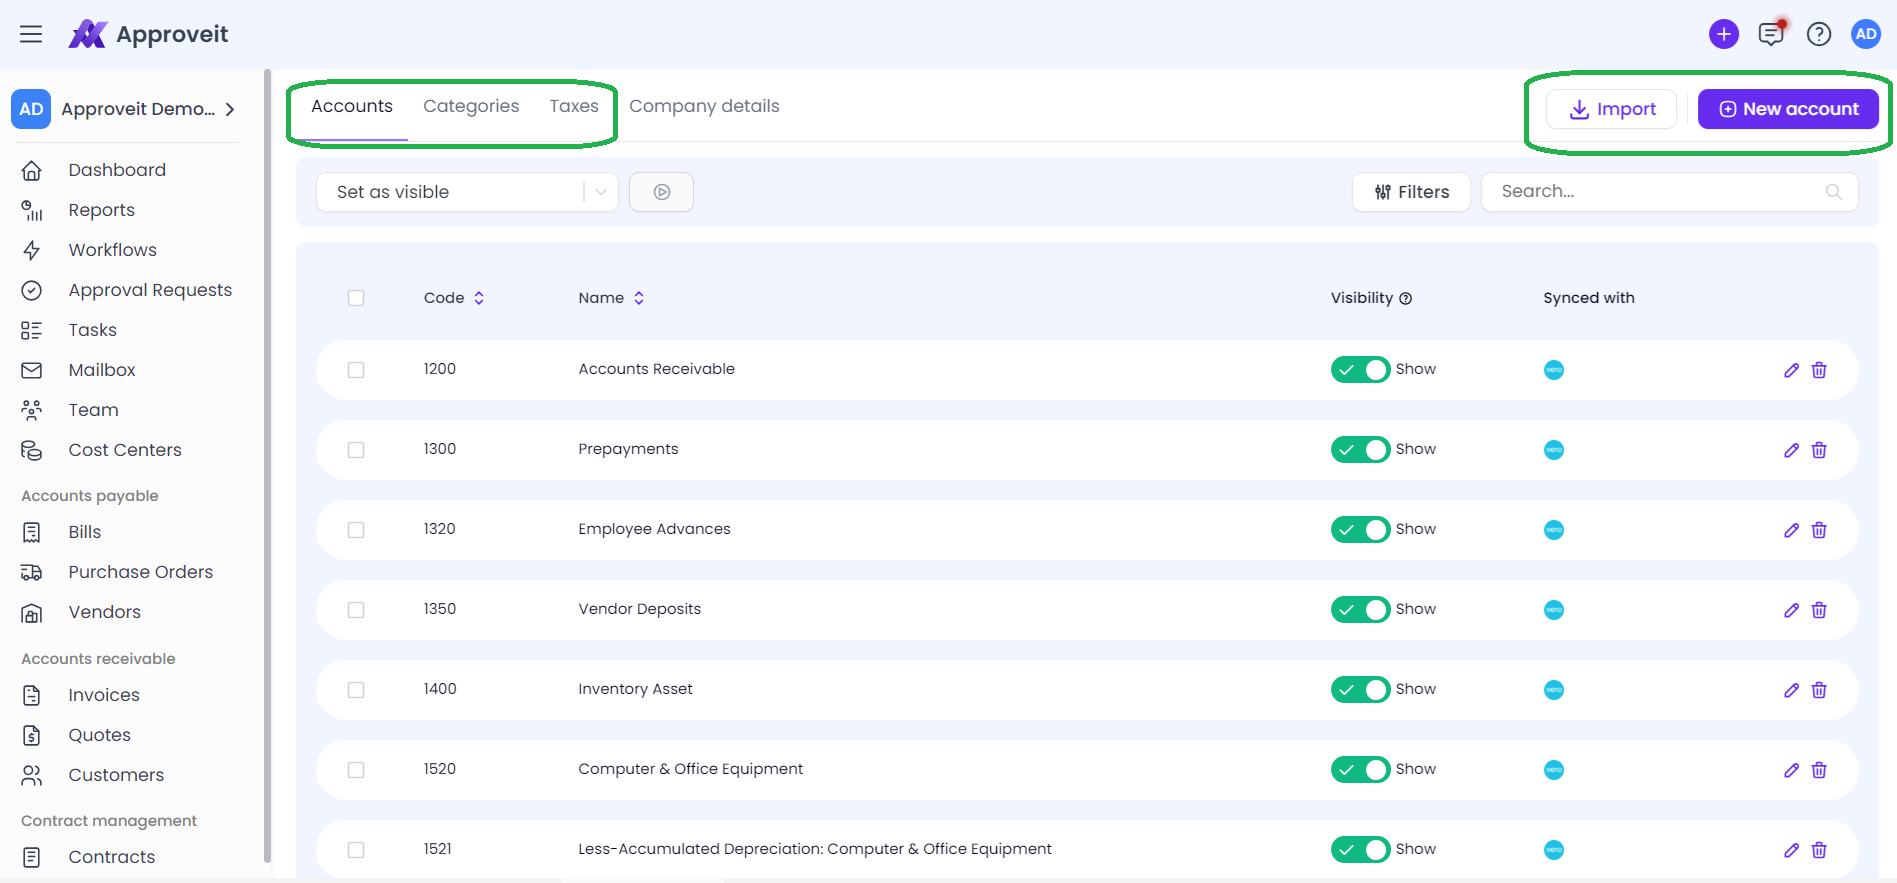
Accounting settings
The next thing you’d need to set up before proceeding to PO and bill automation is Categories and Tax rates
Those accounting settings can be found in your organization’s menu on the top left
Approveit has default tax rates and categories set up already, but you can customize those lists to match your current accounting practice. If you have set up the integration with your accounting system, accounts and tax rates can be imported from there. Alternatively, you can add new accounts, categories, and tax rates manually.
Setting up Purchase Order Management
Once we’ve completed all the prep work, we can start automating PO approval workflows.
To do so, hit “New workflow” from your Dashboard, “+” icon in the header or Workflows tab and select Purchase order approval template on the Templates screen.
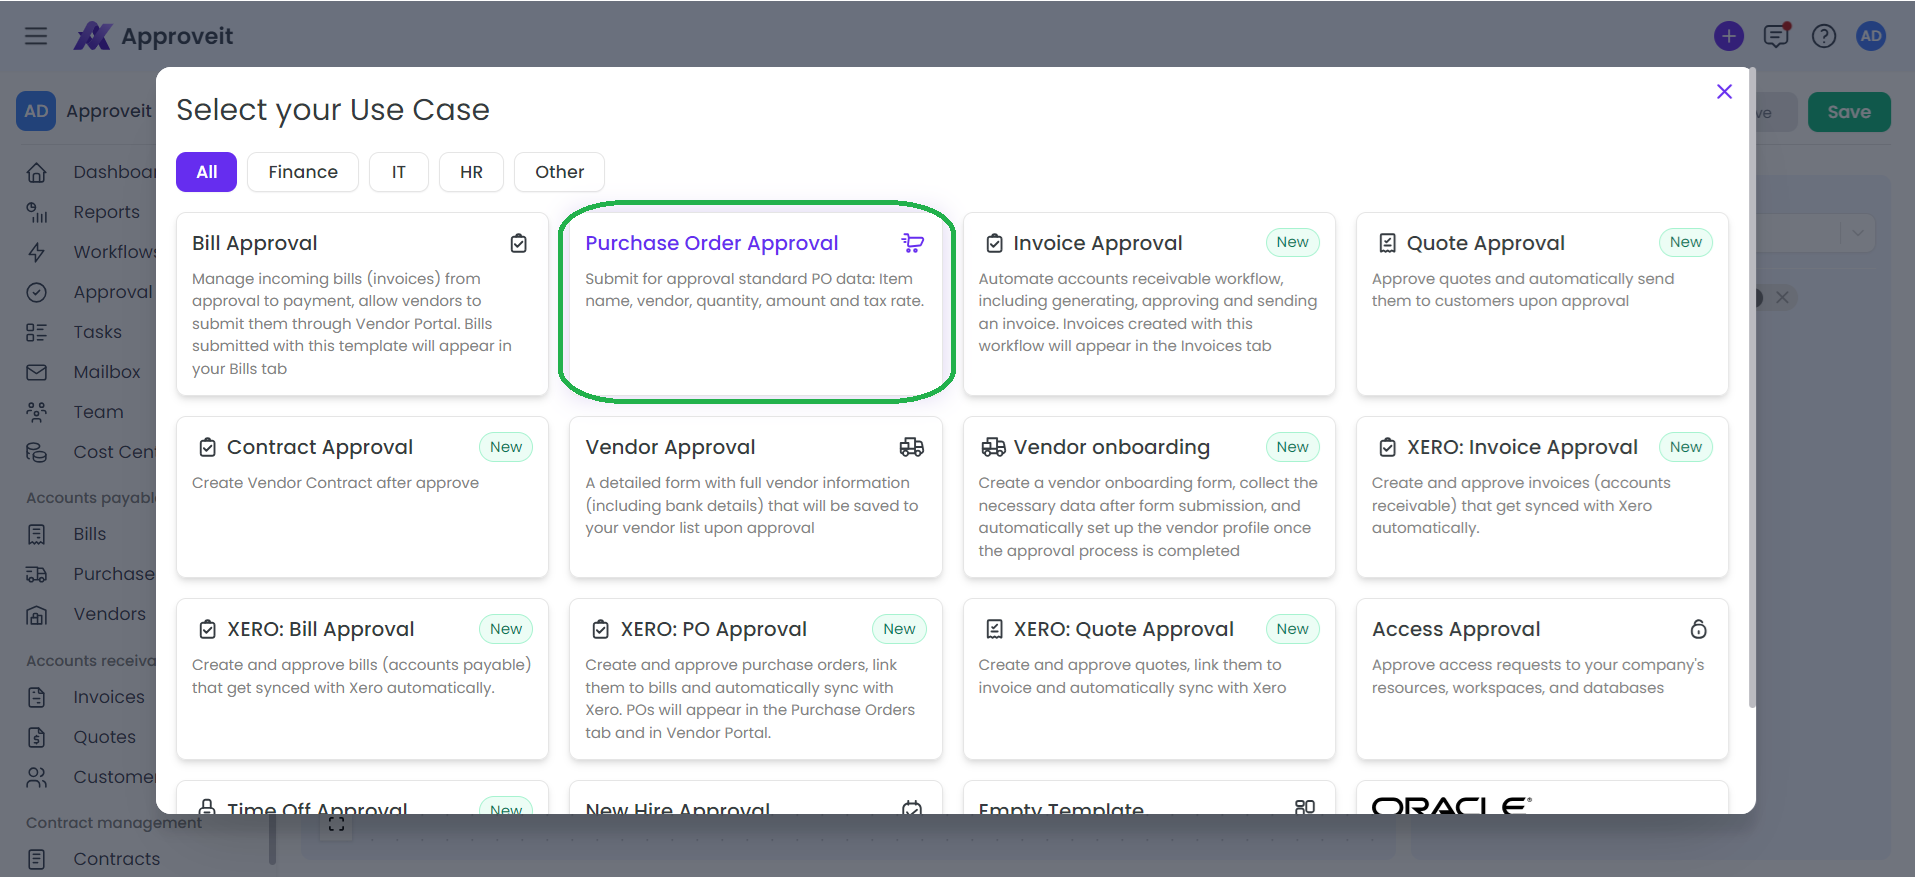
That action will take you to the workflow builder.
On the intake form for your PO you’ll see a toggle “Vendor preapproval process enabled”. If you activate that toggle, a new workflow stage will appear. That means that when your teammates submit a PO for approval, they can add a new vendor that doesn’t yet exist in the system. That vendor has to go through an approval flow before the PO can be raised.
If you keep this toggle inactive, your teammates will be able to request POs only with vendors that already exist in Approveit.
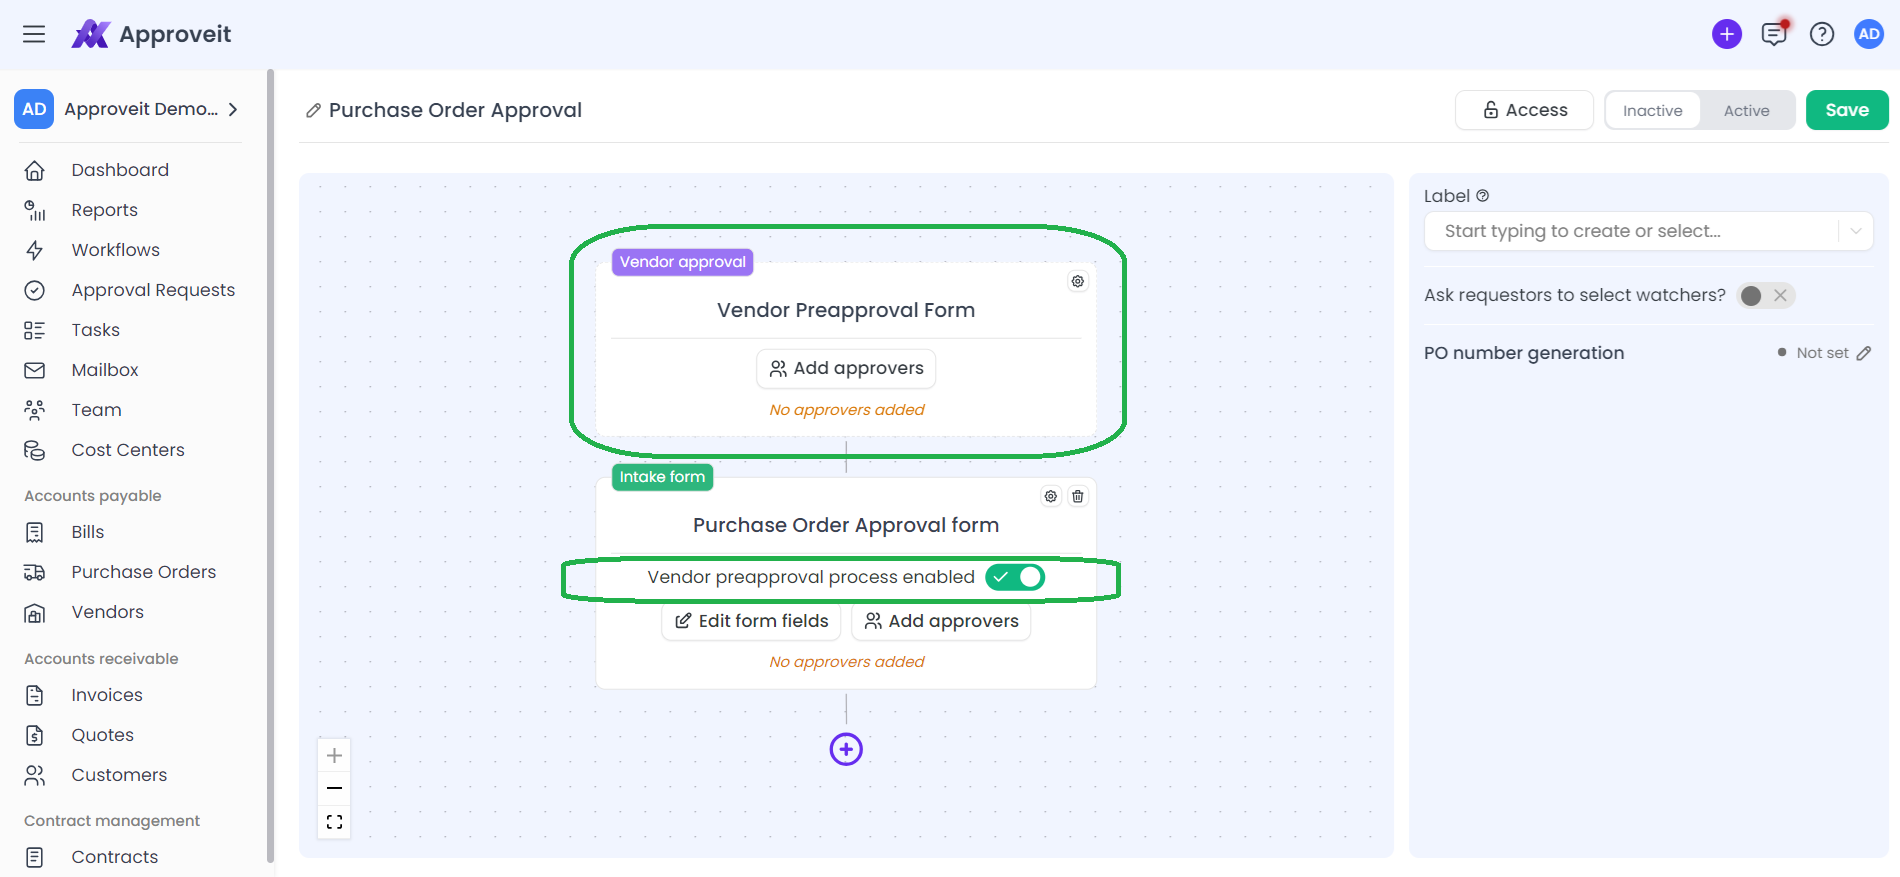
Automatic PO number generation setting is useful to set up so that your team doesn’t have to manually assign PO numbers to every PO they raise.
That setting is in your right-side menu, and there are several options you can choose for PO number generation. You can make it an Approveit-generated number, enter your own key, or select a manual input option.

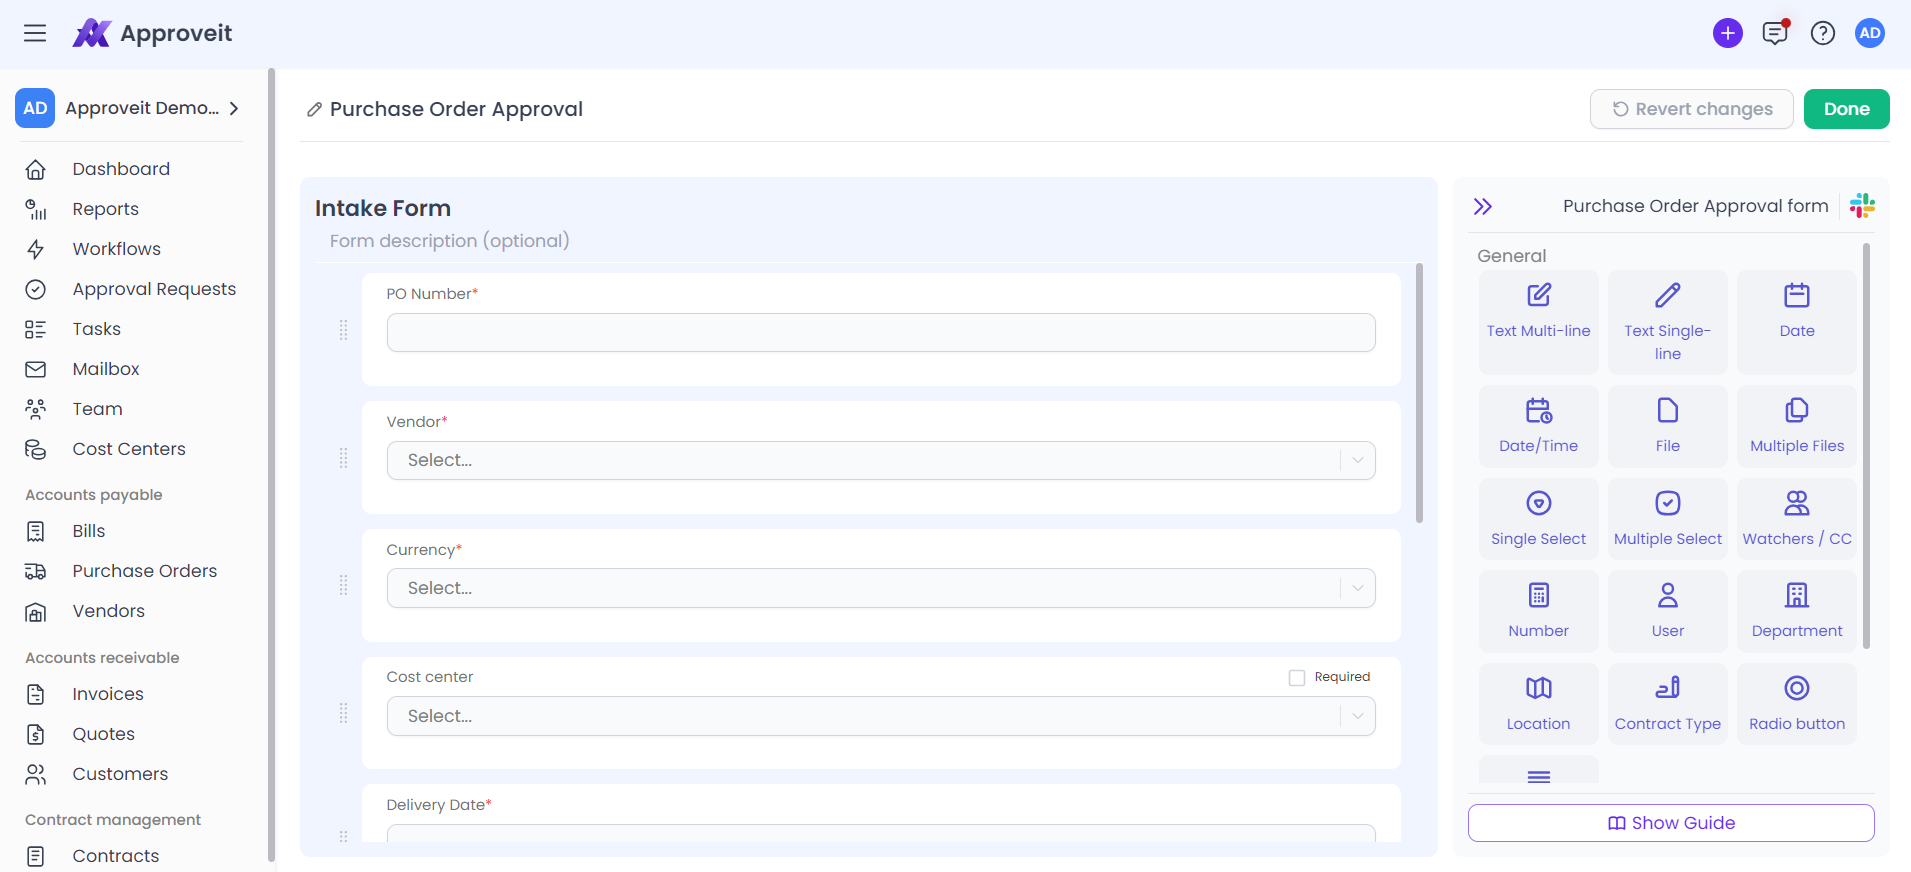
Setting Purchase Order Intake Form
The PO intake form can be reasonably customized. Keep in mind that some fields are required by default since no PO can exist without them filled out. Approveit allows you to add new fields to your PO form and mark some existing ones as required or optional. The field types you can add here are all in the right-side menu. Once you’ve completed customizing your intake form, hit “Done”.
Setting up approvers works exactly the same way as it does for any other workflow. For more detailed information on how to set up approvers, visit “How to create a workflow” guide.
Once your PO approval workflow is set up, it will look like this:
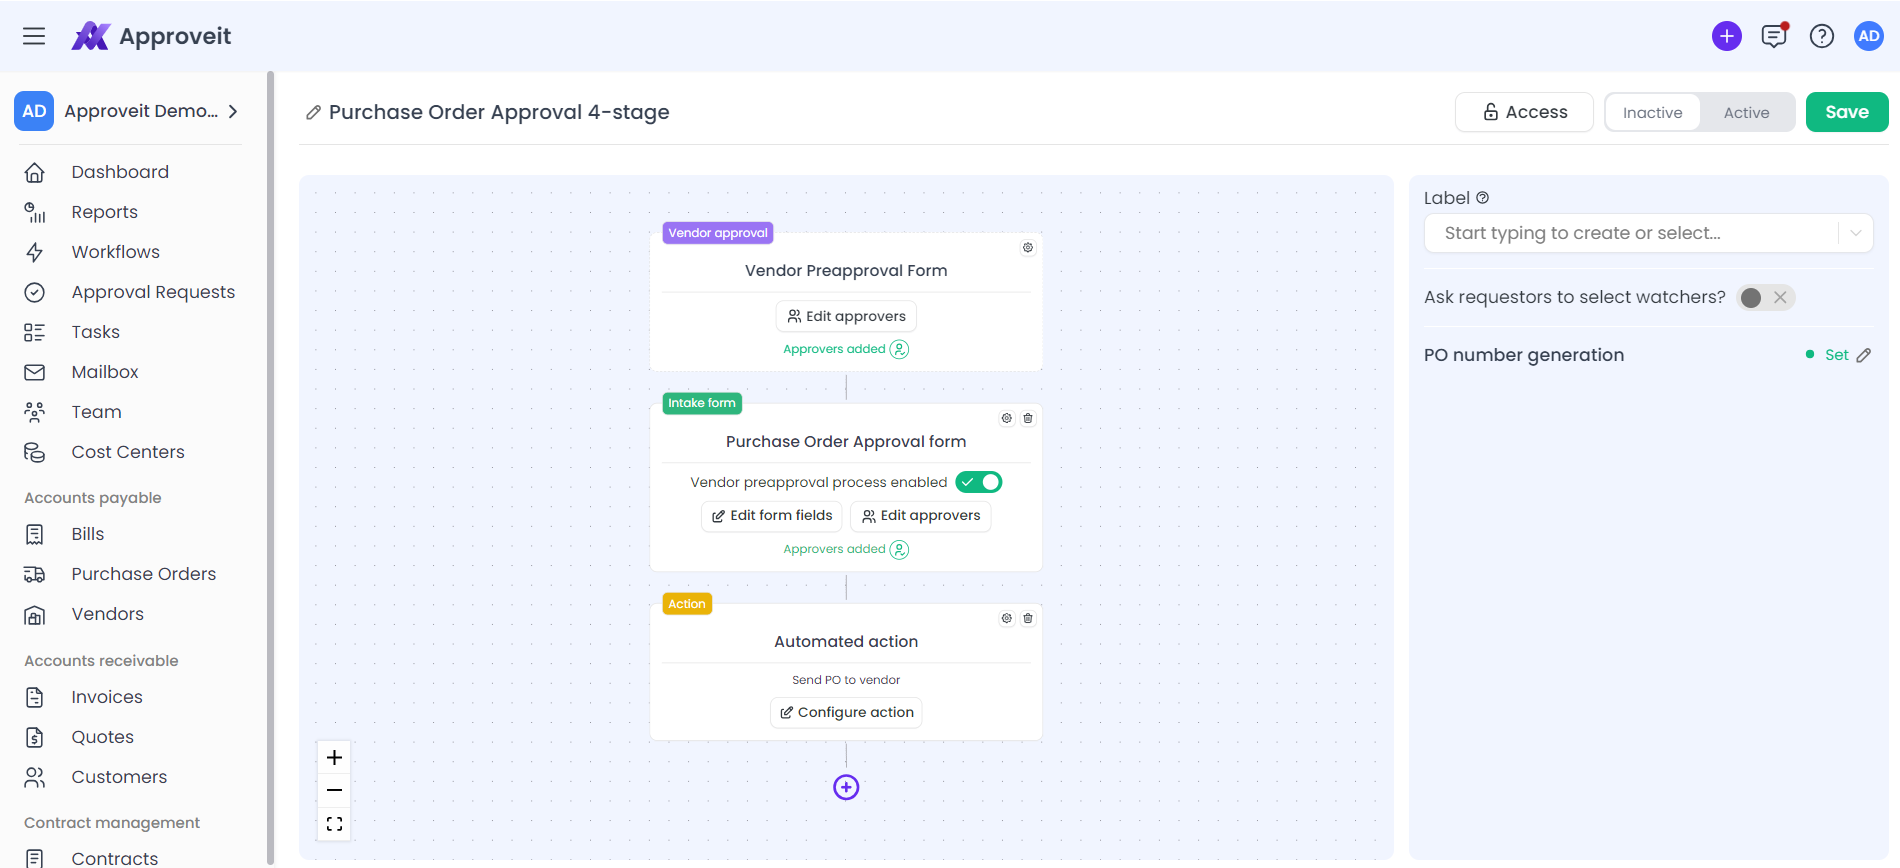
Automated action stage is optional. It allows you to automatically send a PO in PDF to the vendor upon approval.
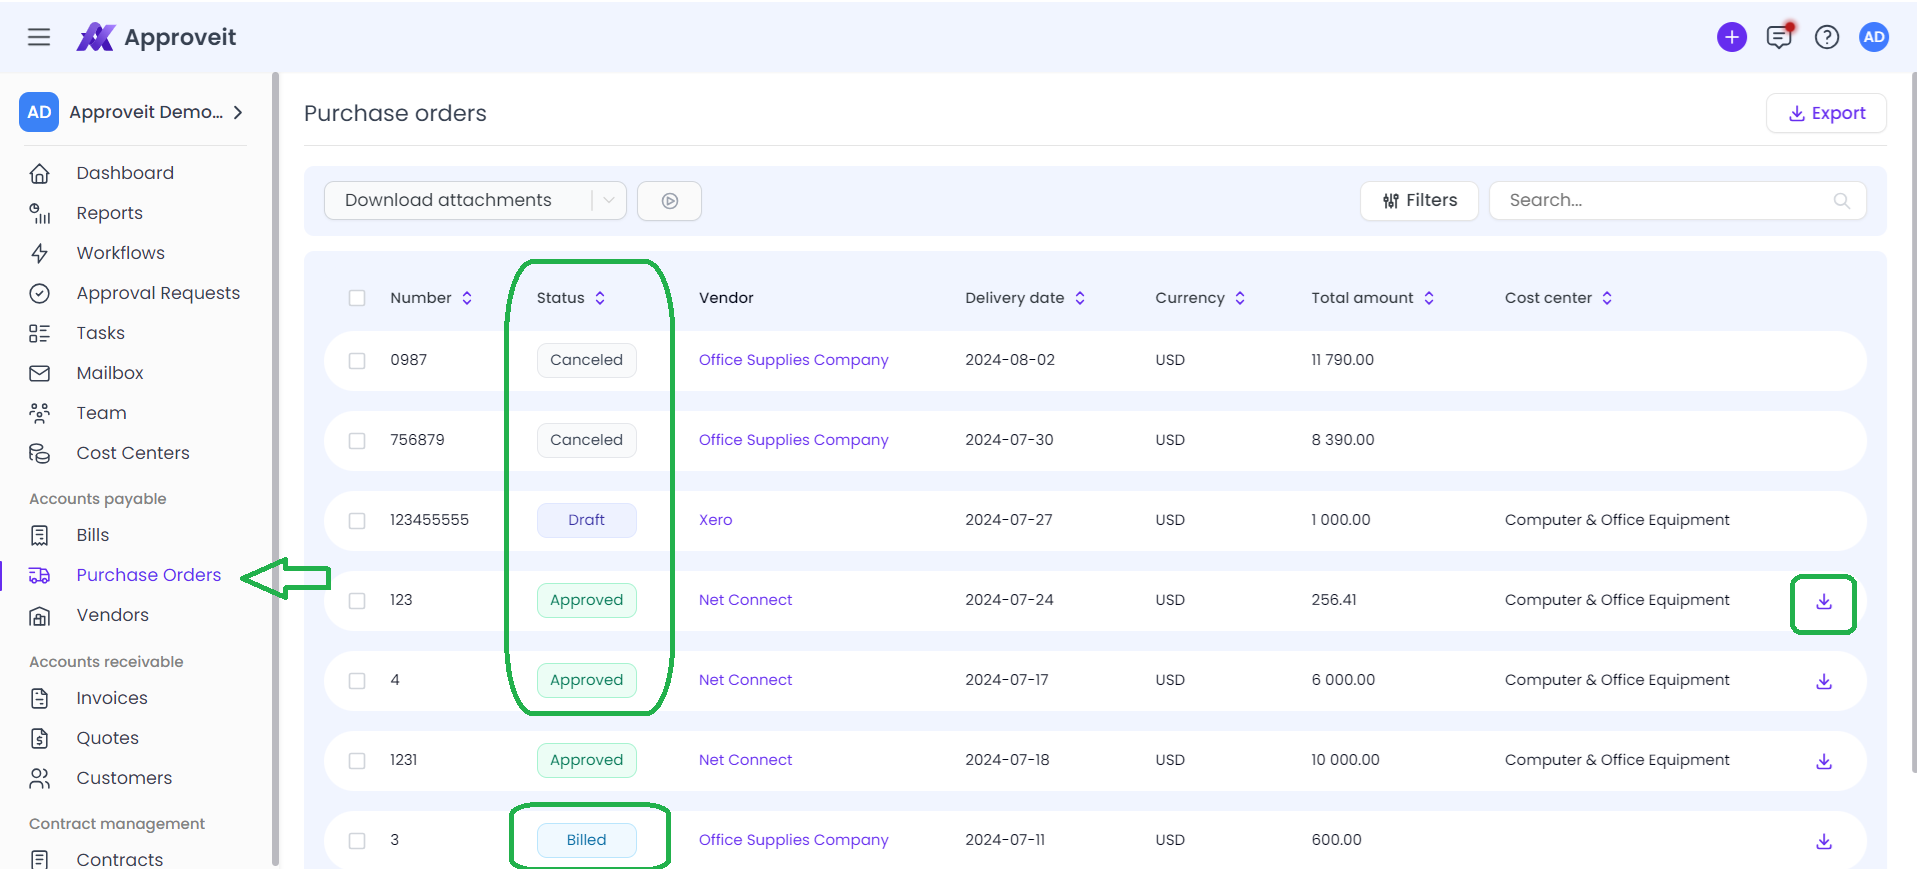
All the POs created using your purchase order approval workflow will appear in the Purchase Orders tab on the Accounts Payable section of the left-side menu.
POs can appear in the following statuses:
- Approved (when the PO was fully approved)
- Draft (when the PO was just created)
- Canceled (if canceled by requestor or rejected by approver)
Status “Billed” will appear when you link bills to this PO. We’ll get back to that later.
By pressing the arrow icon on the right, you can download approved or billed POs in PDF.
Setting up Bill Management
When we’re done with POs, we can move on to a bill approval workflow.
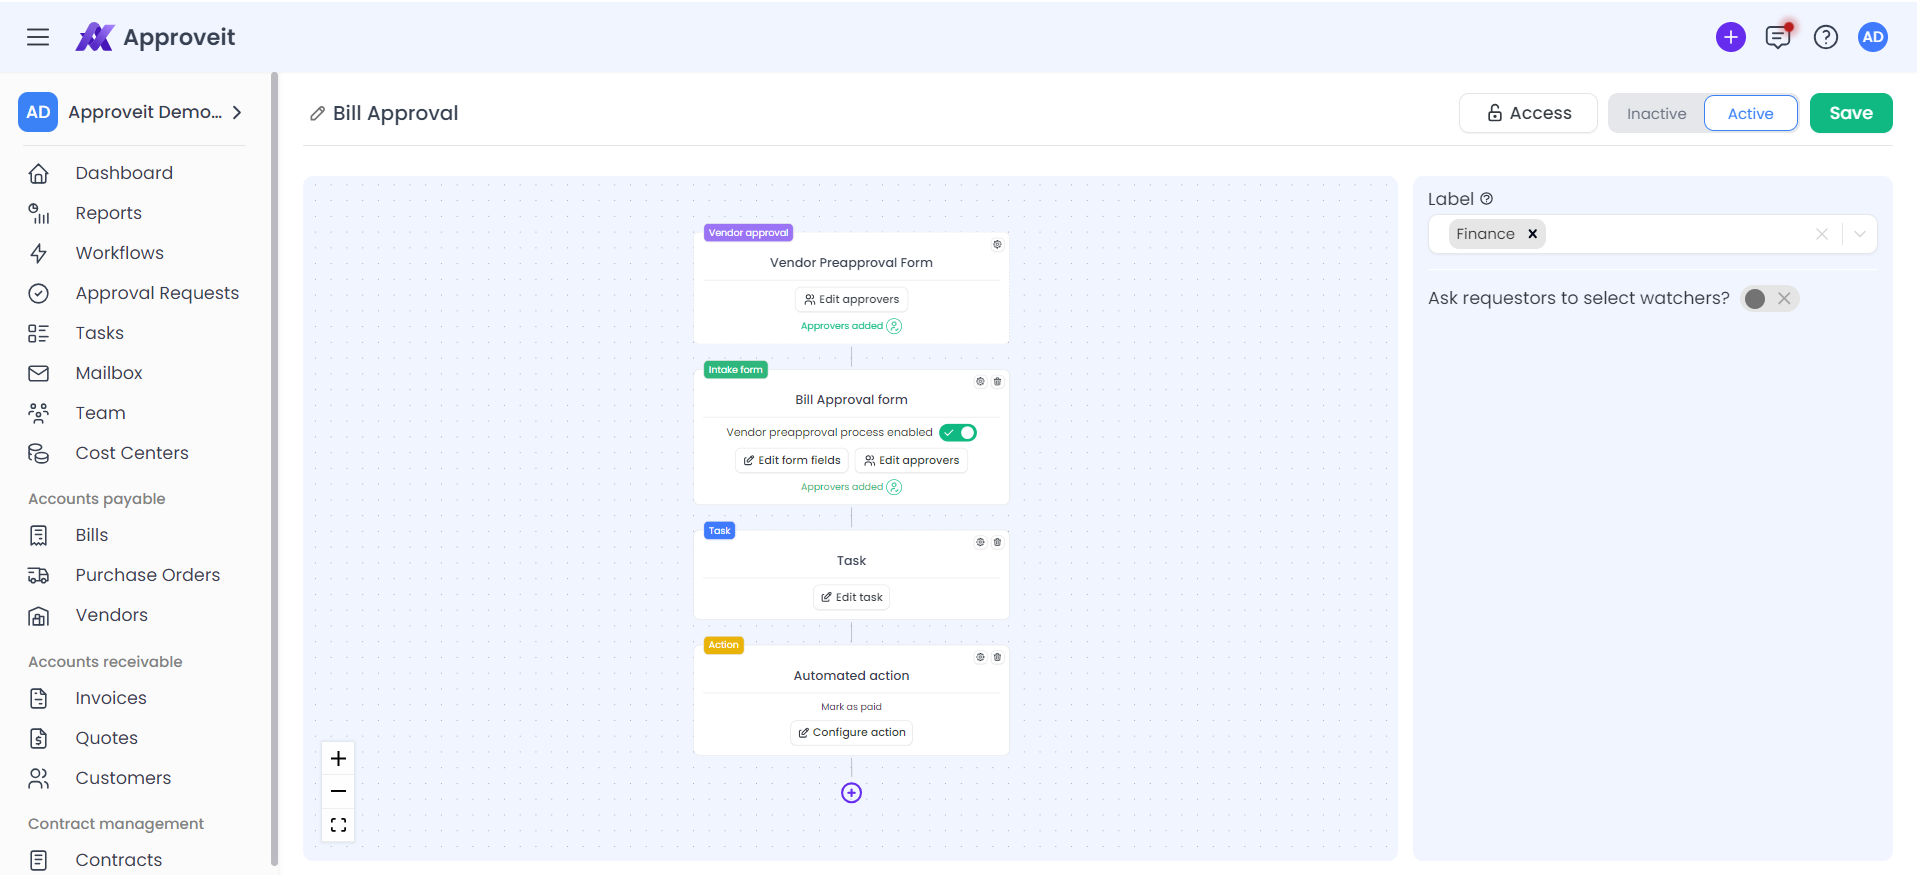
Creating a bill approval workflow is similar to PO approval workflow. You select an appropriate template from the templates library and set up the intake form and approvers in the same way.
Some differences do exist though. With bill approval workflow, the automated action you’d be offered to add is “Mark as paid”. That’s useful especially when you add a task to pay the bill as the previous stage.
The workflow on the screenshot below works like this: Fill in the bill intake form -> preapproved the vendor if it’s new -> approve the bill -> assign a task to the accounting to pay the bill -> automatically mark the bill as paid once the task is transferred to the status “done”.
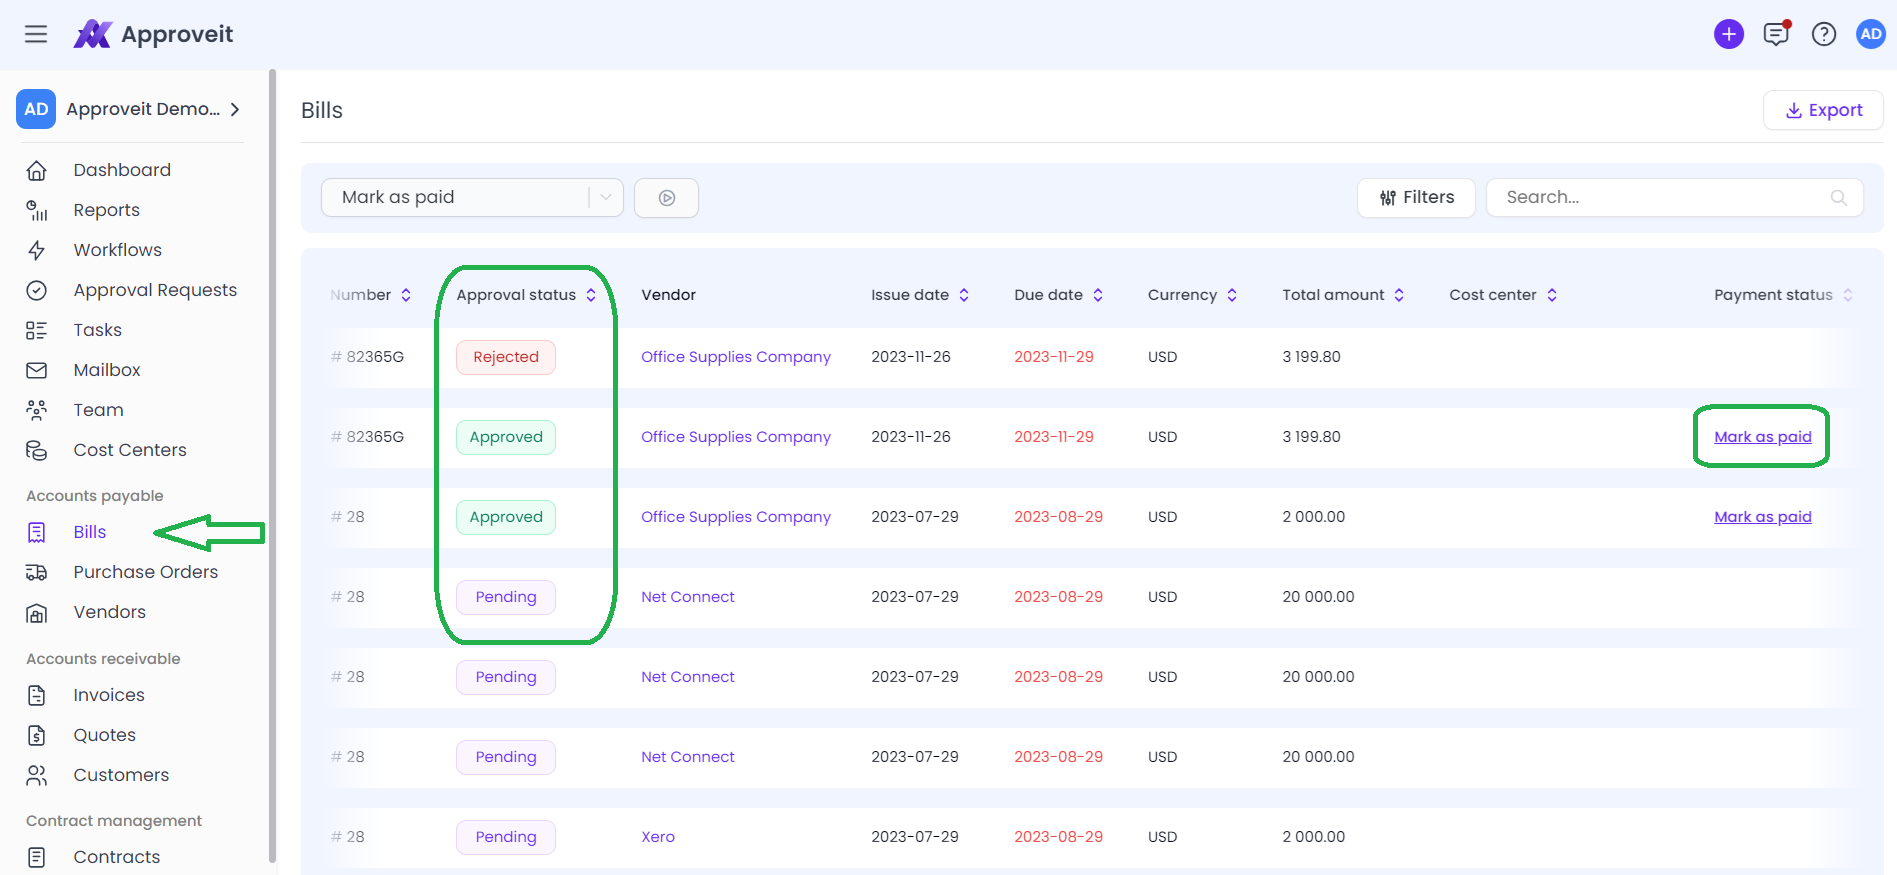
Bills created with your bill approval workflows will appear in the Bills tab in the Accounts Payable section in the left-side menu.
Bills can appear in the following statuses:
- Pending (when the bill was just created)
- Approved (when the bill was approved)
- Rejected (when the bill was rejected by approver)
- Canceled (when the bill was canceled by requestor)
Status “Paid” appears when an approved bill is manually or automatically marked as paid.
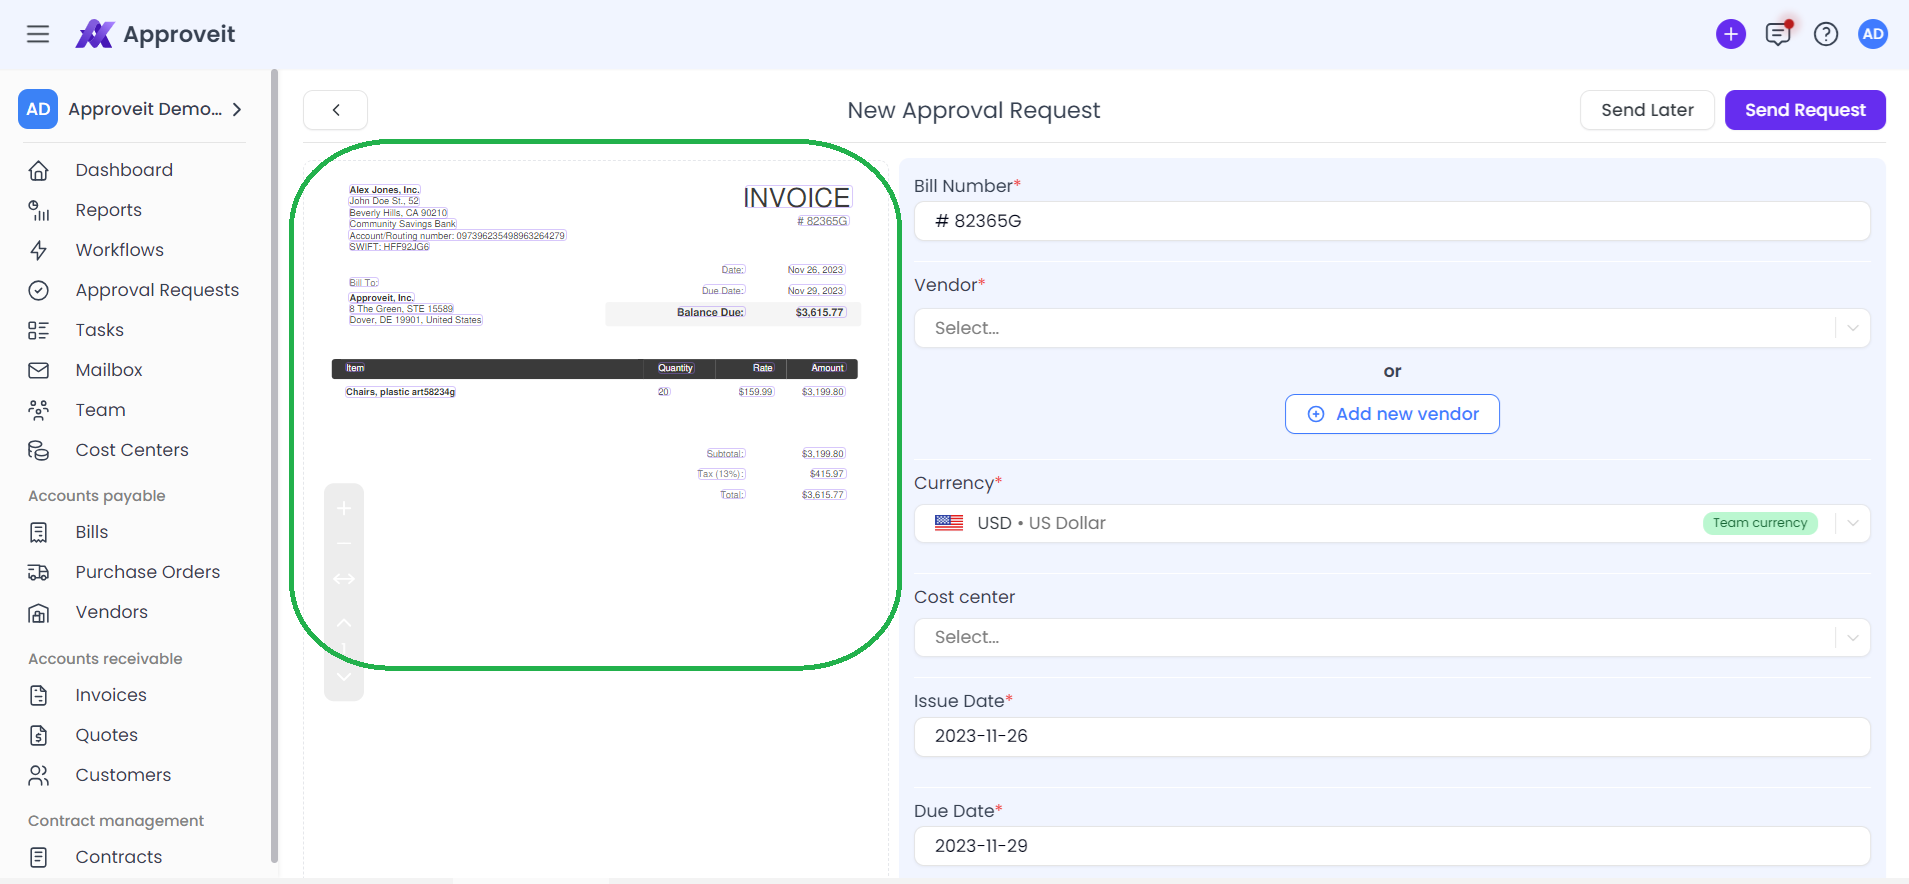
When creating a bill approval request, you will see the form in the screenshot below. Bills can be submitted very easily. If you drag & drop a PDF with the bill you’ve received from your vendor here, data on it will be automatically captured to your form thanks to Approveit’s OCR. All you’ll need to do is select a vendor and a cost center (if applicable).
A parsed bill looks like this:
Bills look like this in the system:
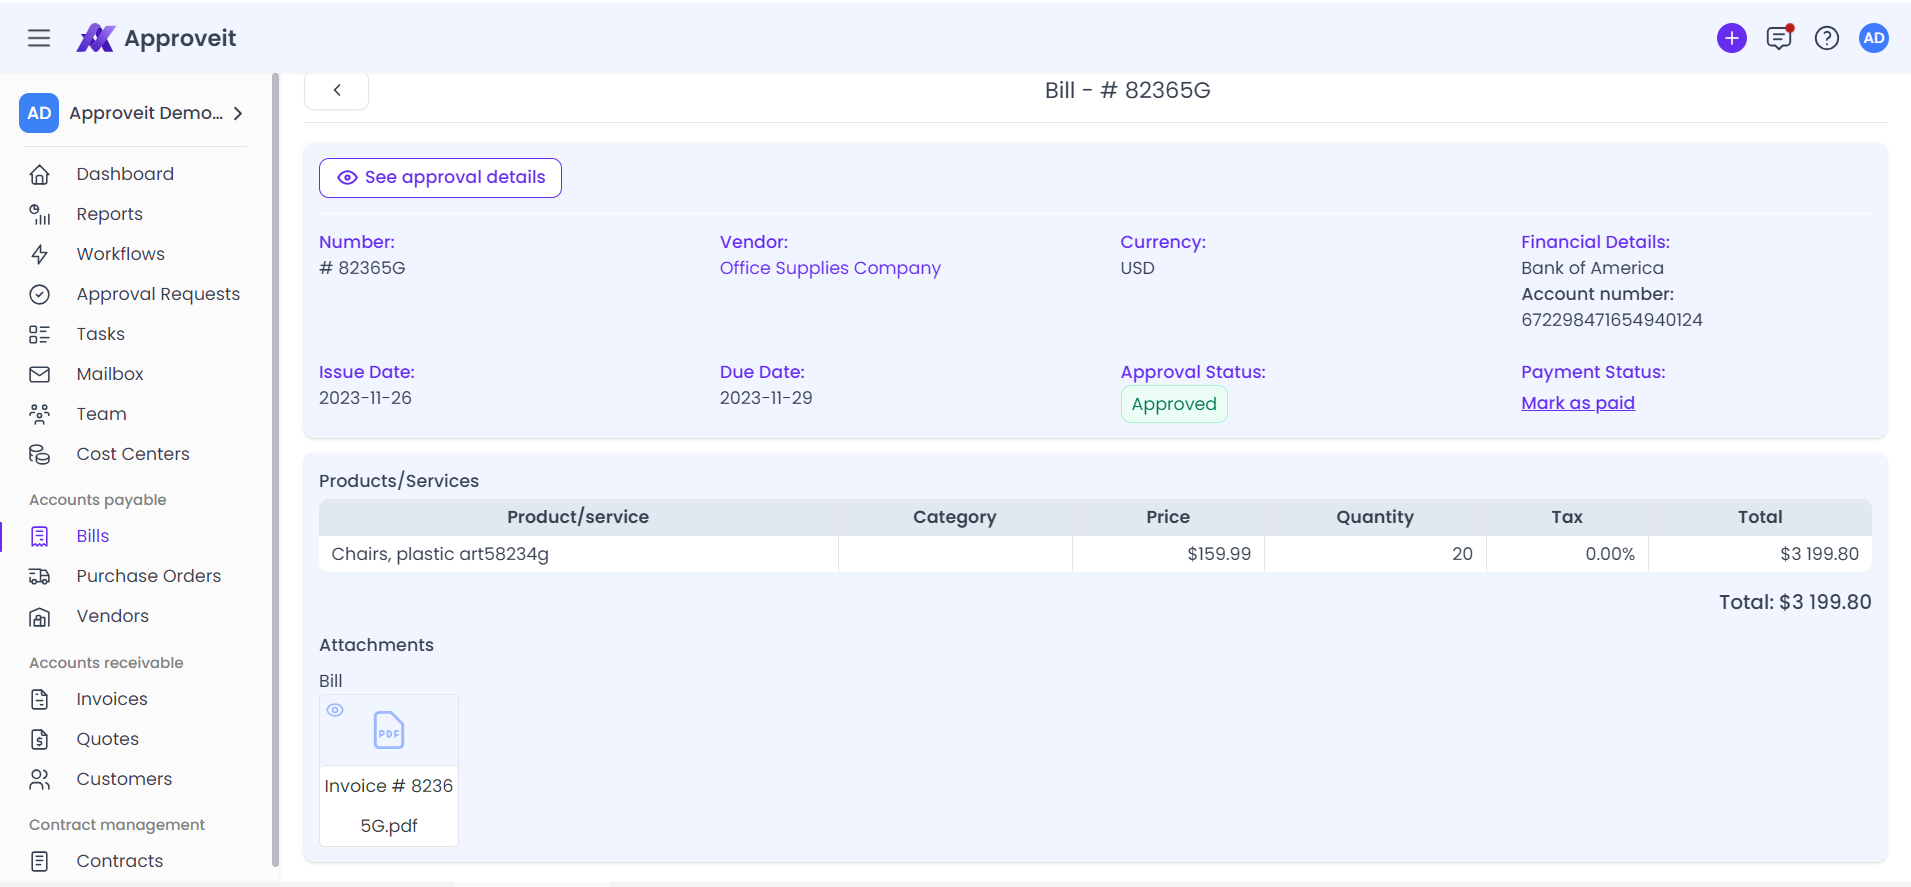
To get that view, simply click on any bill in the Bills tab. You can always review attachments, mark them as paid, and see approval details from here.
Bill-to-PO link
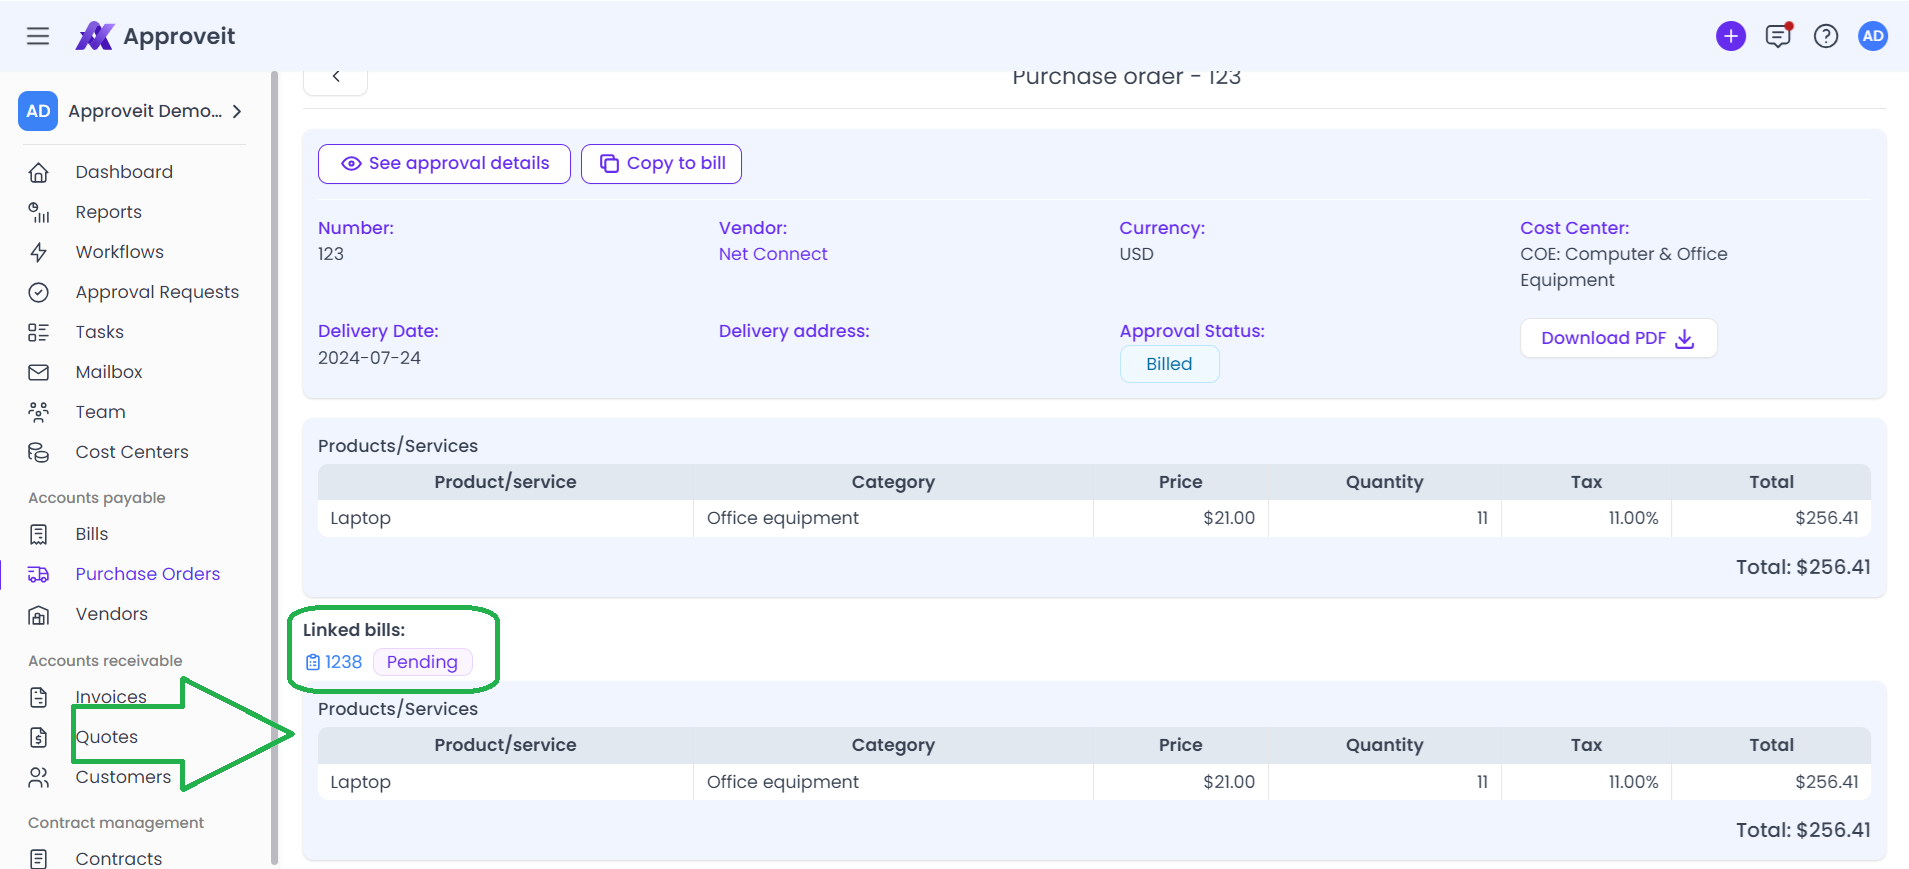
Now, let’s get back to our POs for a minute.
From the POs tab, you can access every PO that has ever been created. Click on one to get the detailed view.
Approved POs can de downloaded in PDF and copied to bills. If you hit “copy to bill”, data from this PO will be copied automatically to a bill and sent for approval. That action created a link between POs and bills.
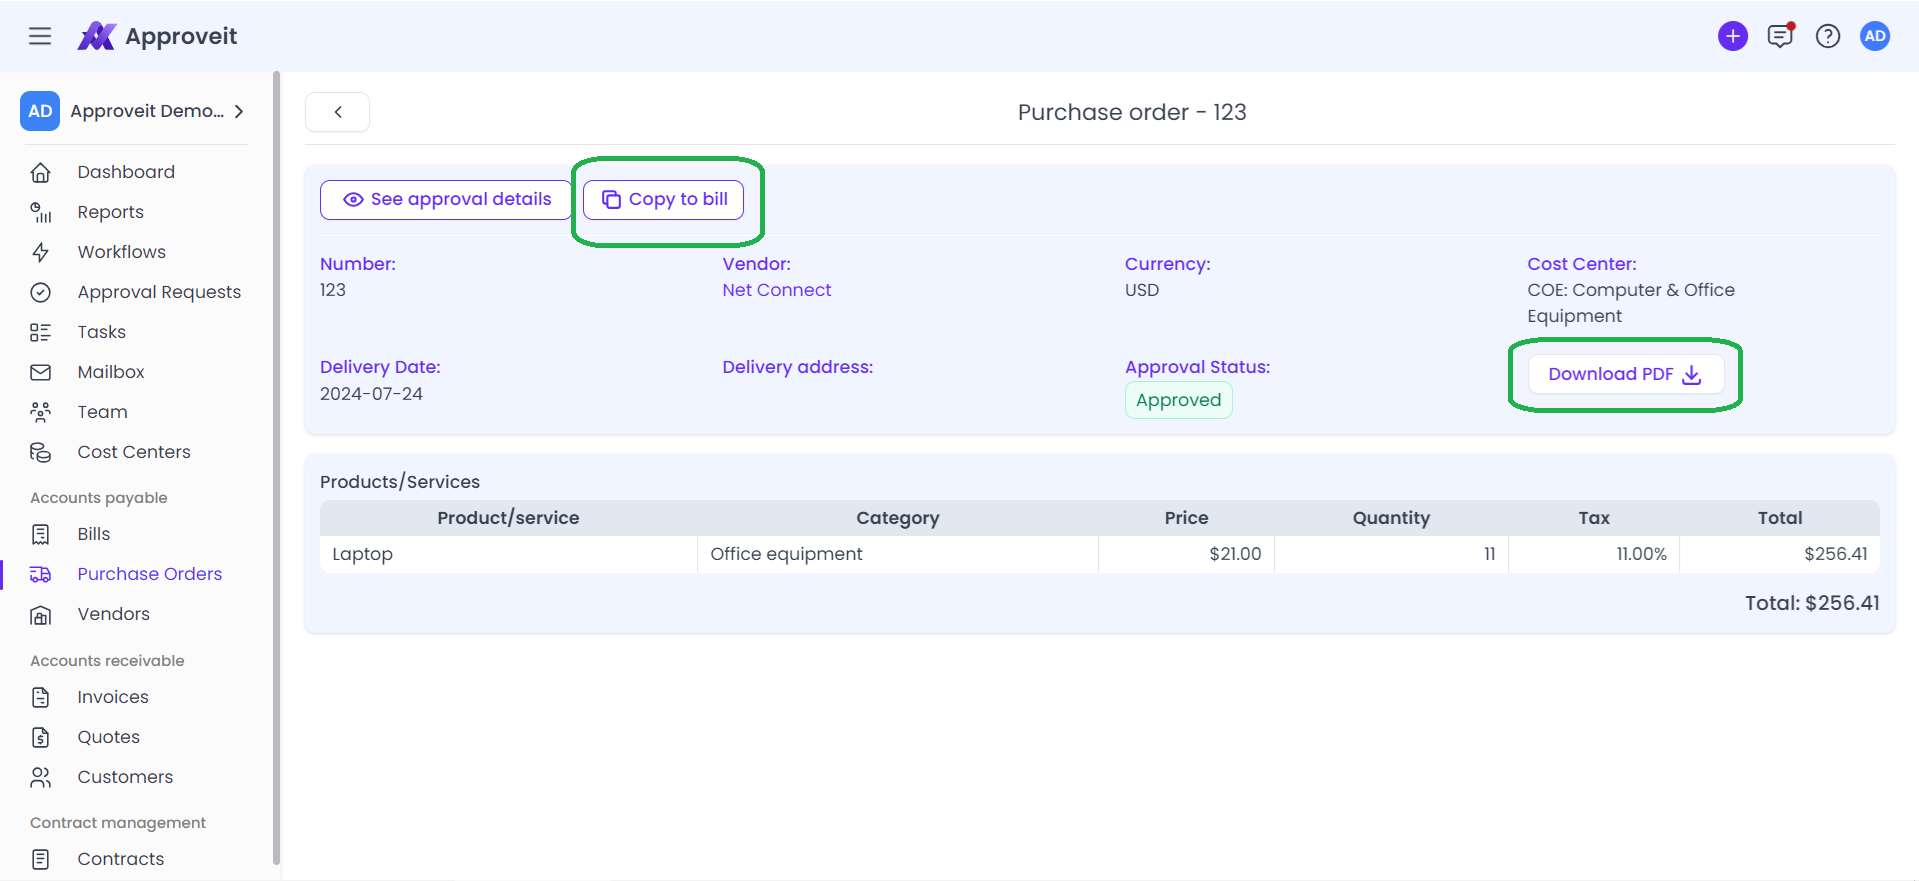
Once the linked bill is requested, PO’s status automatically changes to Billed. All linked bills can be viewed in the detailed view of billed POs.
Expense control
You can control the spending your team requests automatically using Cost Centers feature. To learn more about setting up Cost Centers and Budgets, visit this guide.