Approveit Guide: How to Create an Approval Workflow
We’ve issued a big update, and the interface of the workflow builder has changed. In this guide, we will walk you through the new workflow building process.
PLEASE NOTE, that none of your existing workflows will break, everything will work just as it used to.
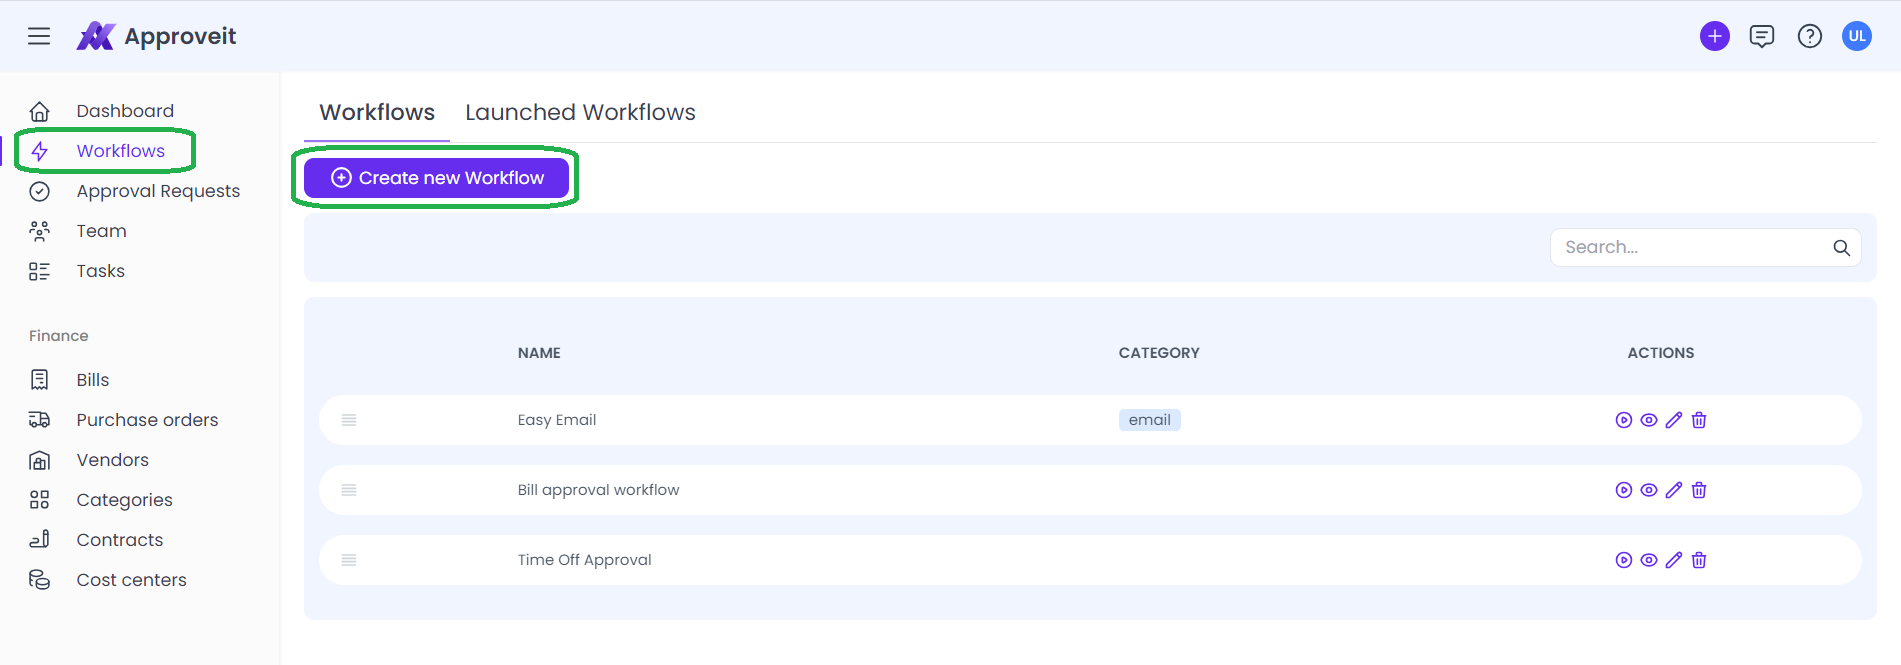
Choosing your workflow
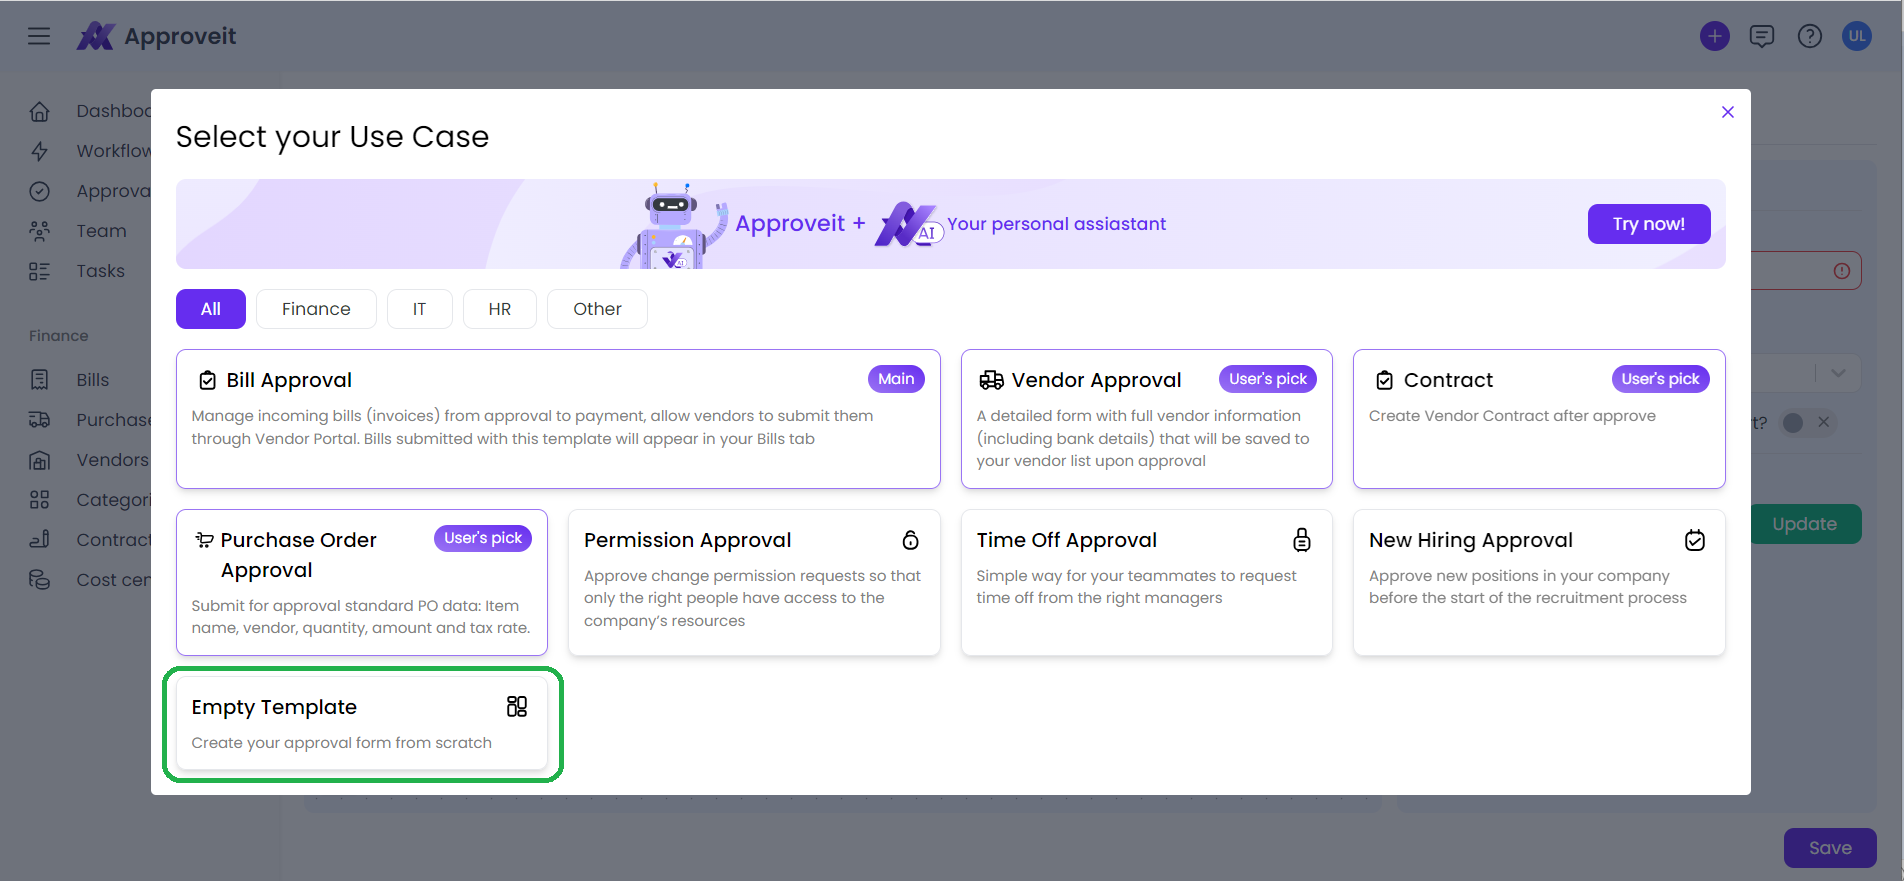
Next, you’ll be asked to choose the approval form template that suits your use case. In case you don’t see the appropriate template, just choose the Empty template and later you’ll be able to configure it from scratch.
Workflow builder
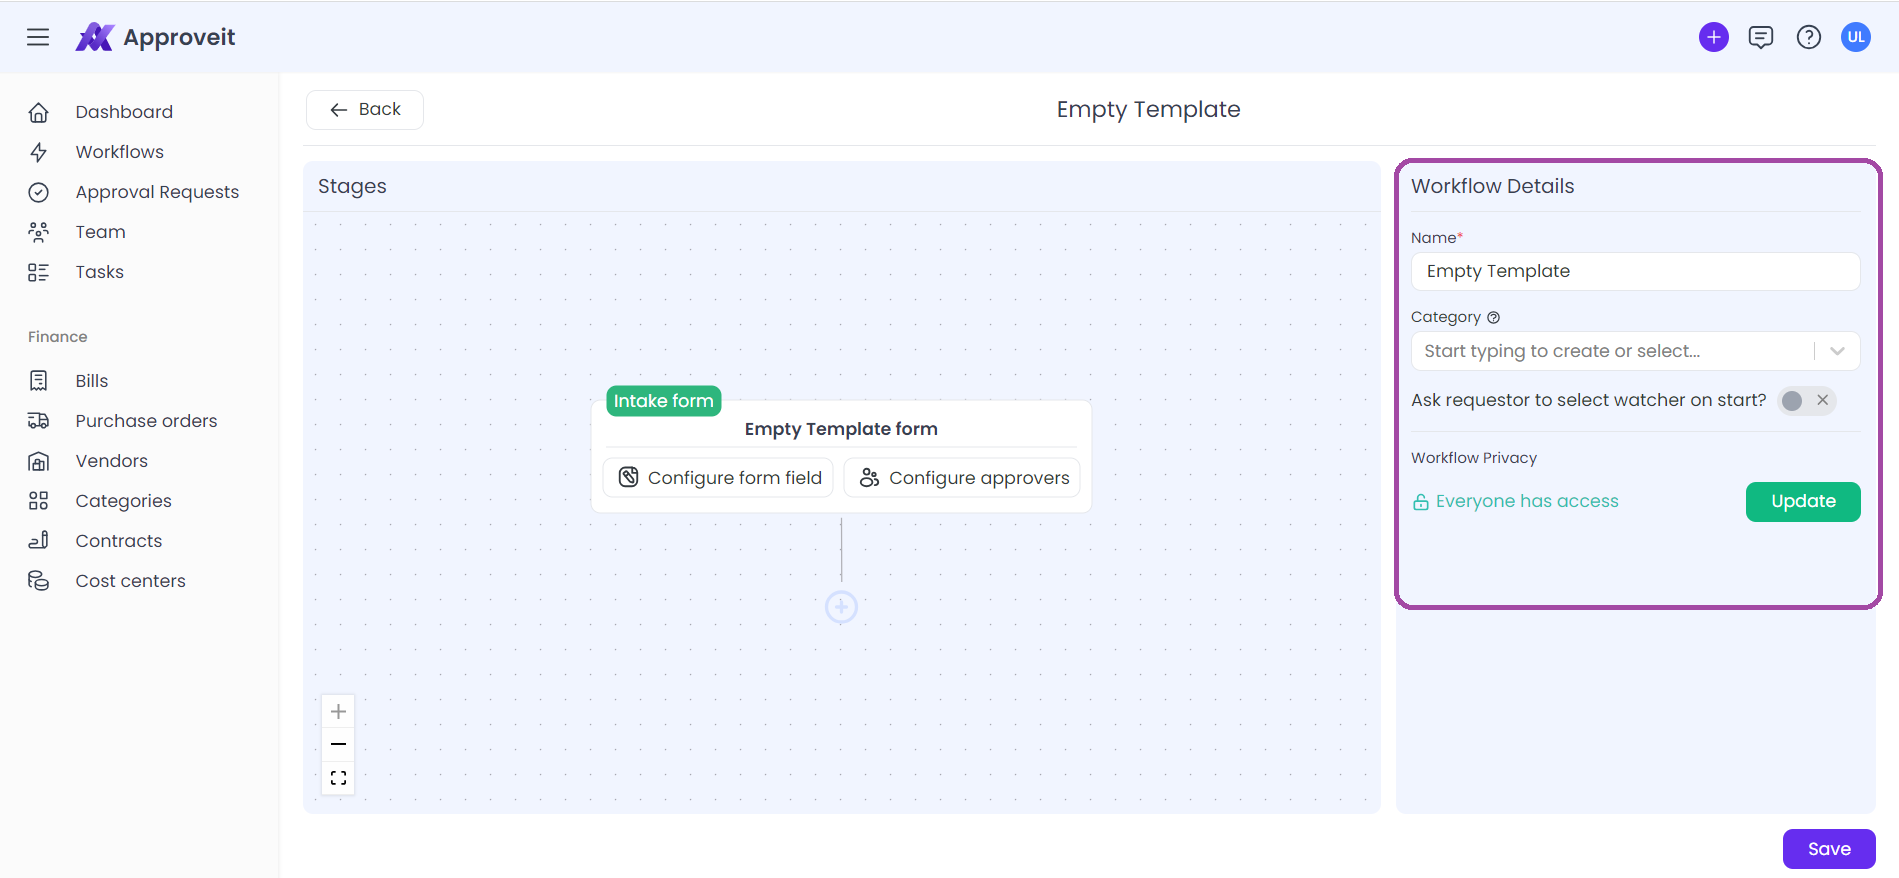
You’re now in the workflow builder. All the configuration of your process will be happening here.
In the right-side menu, you’ll see the workflow details where you can rename your workflow, assign categories to it, and change privacy settings.
There’s also a toggle “Ask requestors to select watchers for their requests”. By activating this, you’ll add a dropdown field to all approval forms with all your team members and the label “Choose watchers”
Form fields
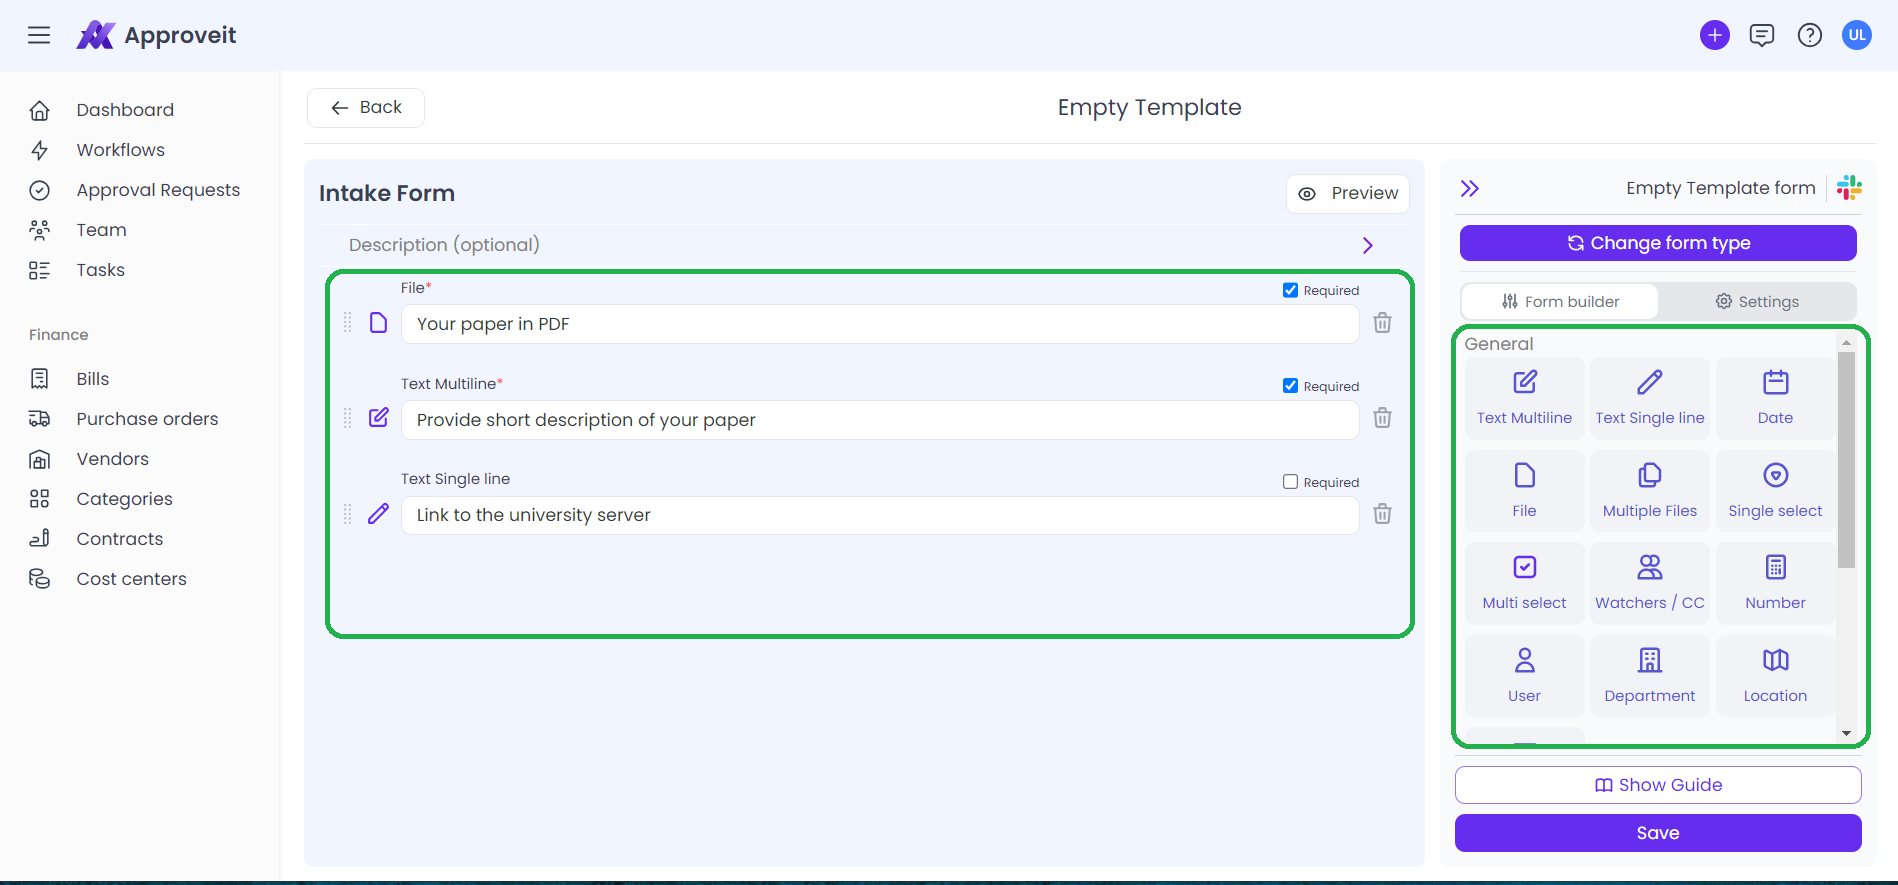
To configure your approval form, click the “Configure form fields” button
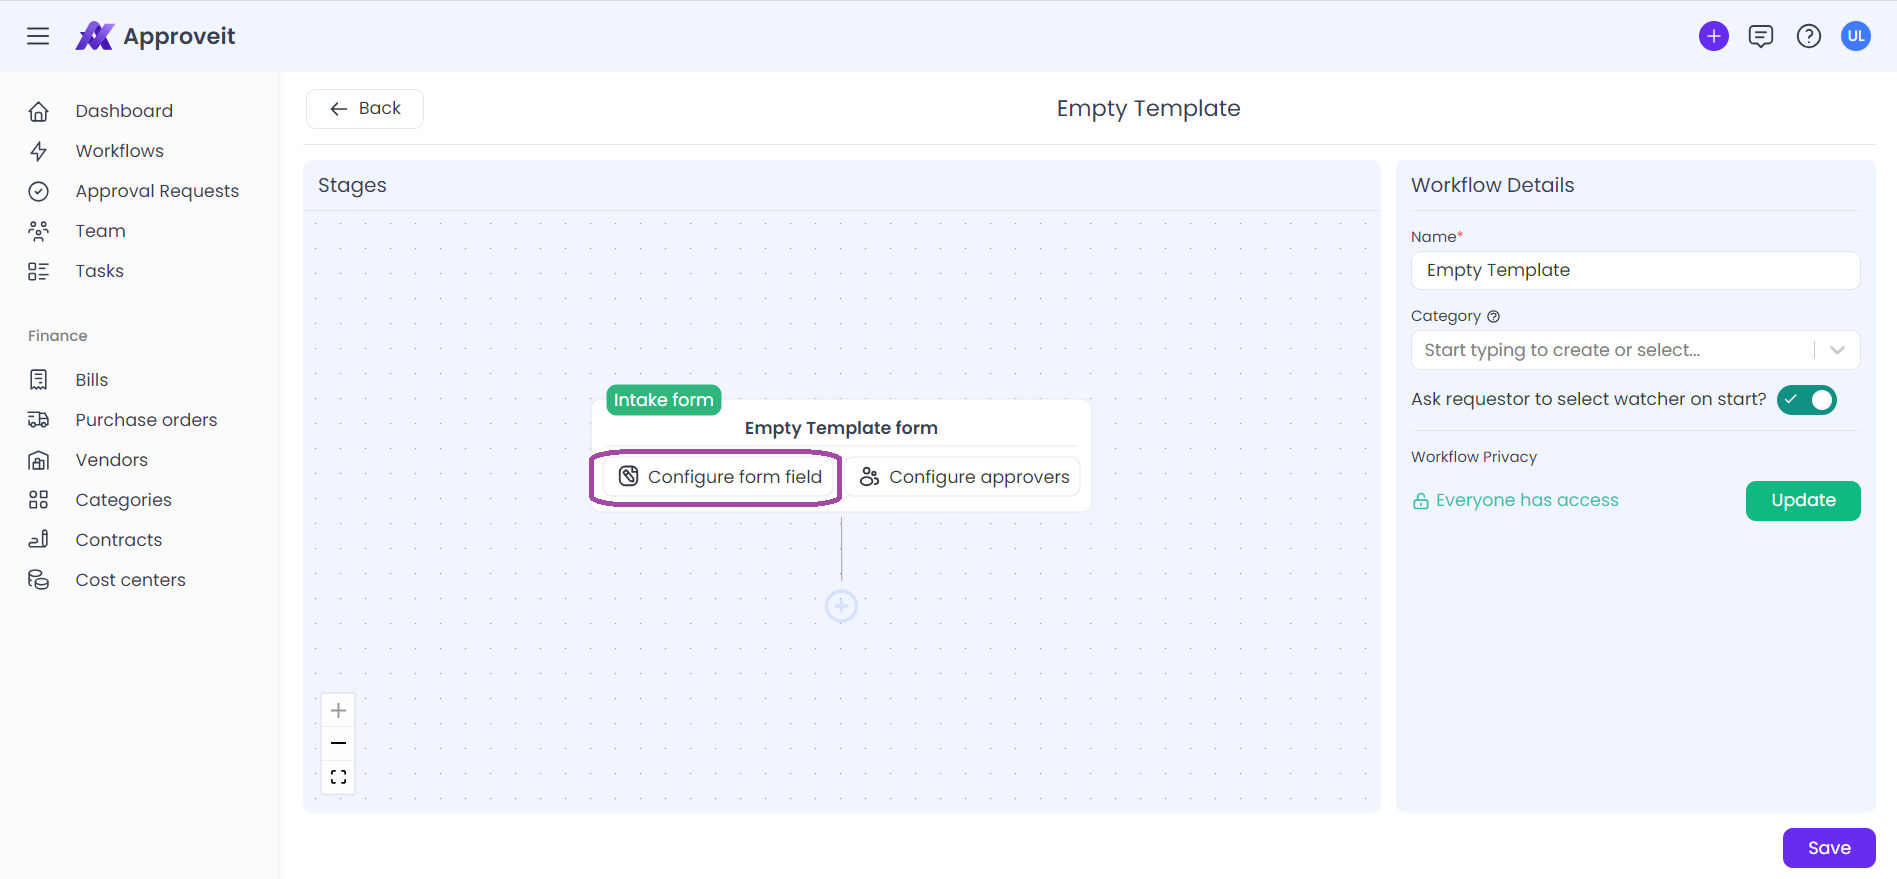
It will lead you to the approval form builder. You can add the fields to your form from the right-side menu, label fields for your requestors, and mark them as required if necessary.
Please, note – whenever you add the field to your form, you need to enter the LABEL of that field and NOT the actual data you’d want approved.
Adding approvers
Once you’ve completed setting up your form, it’s time to move on to adding approvers. “Add Approvers” button will be right on your intake form
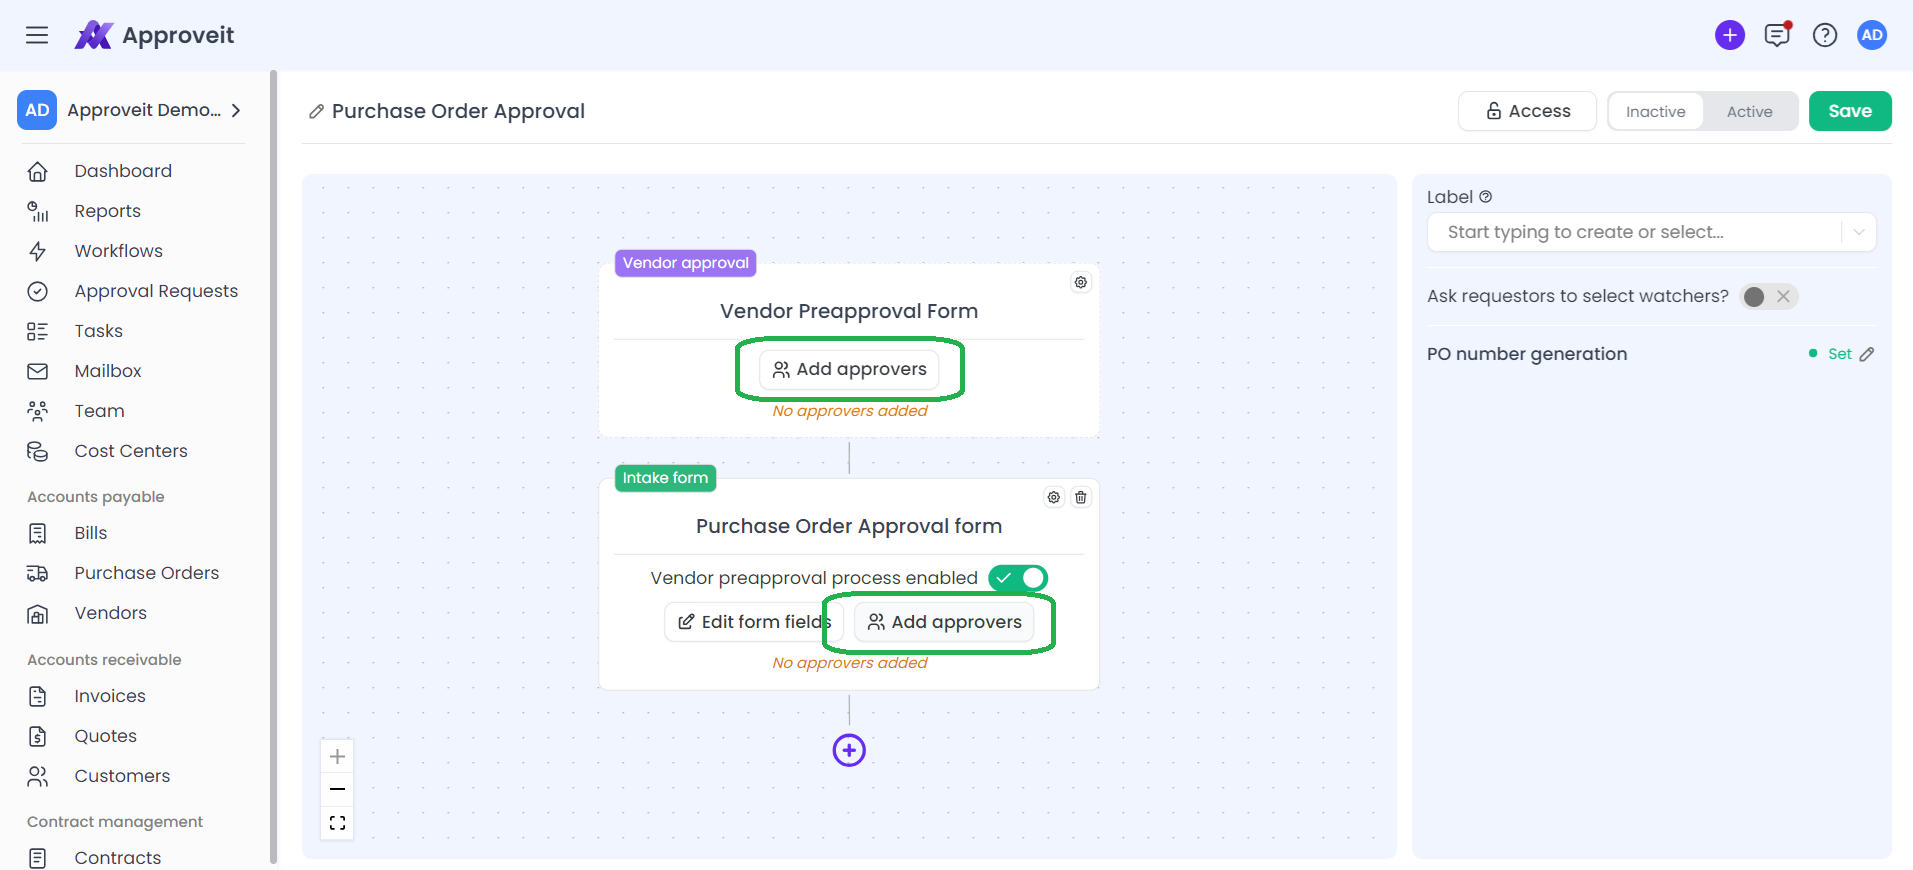
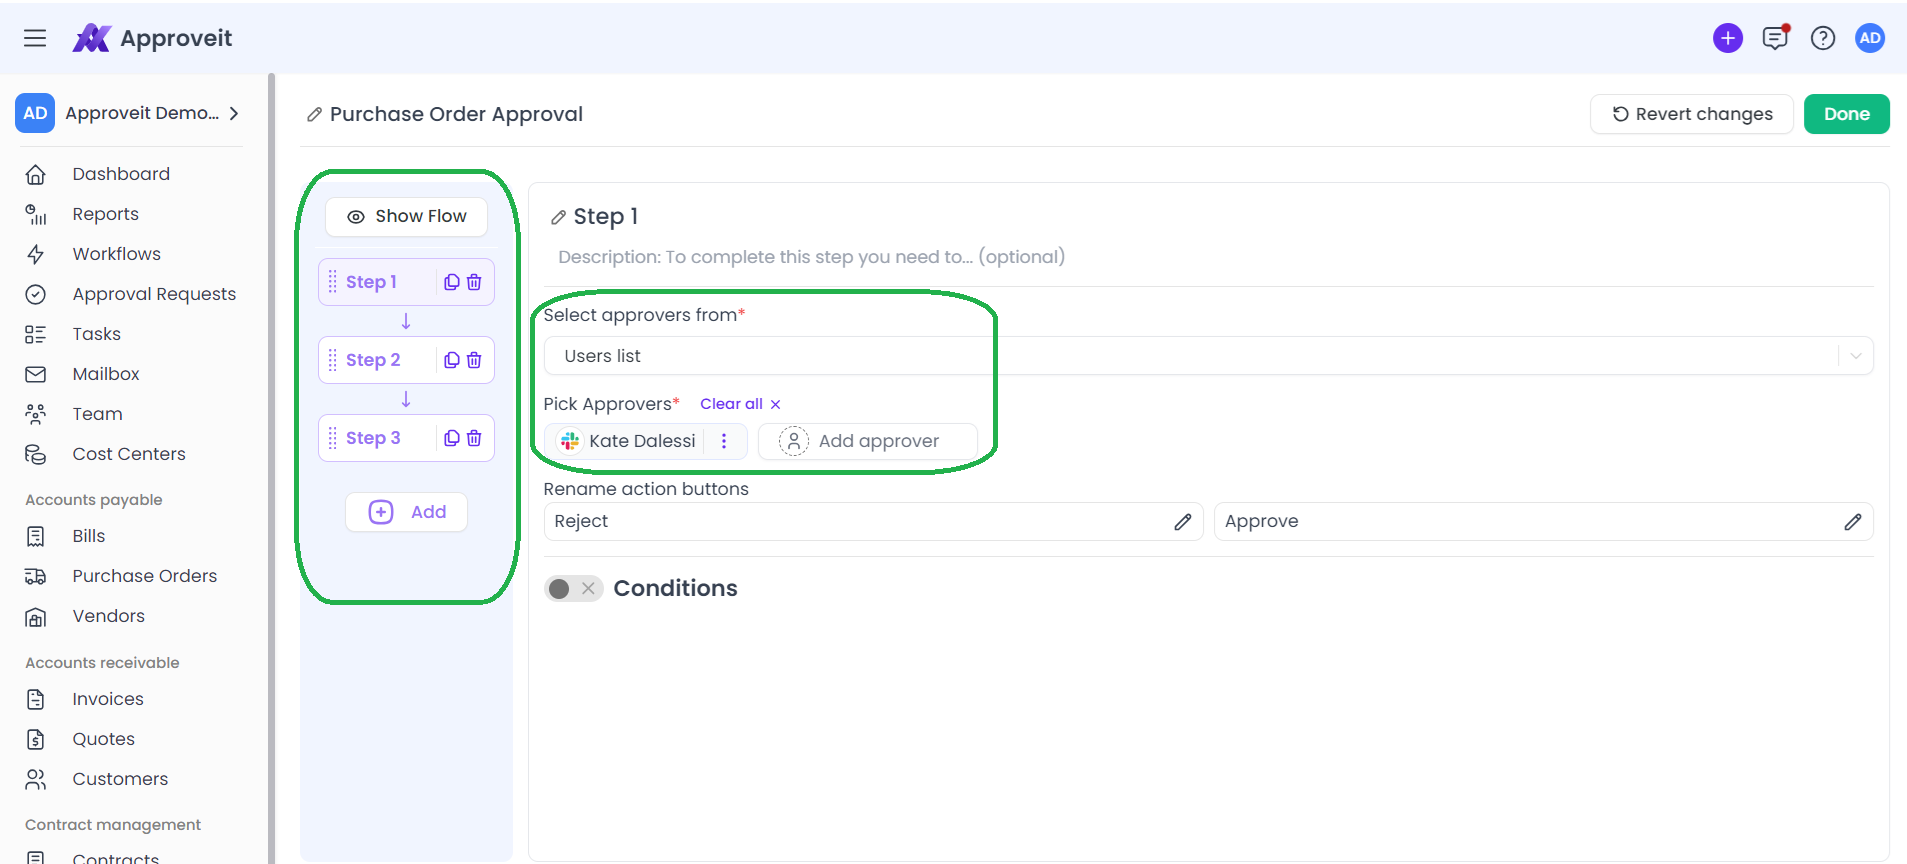
Here you create your approval flow, set up additional notifications and, of course, assign approvers.
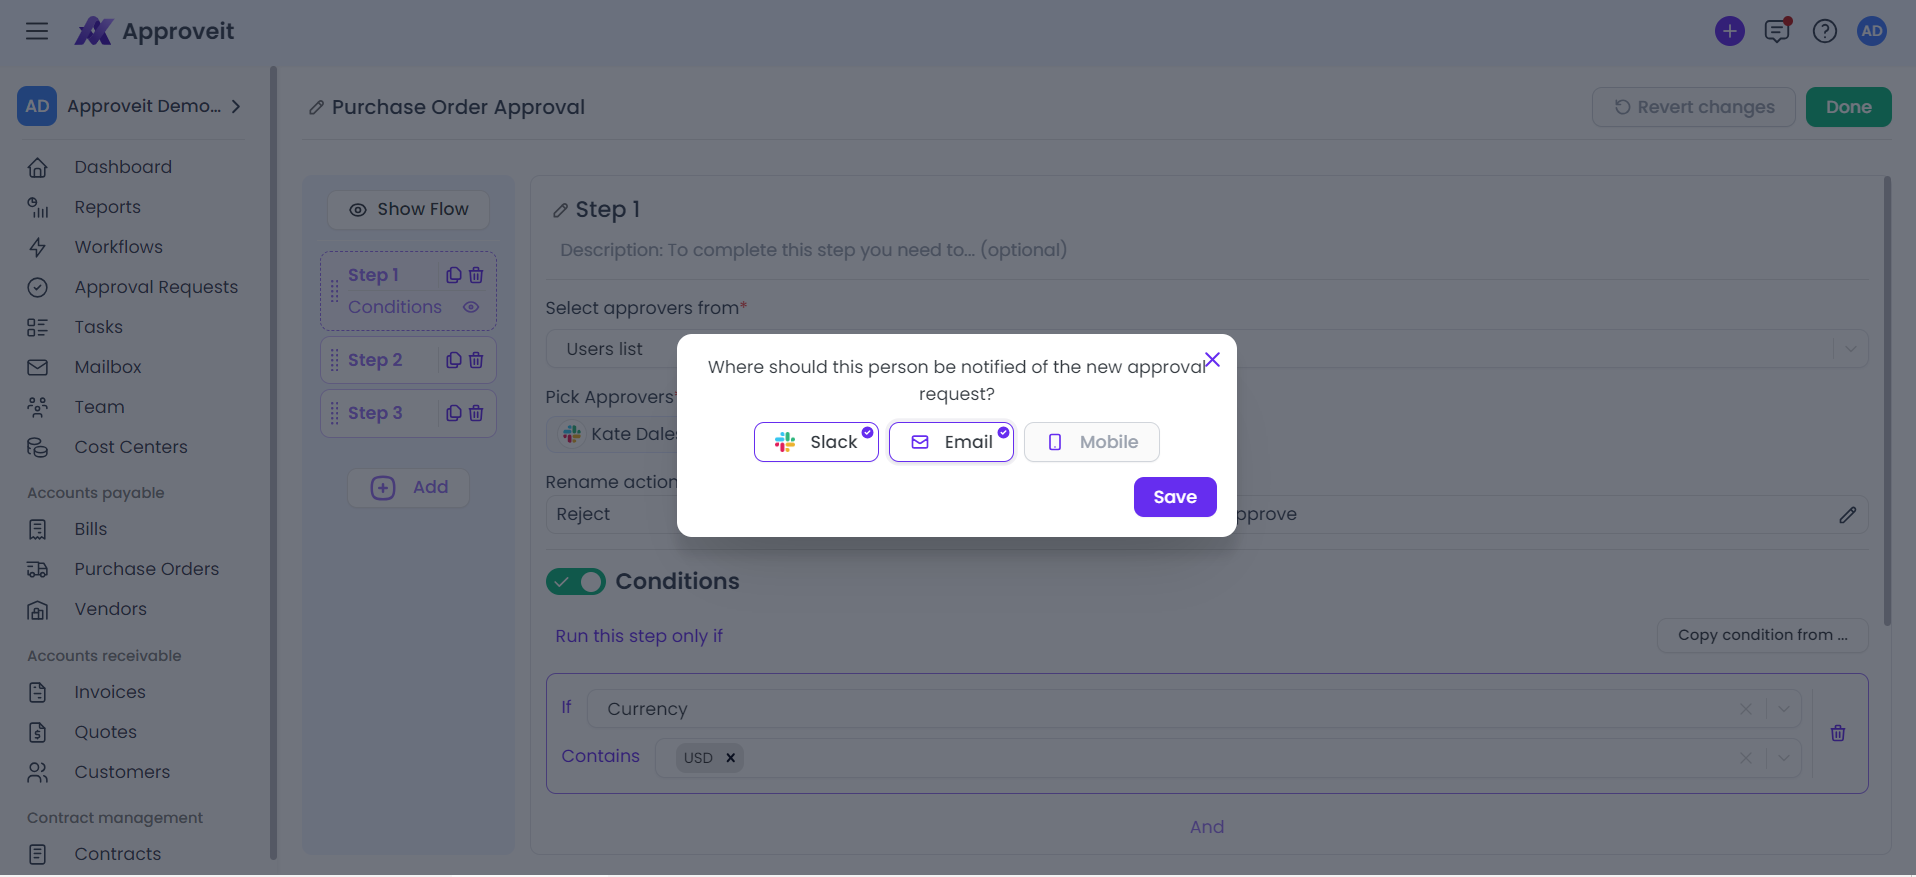
When selecting an approver, you will be asked to choose a communication channel where that approver will receive notifications about pending requests. You can choose more than one channel at a time. The selection of channels depends on whether you’ve connected a messenger you use to Aprpoveit or not.
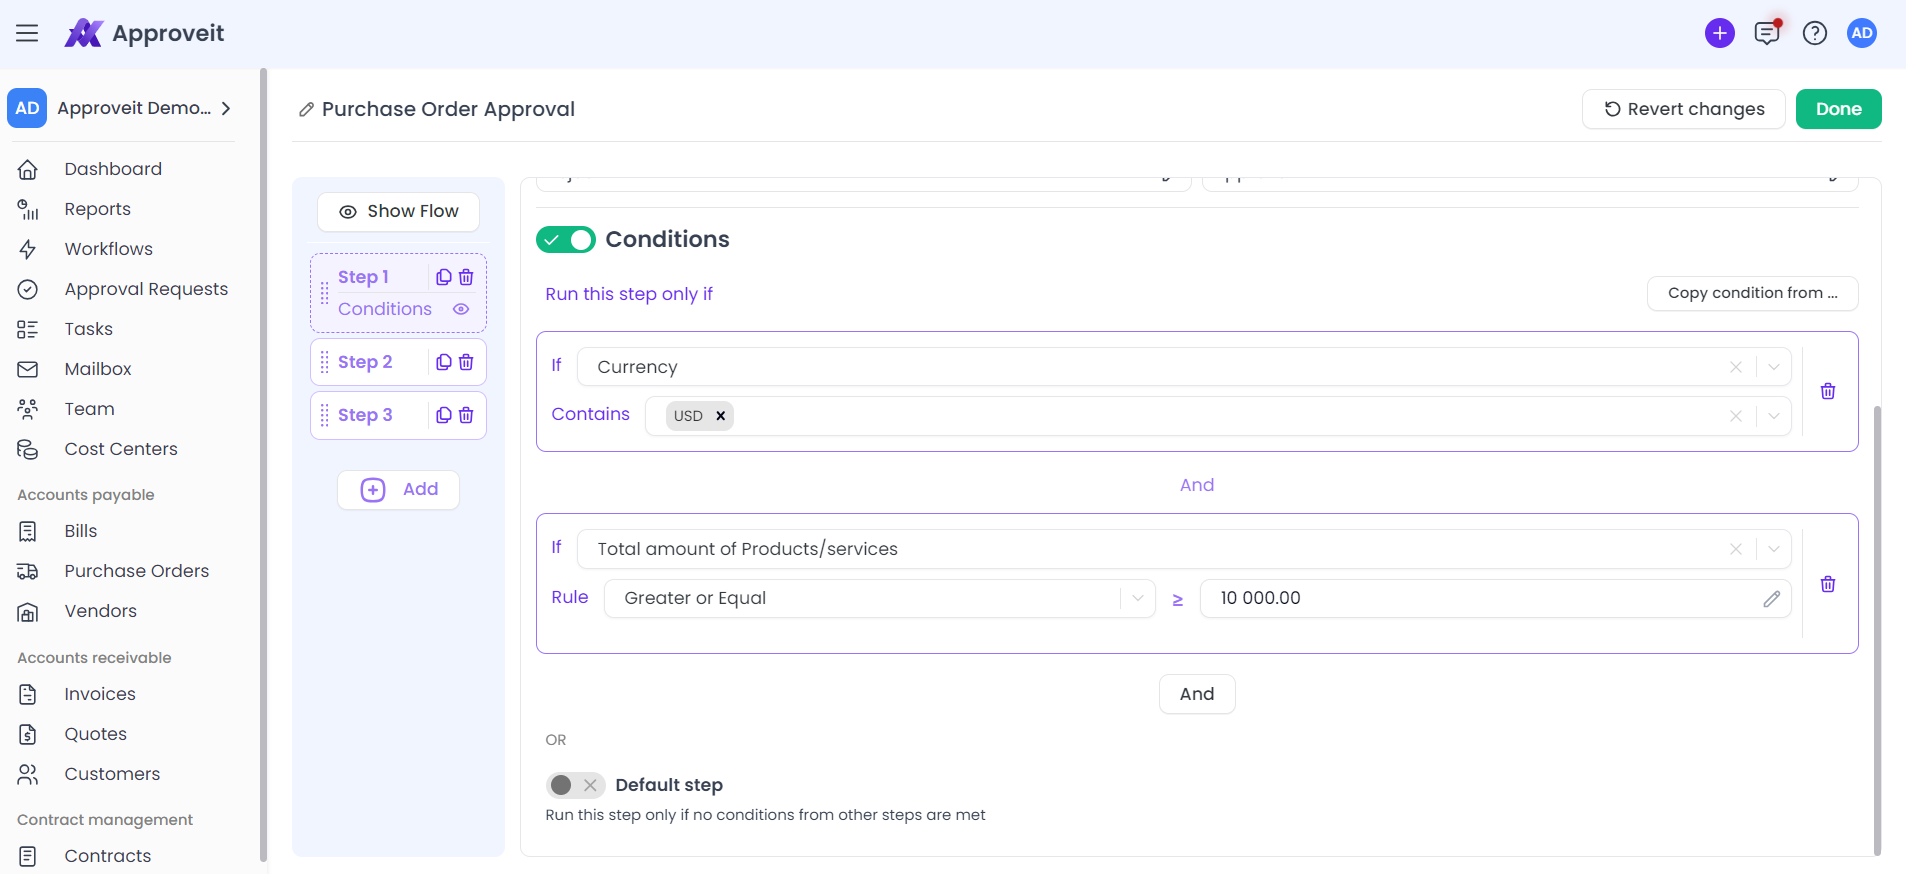
Conditions
This is where you also configure conditions for your approval steps.
You can base conditions on 5 types of fields:
- Amount
- Single select (dropdown)
- Line item with a “Total” sum
- Department
- Location
- Currency
- Cost center
- Radio button
You can add conditions based on two fields simultaneously.
Note: When setting up conditions, you need to create one “Default” step – the step that gets triggered if no conditions from previous steps were met, or simply have at least one step without any conditions on it in your approval flow.
You can add several conditions simultaneously to an approval step.
Stage settings
You can add more than one stage to your workflows. A stage can be an intake form, a vendor pre-approval form, a task, or an action.
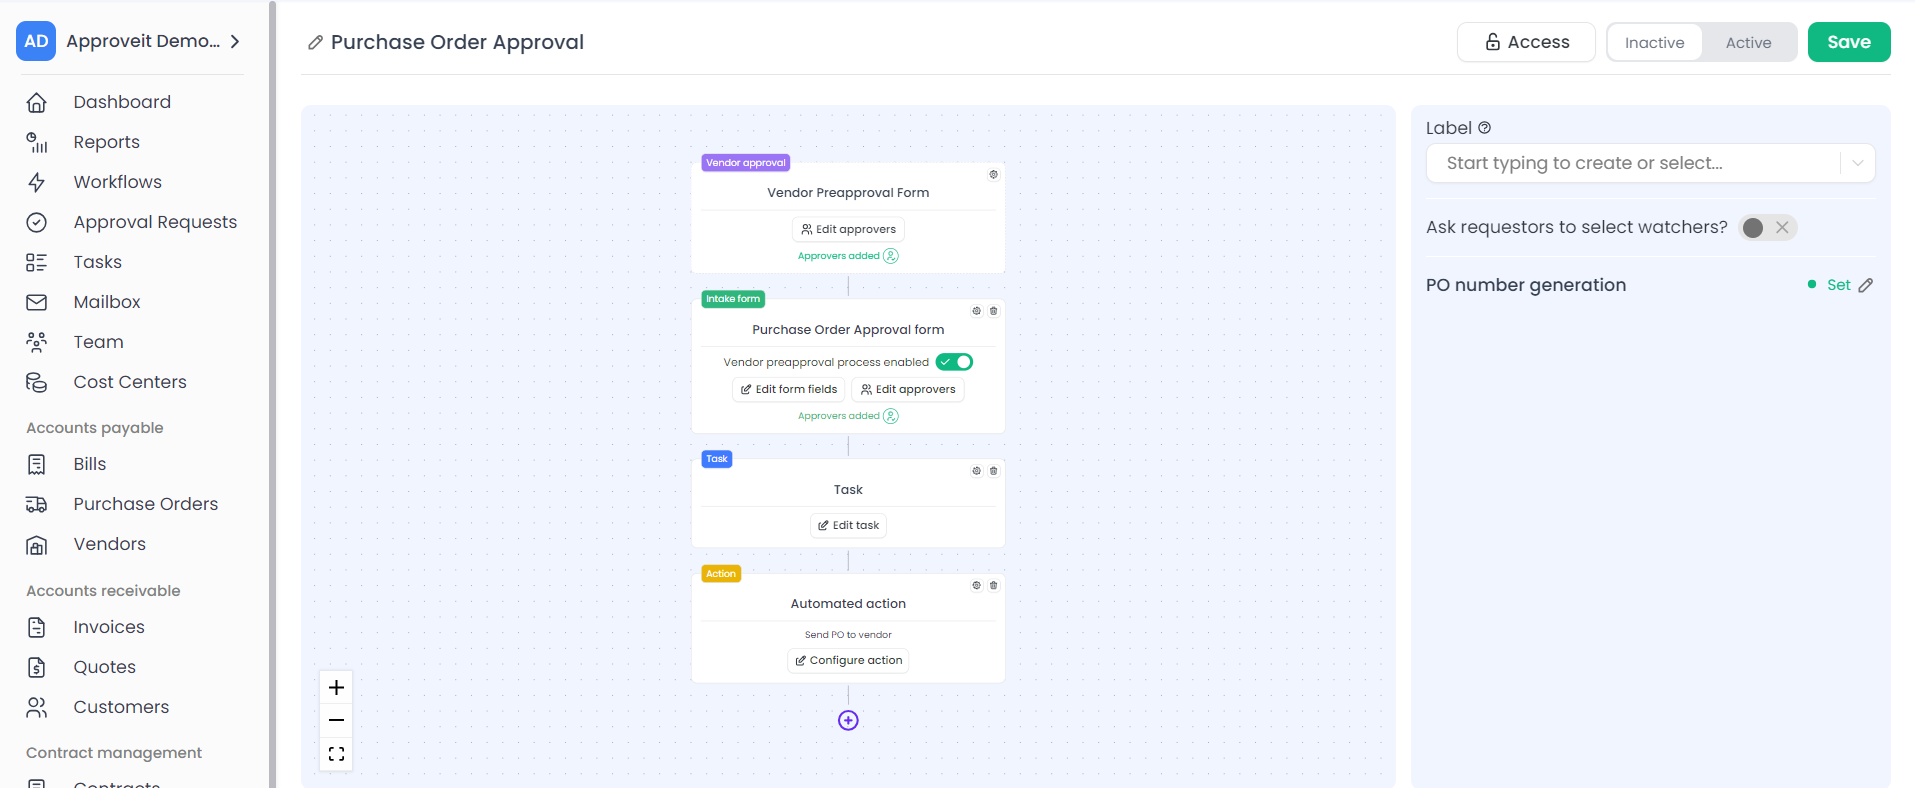
Each stage will have a different set of stage settings. To add a new stage, hit the “+” icon under your existing stage.
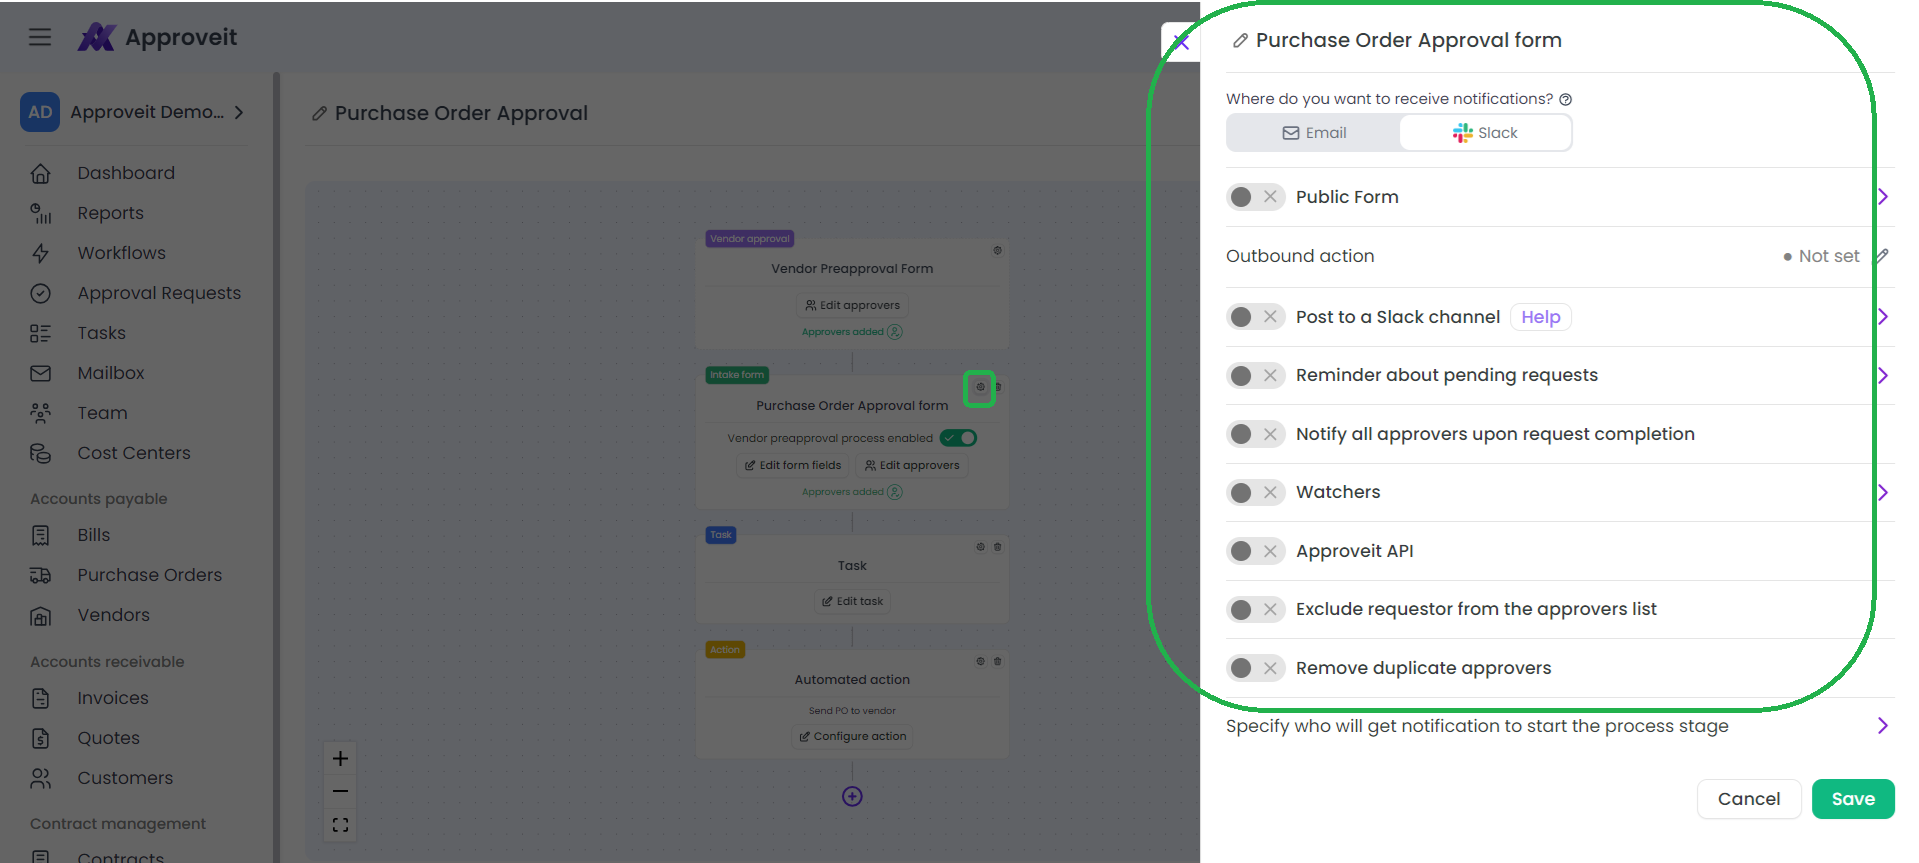
Intake form settings
Here you can add customizations that will add to Approveit’s convenience and automation level you achieve with it.
To learn more about public forms, please watch this video. All other settings are pretty self-explanatory, you’ll also find tooltips in the app when you’re exploring this section.
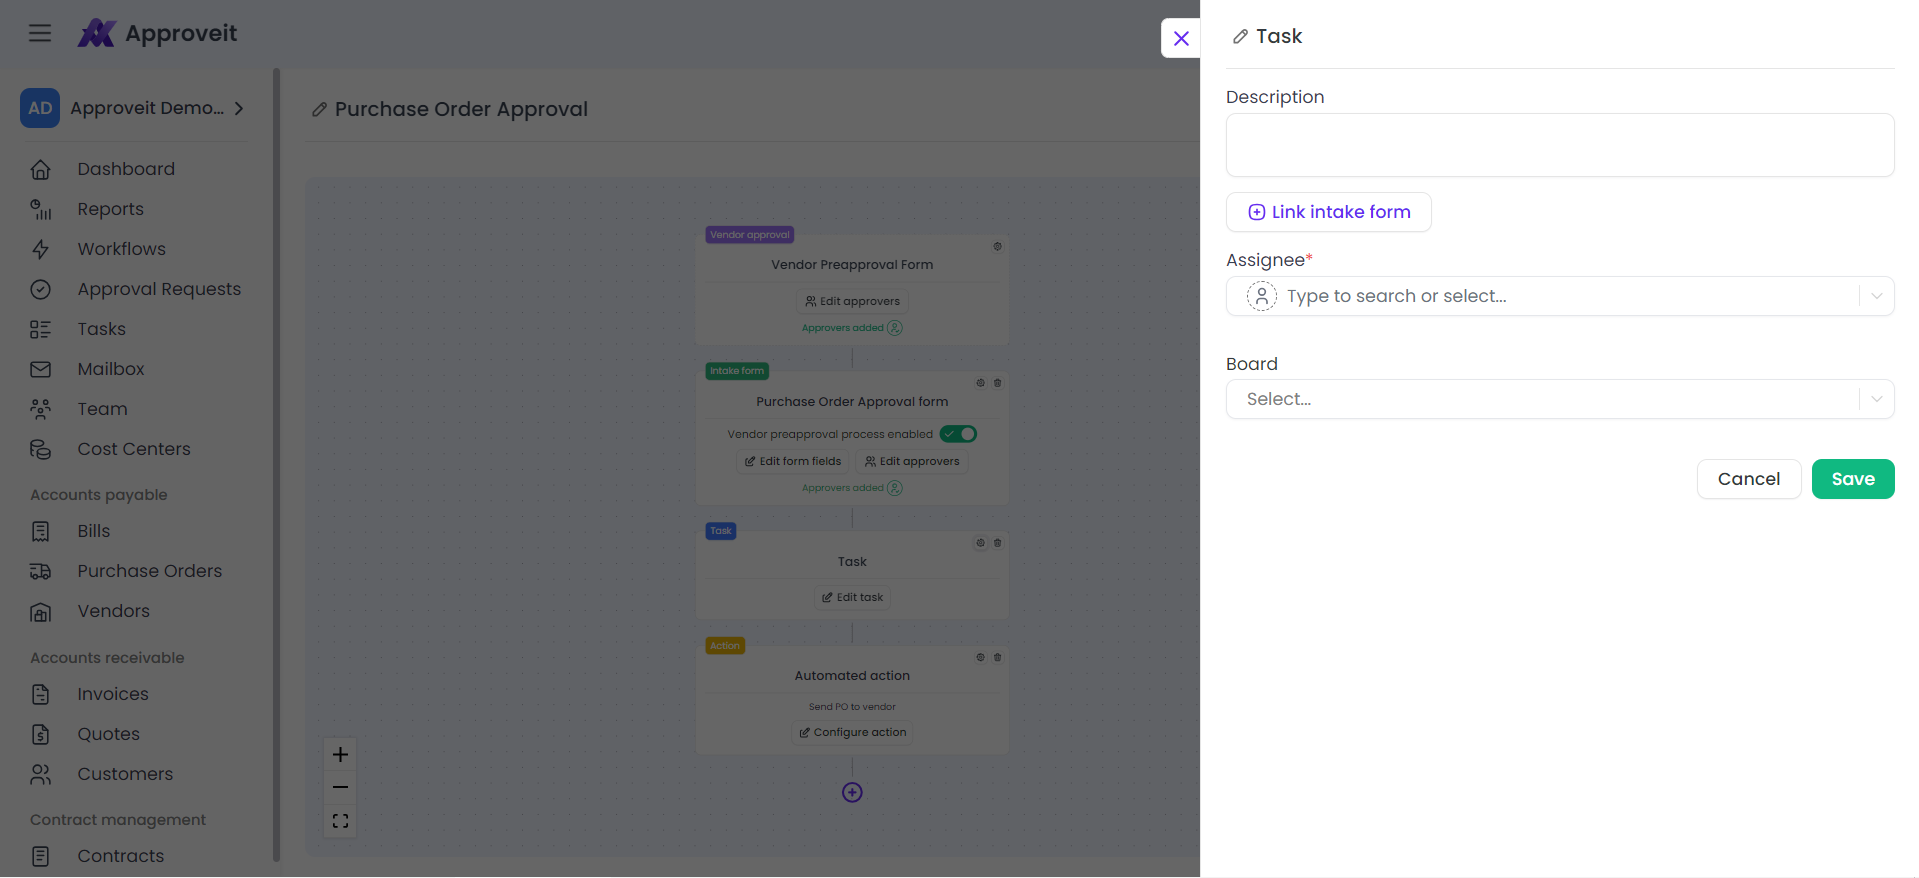
Task settings
In here you can add a task description and link the intake form you’d like the assignee to base their work on (there may be several intake forms in your workflow). If you don’t link the intake form to the task, the assignee will NOT see it. There’s a dropdown with all the existing task boards and you can choose which board the tasks from this workflow end up on. If you leave it blank, Approveit will create a task board named identically to the workflow its a part of.
You can choose several assignees here, and if you do, the first one to pull the task to “in progress” status will be considered an assignee.
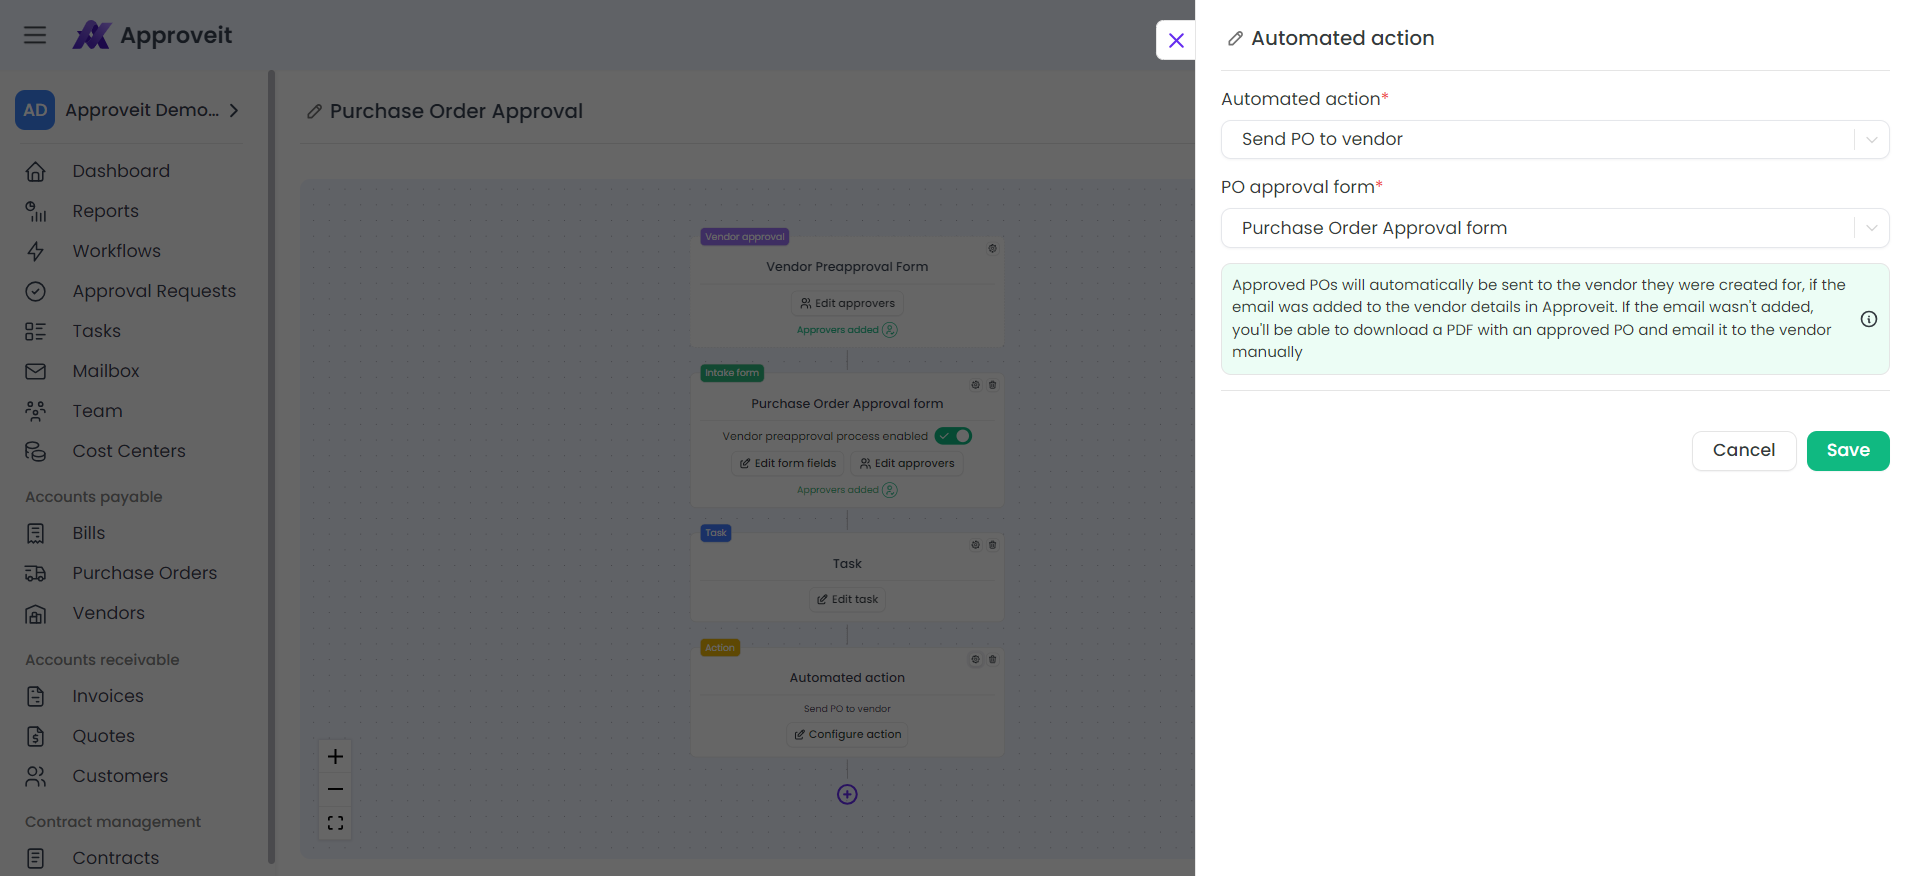
Action settings
Automated actions can be set up only with specific intake form types, and the actions available will change depending on the intake form you’re working with. In the case on the screenshot, we have a PO intake form, and the action available to us is sending a PO to the vendor automatically once the previous stage is completed.
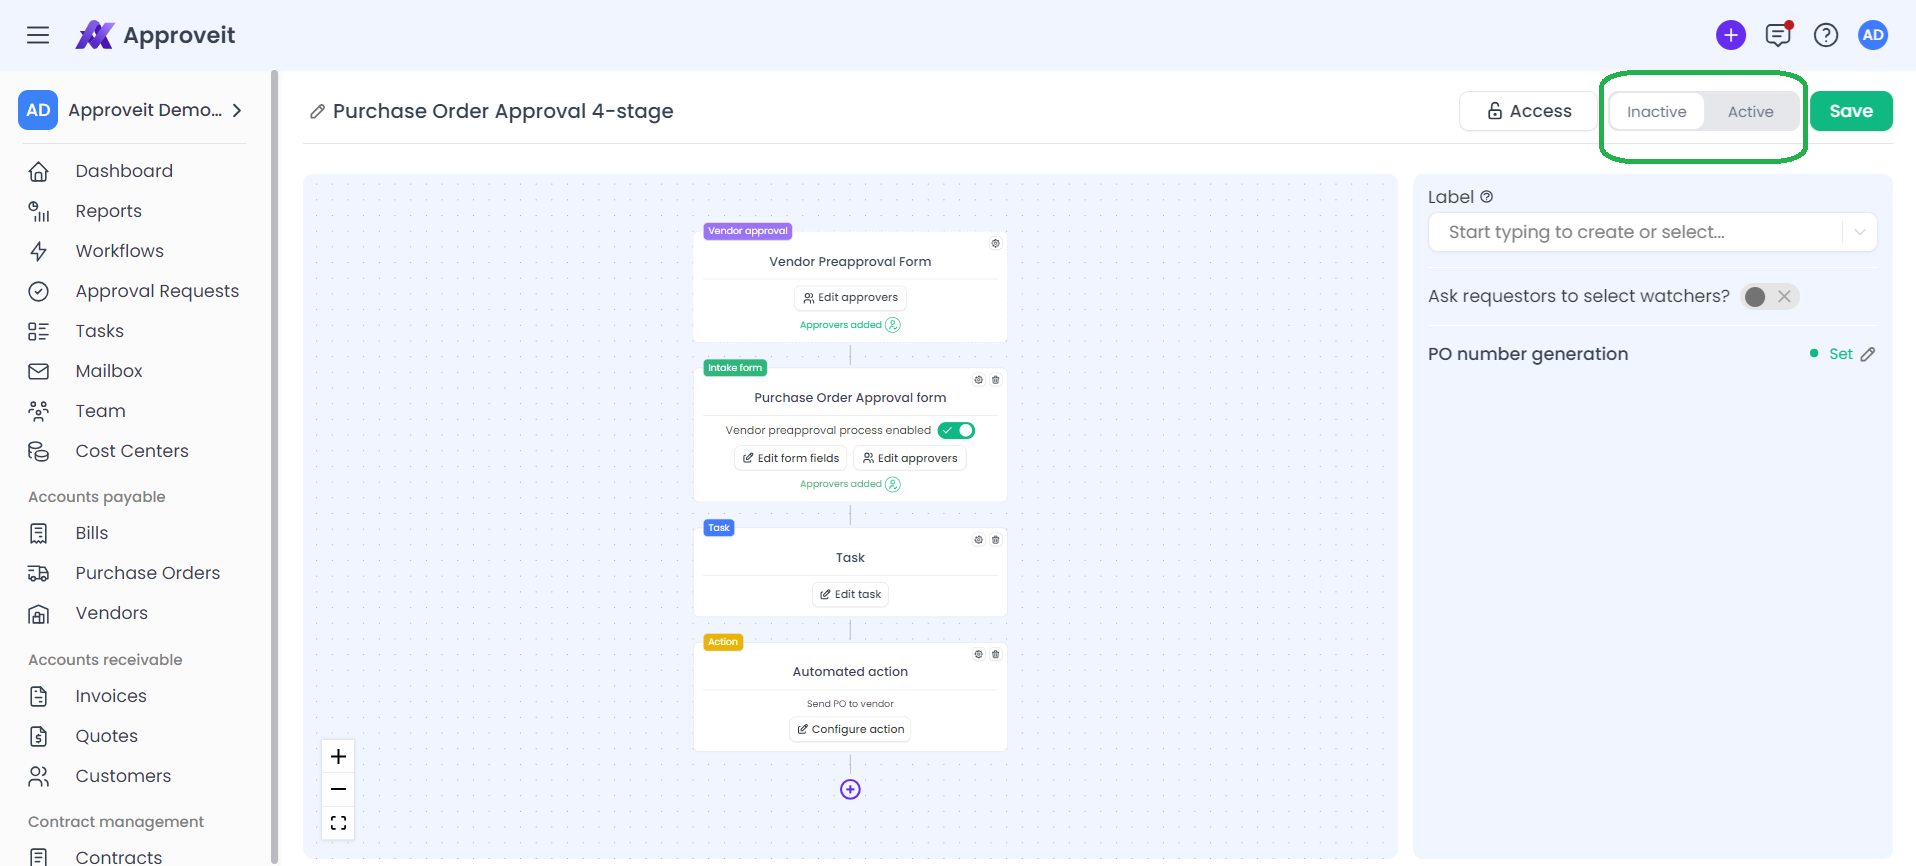
Access settings
You can limit access to your workflows. Workflows can be made visible only to certain users, or to selected departments. If you leave this off, everyone on your team will see the workflow.

Workflows can be saved as active or inactive.
Inactive workflows are not visible to anyone but admins of your Approveit account.
Your subscription plan limits only the number of workflows you can have active at the same time. You can create as many inactive workflows as you need and activate them when necessary.
Once you’ve completed your setup, hit “save” and enjoy automated approval workflows that minimize manual work and make your work life easier!