Approveit Guide: Cost Centers & Budgets in Approveit
In Approveit, you can track your business expenses efficiently and easily by setting up budgets.
In this guide, you’ll learn how to set up and use Budgets, and specifics of calculations and reporting.
1. Setting up a cost center
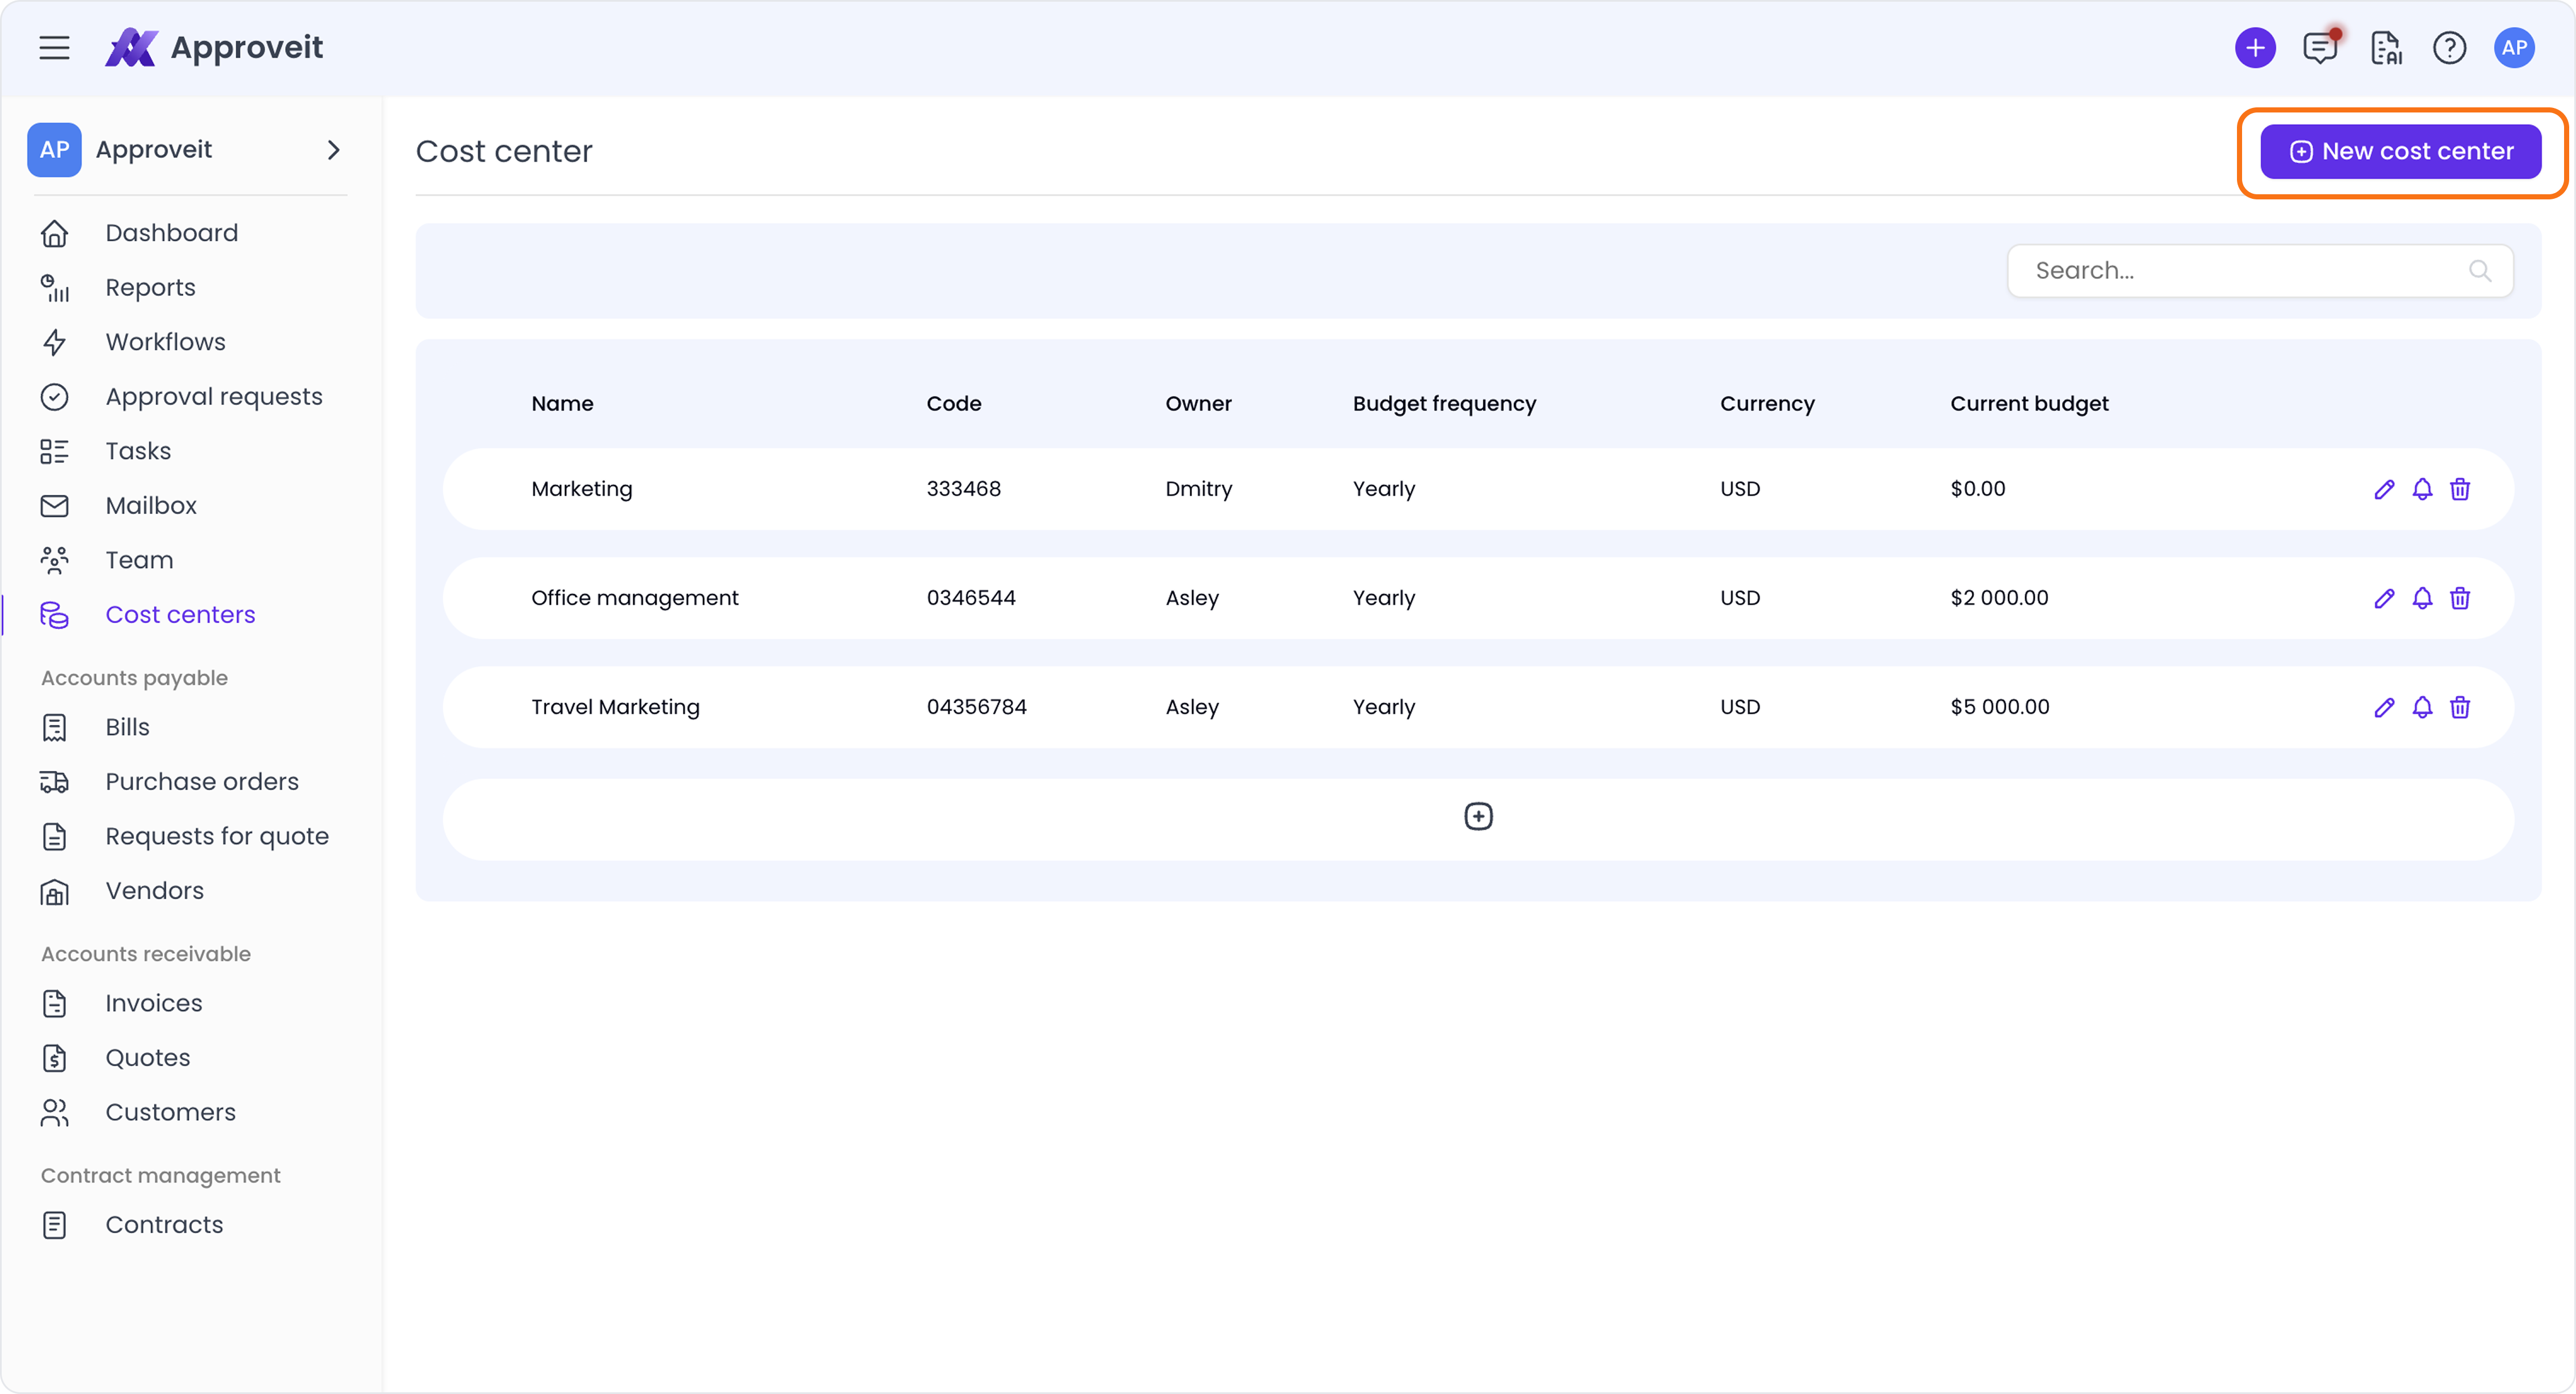
First, go to the Cost Centers tab and click “Add New Cost Center”
You will see the screen with Cost Center settings, where you’ll be asked to specify your Cost Center parameters.
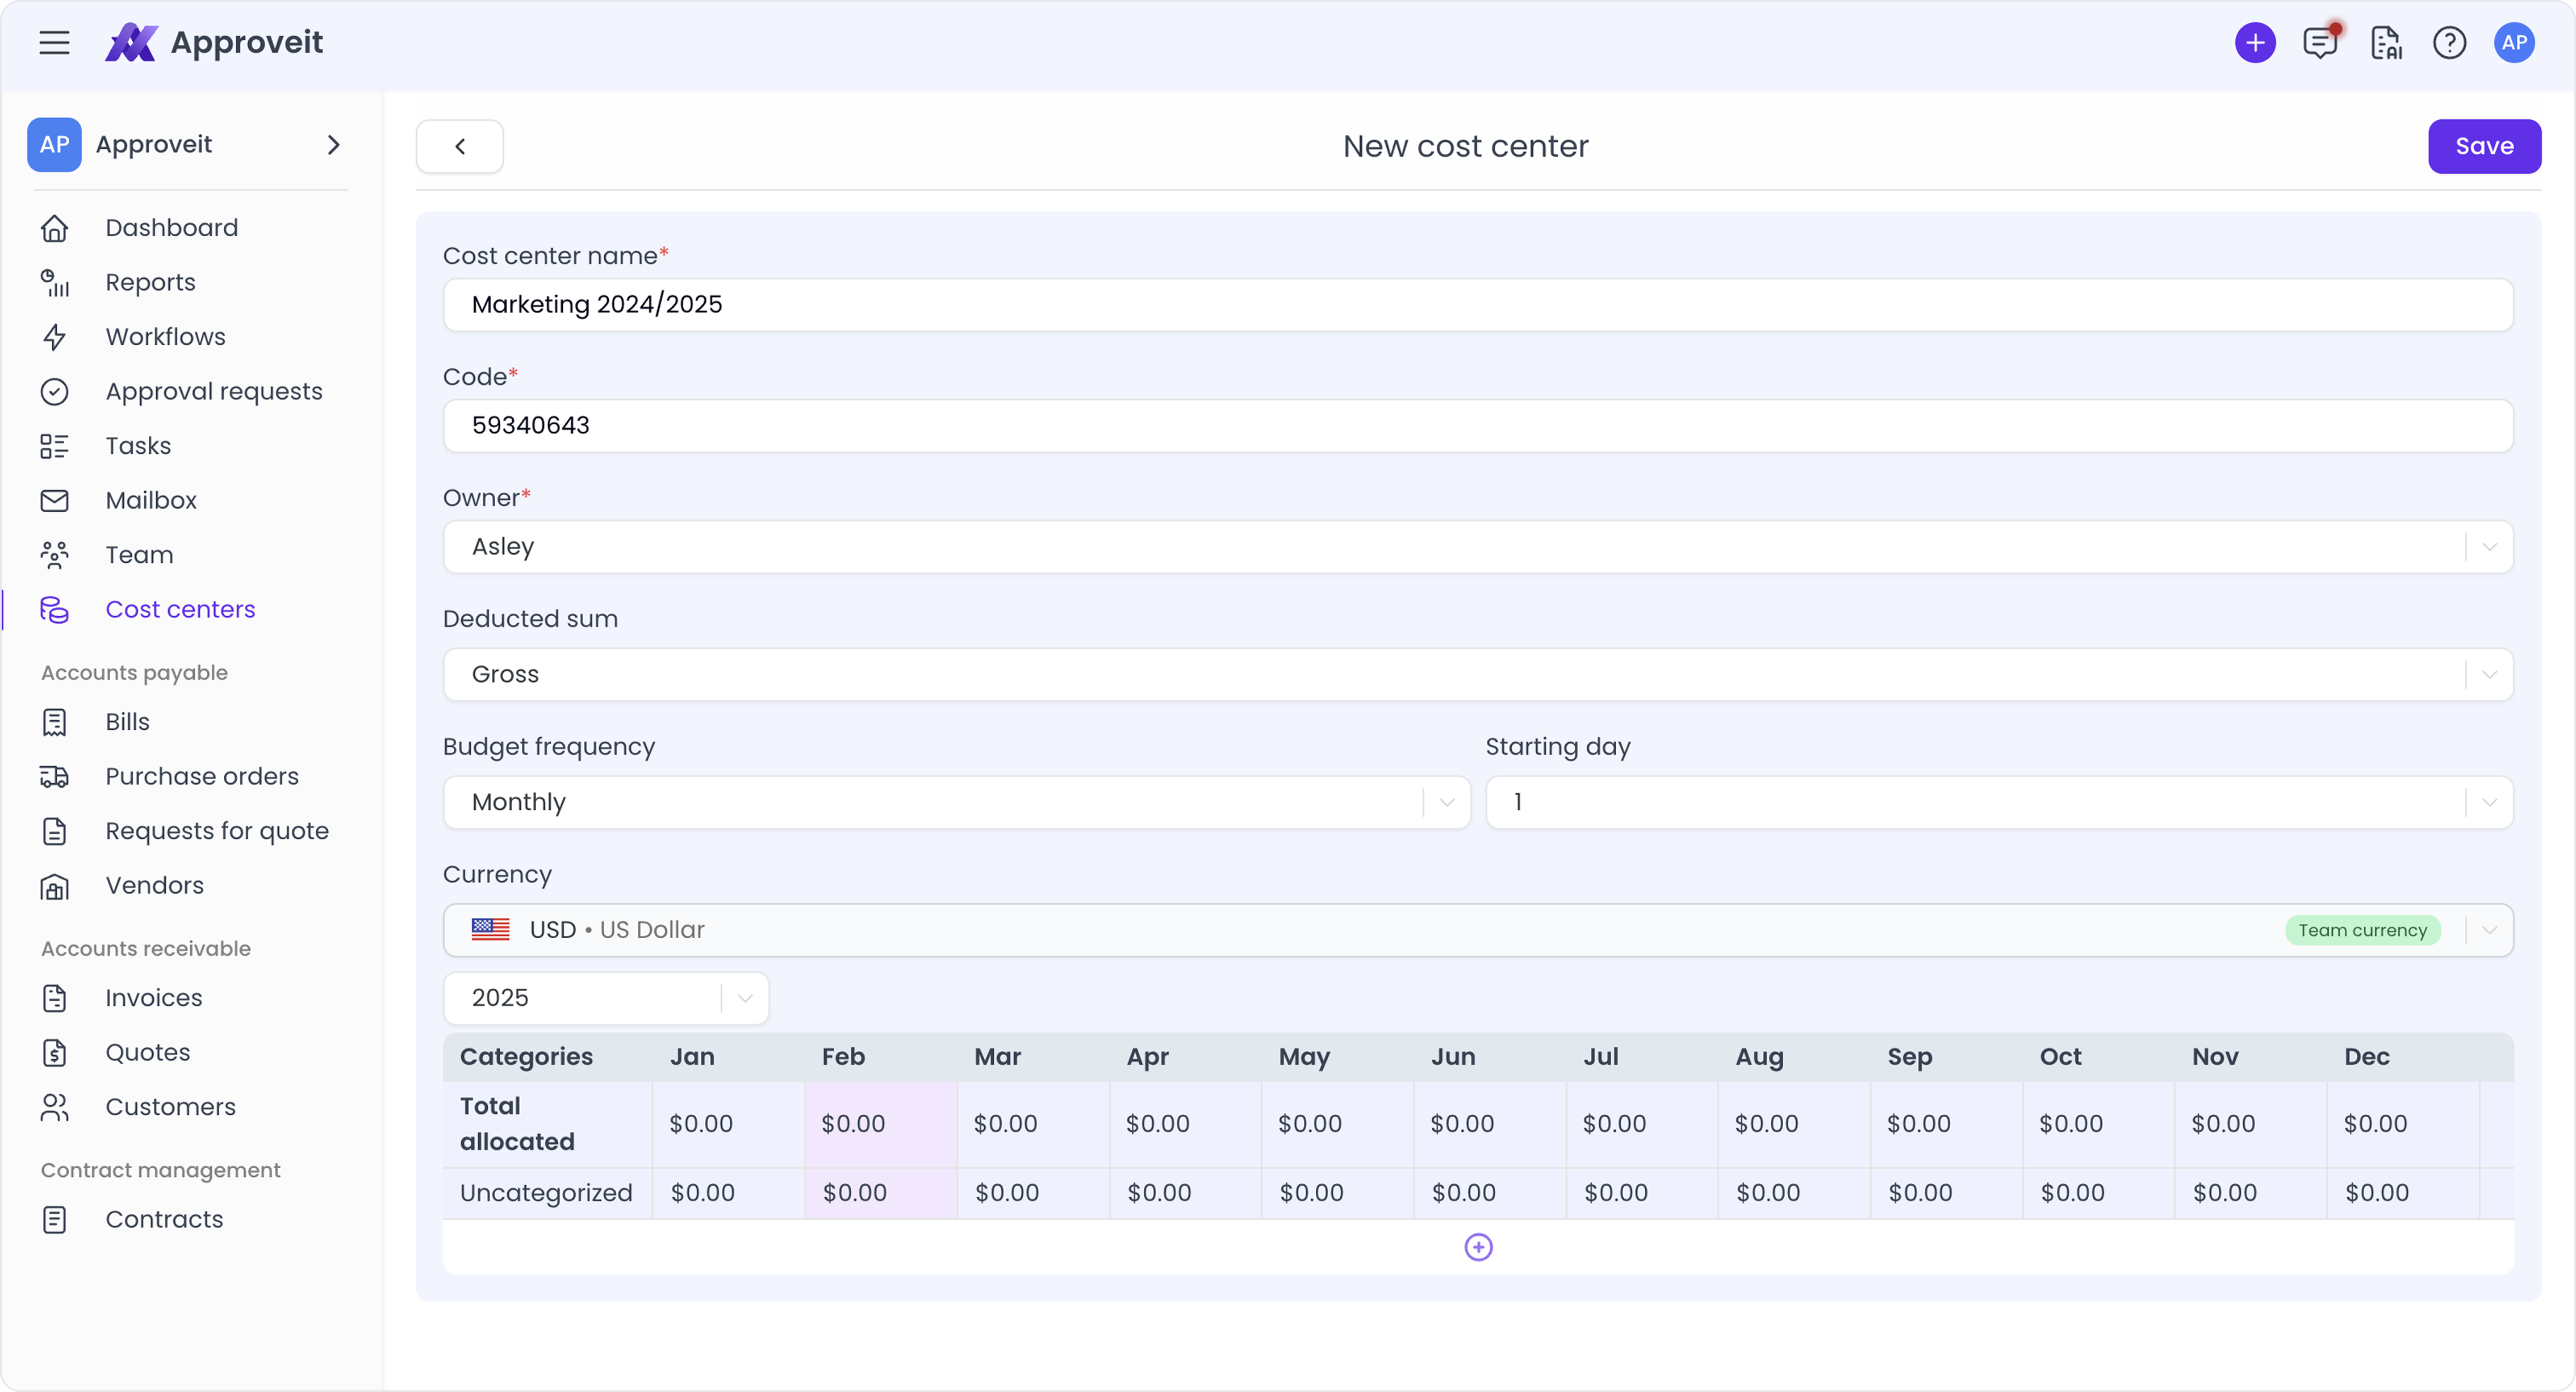
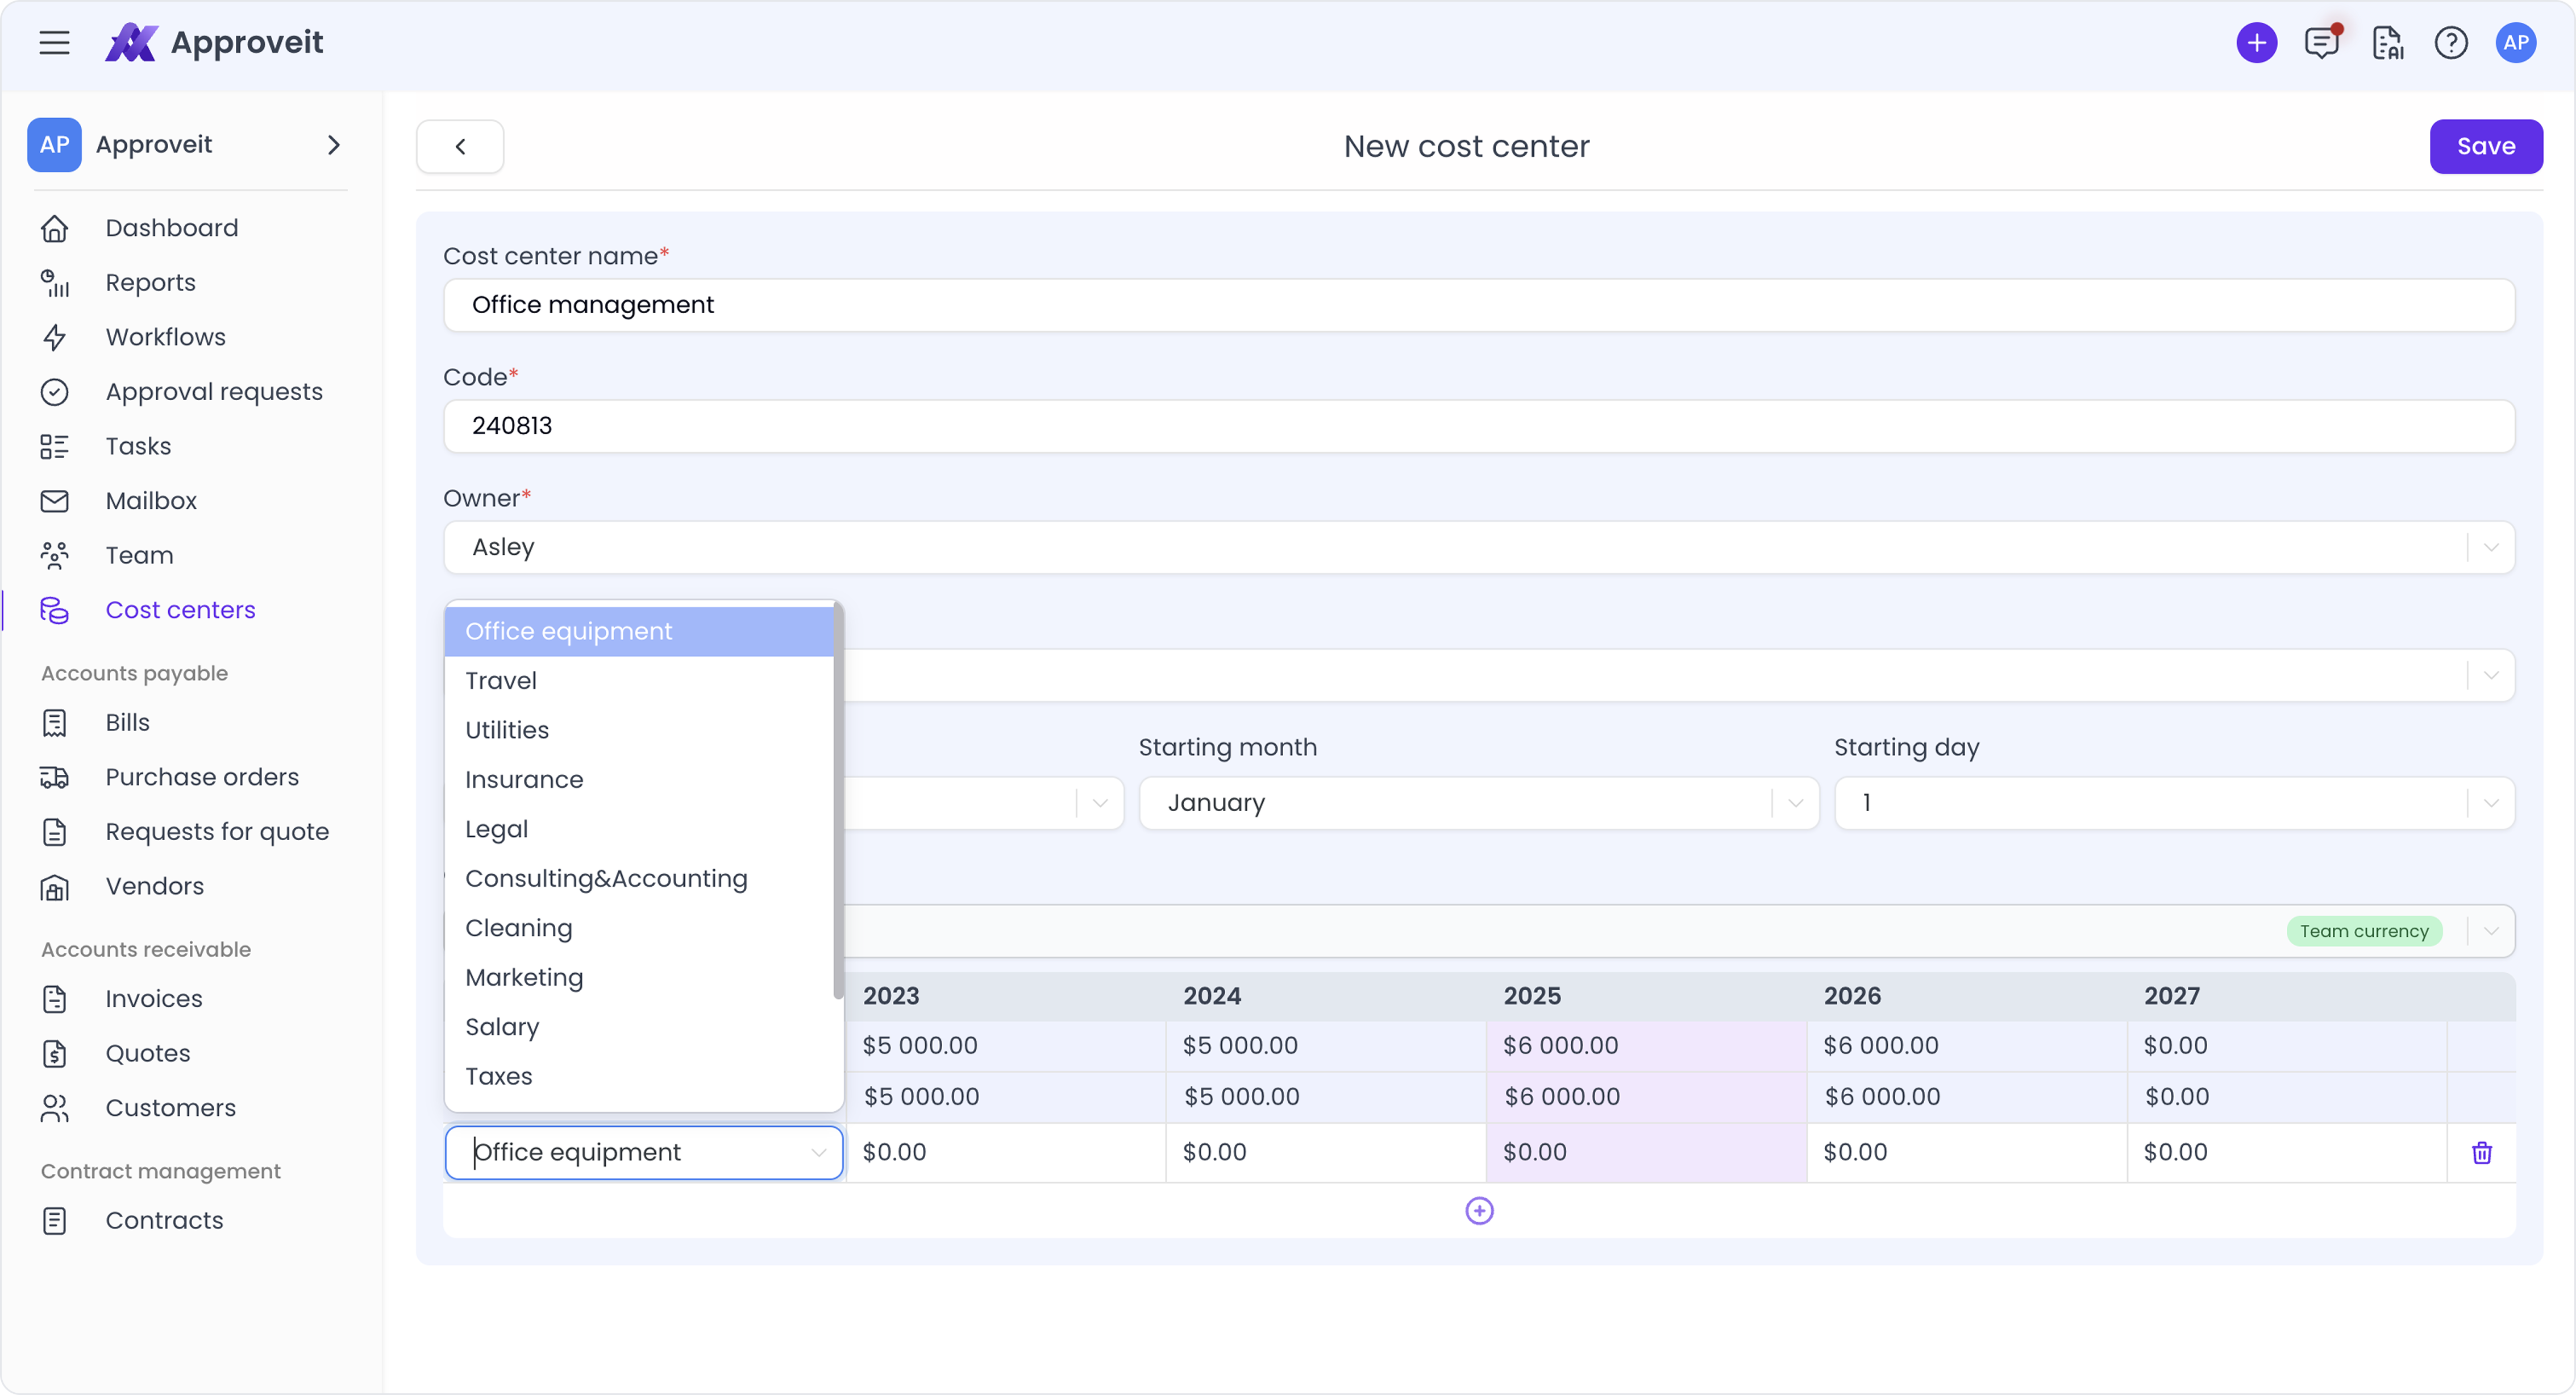
Cost Center name – The name of your cost center that will be displayed in the “Cost Center” dropdown list for requestors when creating a bill or a purchase order.
Code – An additional identificator for your Cost Center, digits only
Owner – Someone on your team who’s going to be responsible for this specific Cost Center
The rest of the parameters are optional and only apply if you want to allocate a budget for this cost center.
Deducted Sum – Choose if you want Gross or Net amount to be deducted from your budget
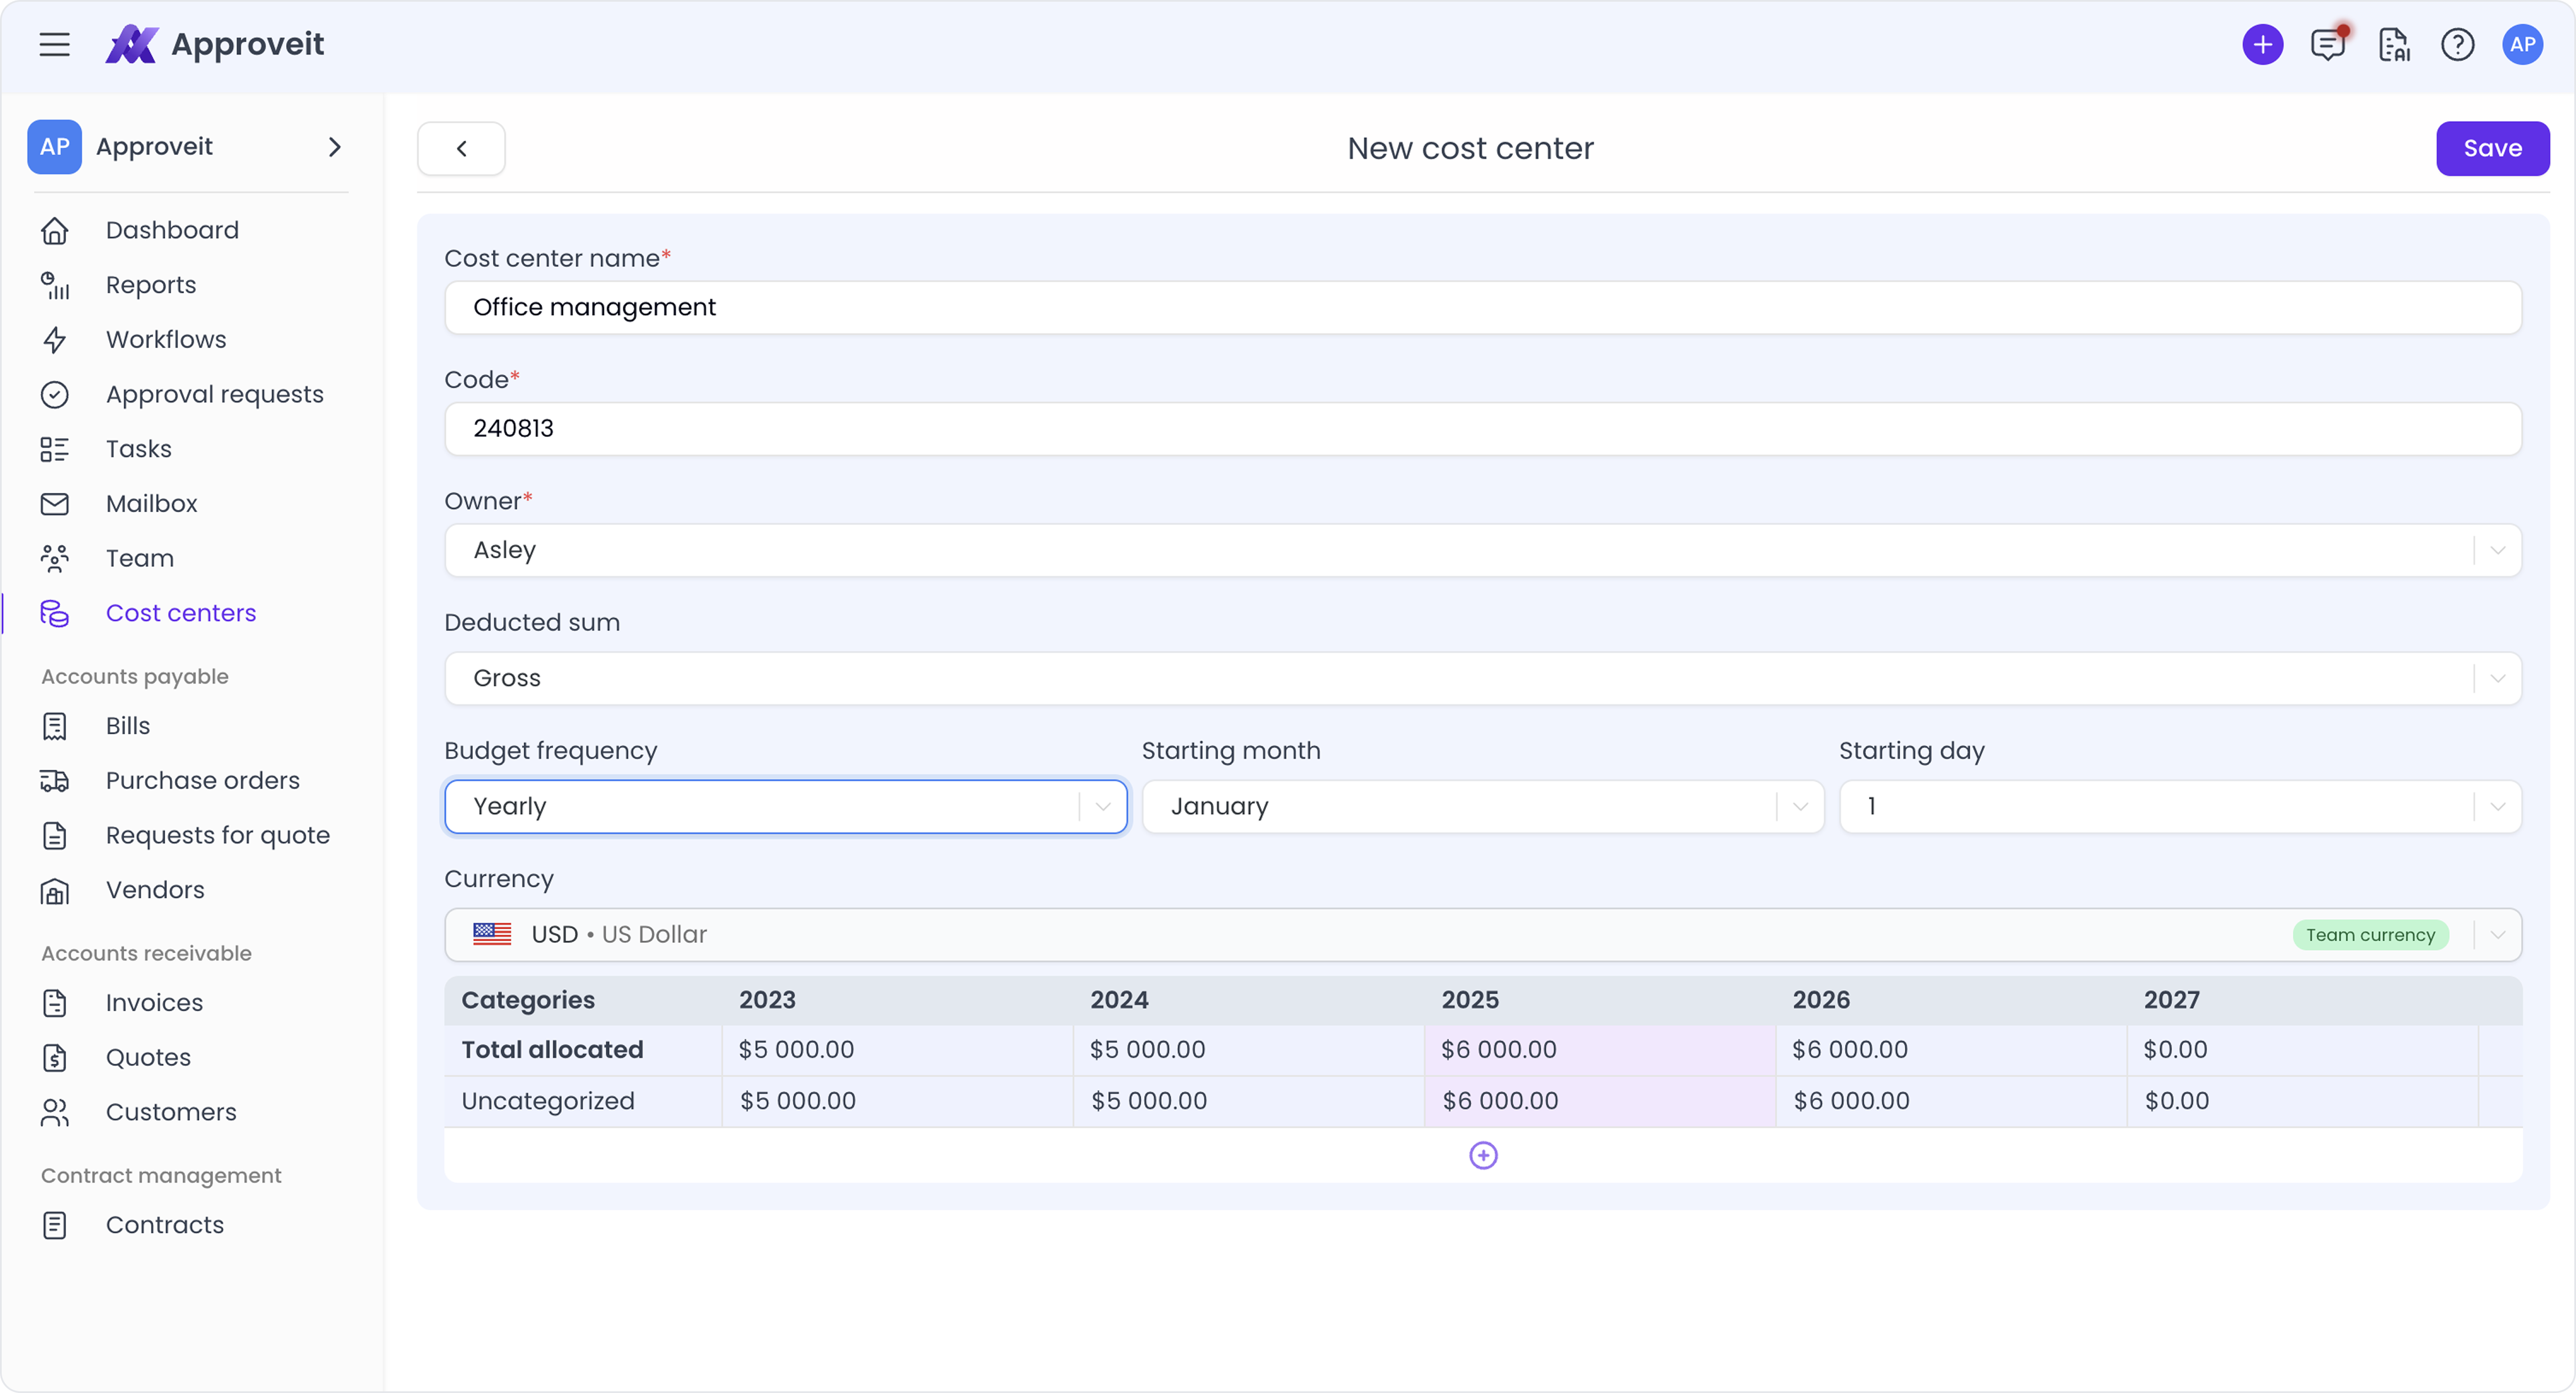
Budget Frequency – Choose how you would like to allocate your budgets: per year, per quarter, or per month.
Starting day – Choose the day of the month when one budget ends and another starts. For example, if I choose the starting day to be 5, and my budget frequency is monthly – my budget will last from the 5th of January to the 4th of February, and on the 5th of February a different budget starts.
Currency – The currency of every budget is your default team currency. To change the default team currency, you need to go to your team settings

Now, time to allocate your budgets. Remember – it’s optional. If you prefer to use cost centers merely as an expense records log – you can skip following steps.
2. Setting up budget
As an example, we’ll choose quarterly budgets. Monthly budgets work identically. Yearly budgets will simply not have a year selector above your budgets table.
By clicking the + icon at the bottom of the table, you’ll add a category to your budget.
The categories list is pre-set, but you can always edit the categories in the “Categories” tab.
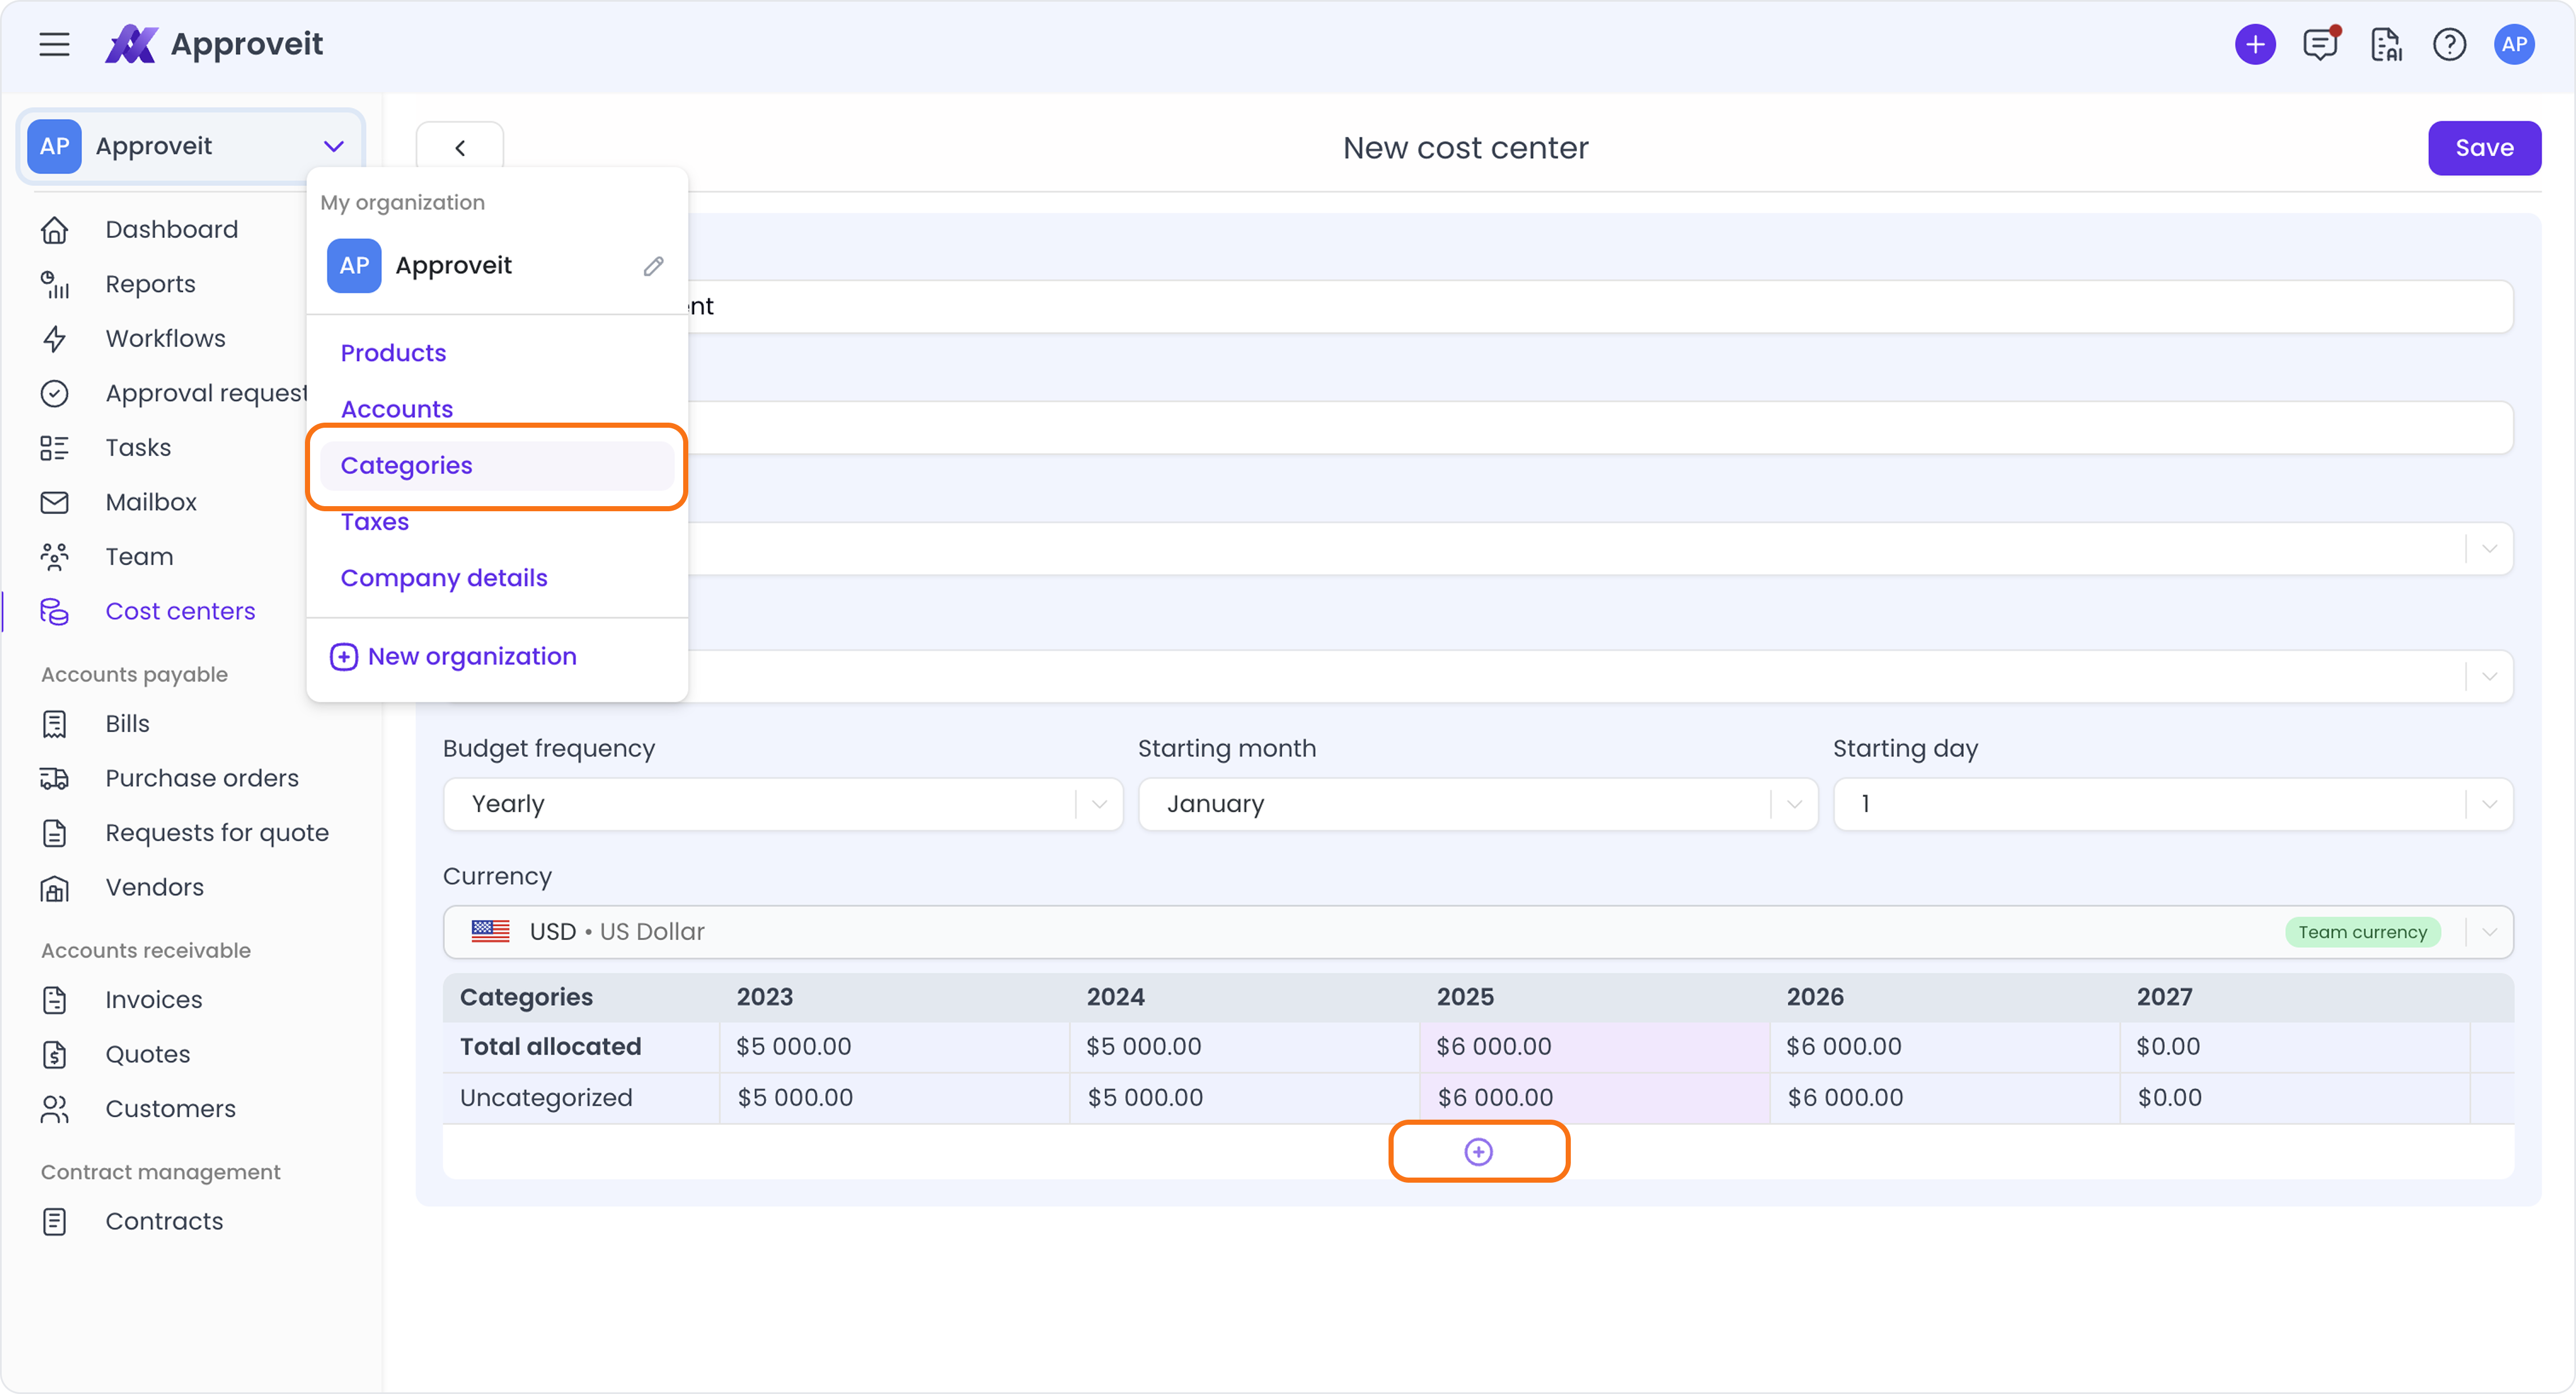
To change the category, simply click on it, and the dropdown list of available categories will open
Note: Categorizing your budget is optional. You can simply fill in the total allocated amounts.
If you’re categorizing your budget, the sum of amounts you allocate for each category will be automatically calculated in the Total Allocated cell. However, if you manually enter the Total Allocated amount, Approveit will no longer auto-calculate the sum of amounts you enter for categories.
If you manually enter the Total Allocated amount, you can leave a part of it with no category. That amount will appear in the “Uncategorized” cell.
Uncategorized amount = (Total allocated amount) – (Sum of amounts allocated for each category)
Advice: Choose the budget frequency before you allocate amounts. If you change the budget frequency after you allocate and categorize amounts, the amounts will reset and you’ll have to start over.
Important: Once you save your budget, you won’t be able to change budget frequency.
3. How the budgets work
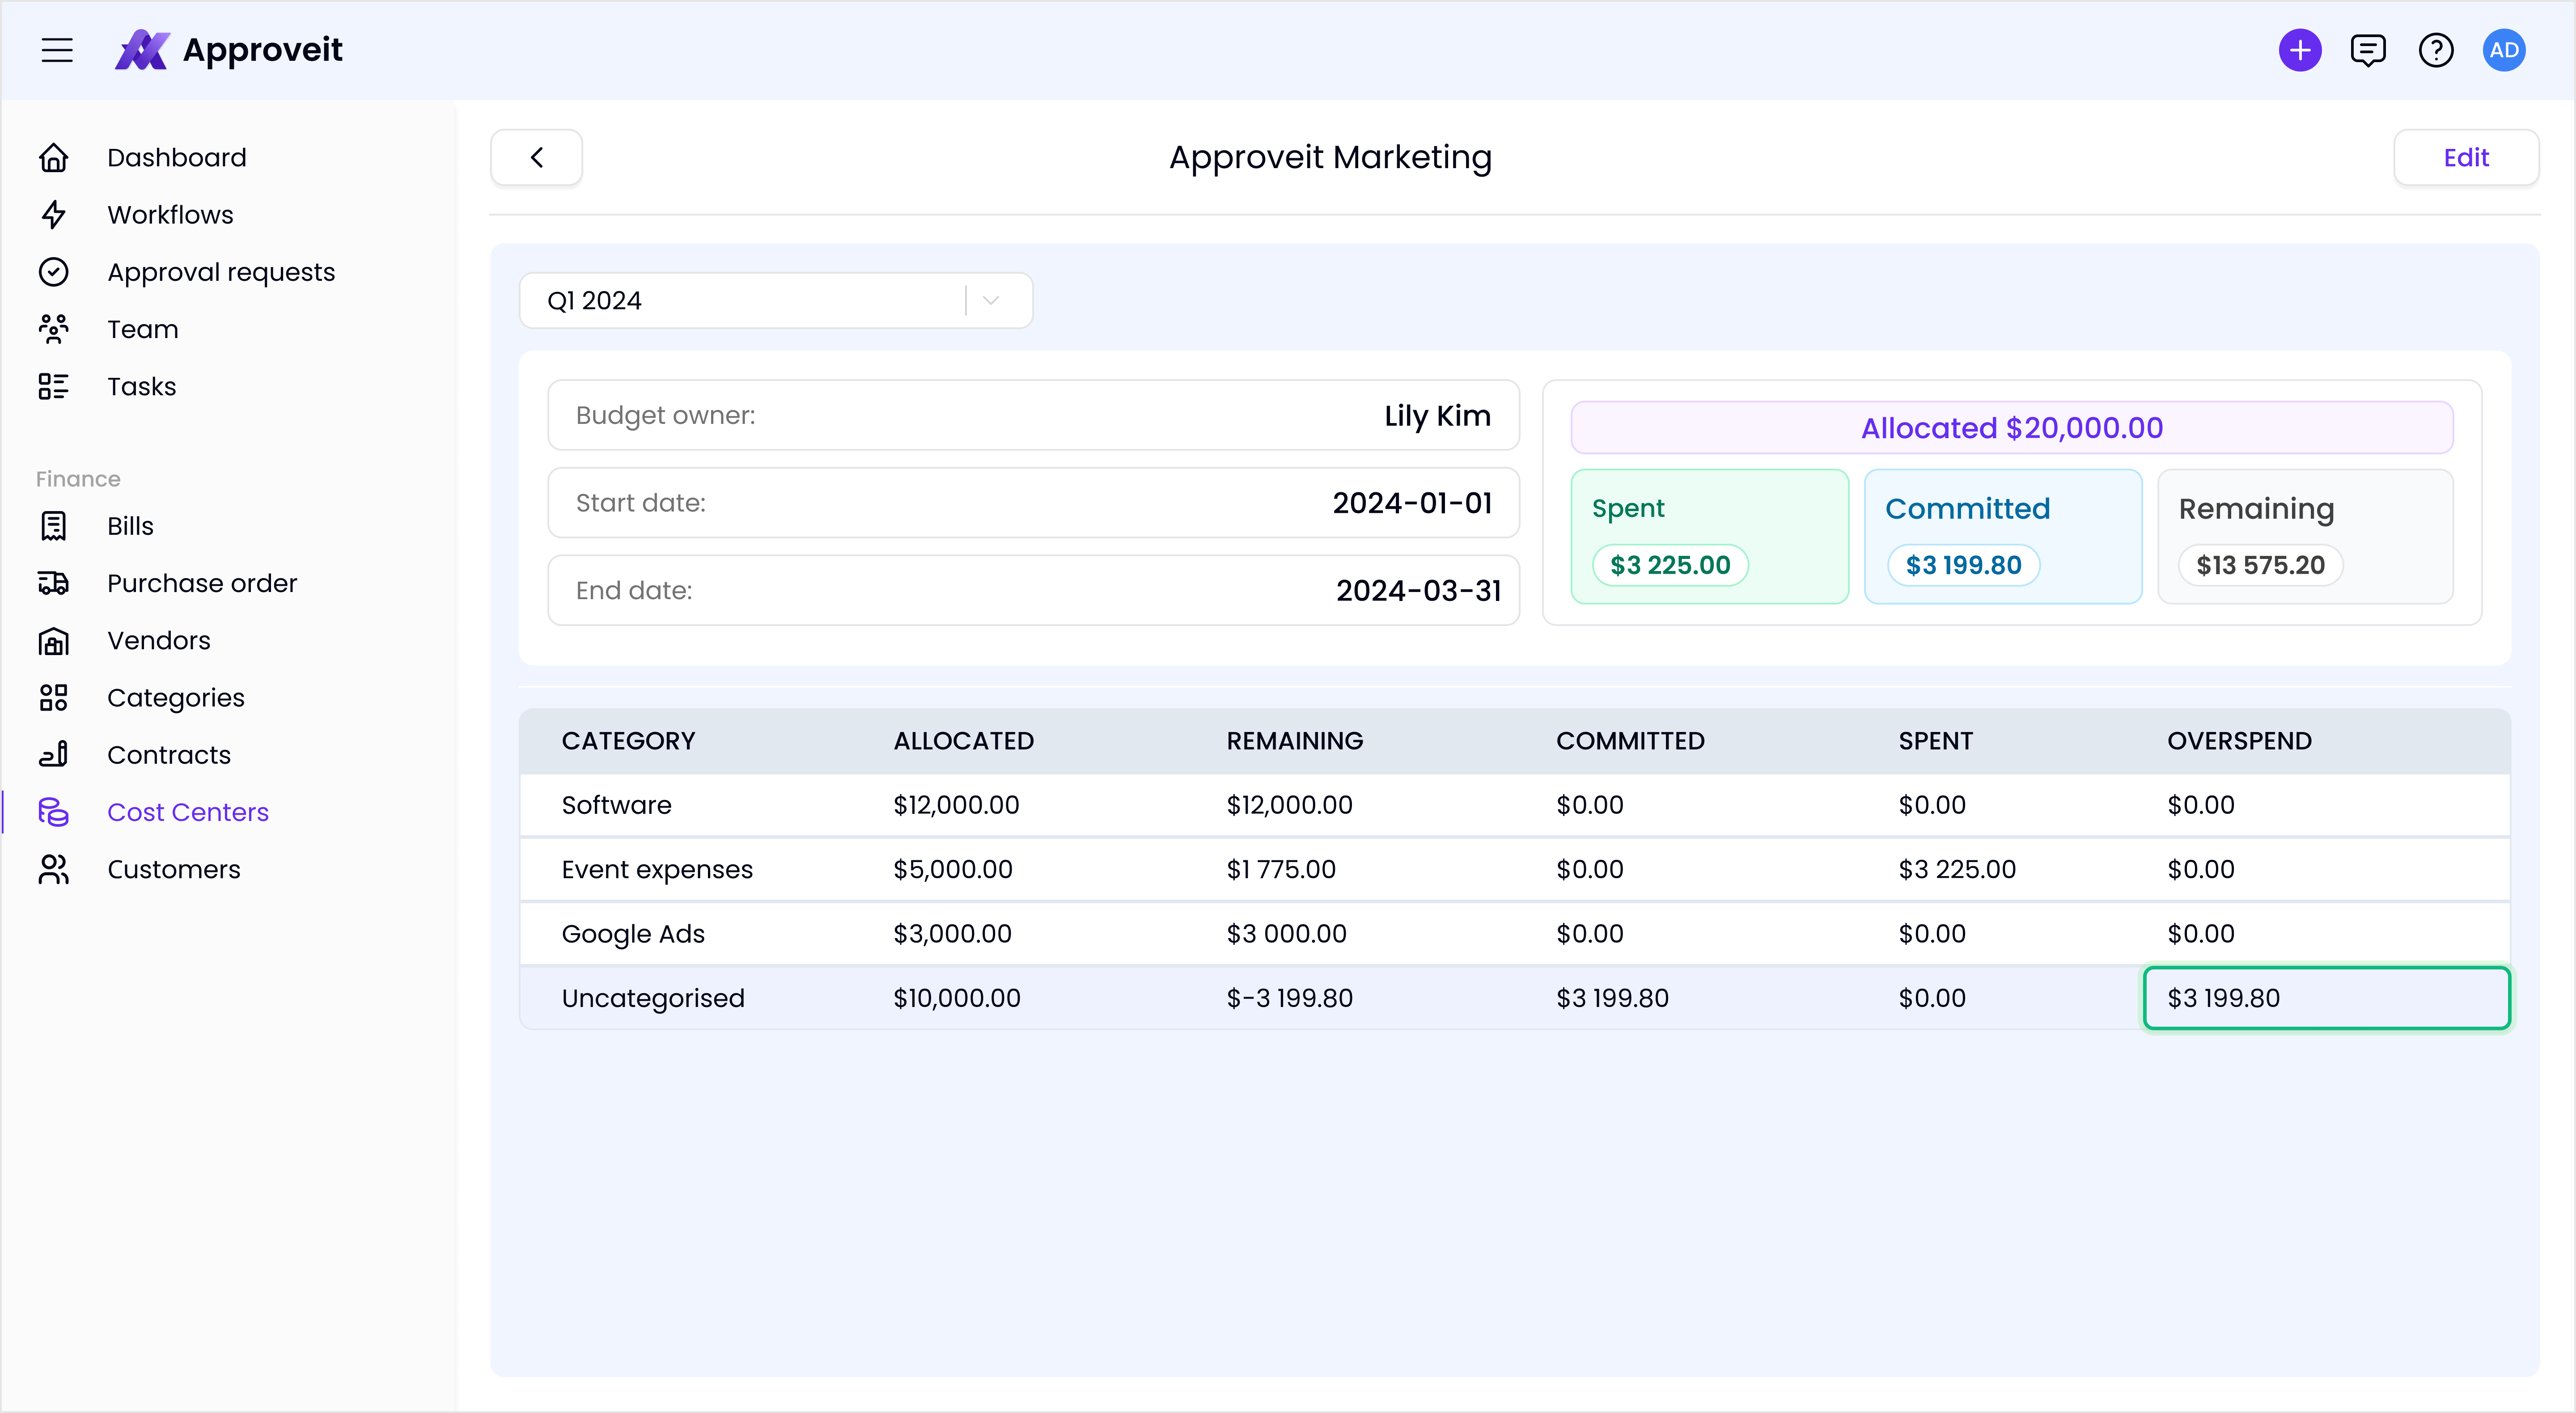
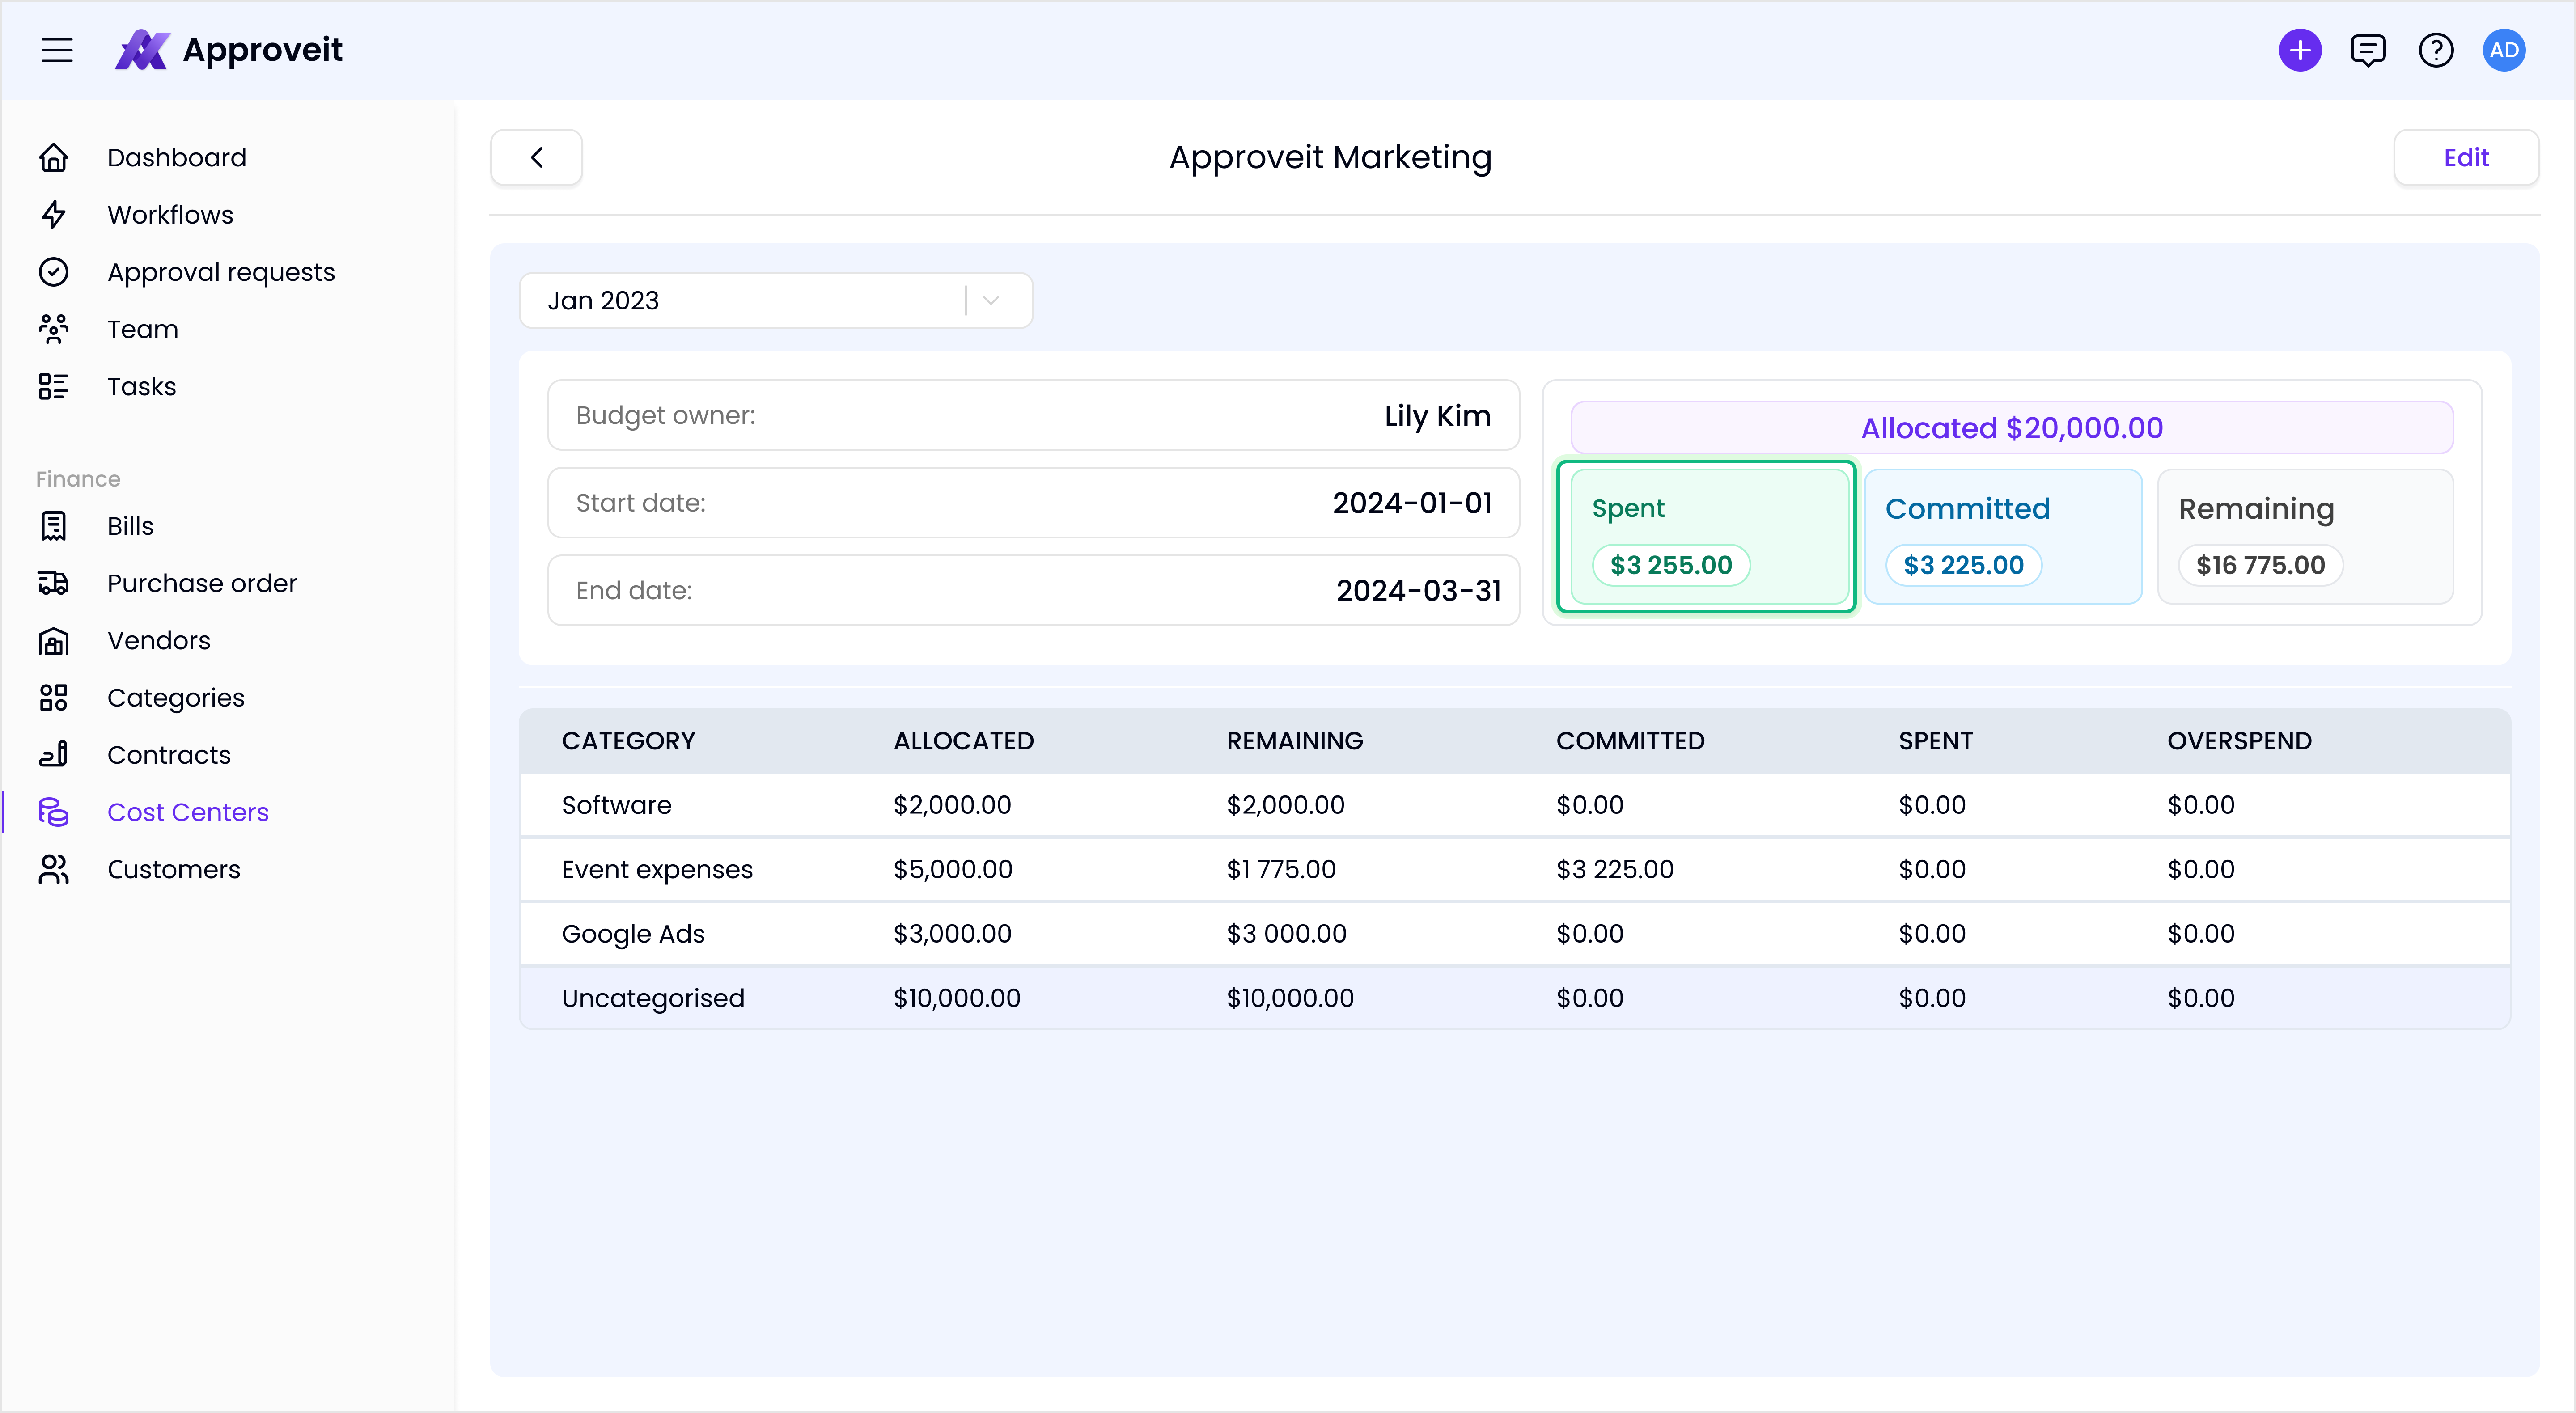
I have created a cost center named Approveit Marketing. All amounts are allocated per category, and it’s ready to go.
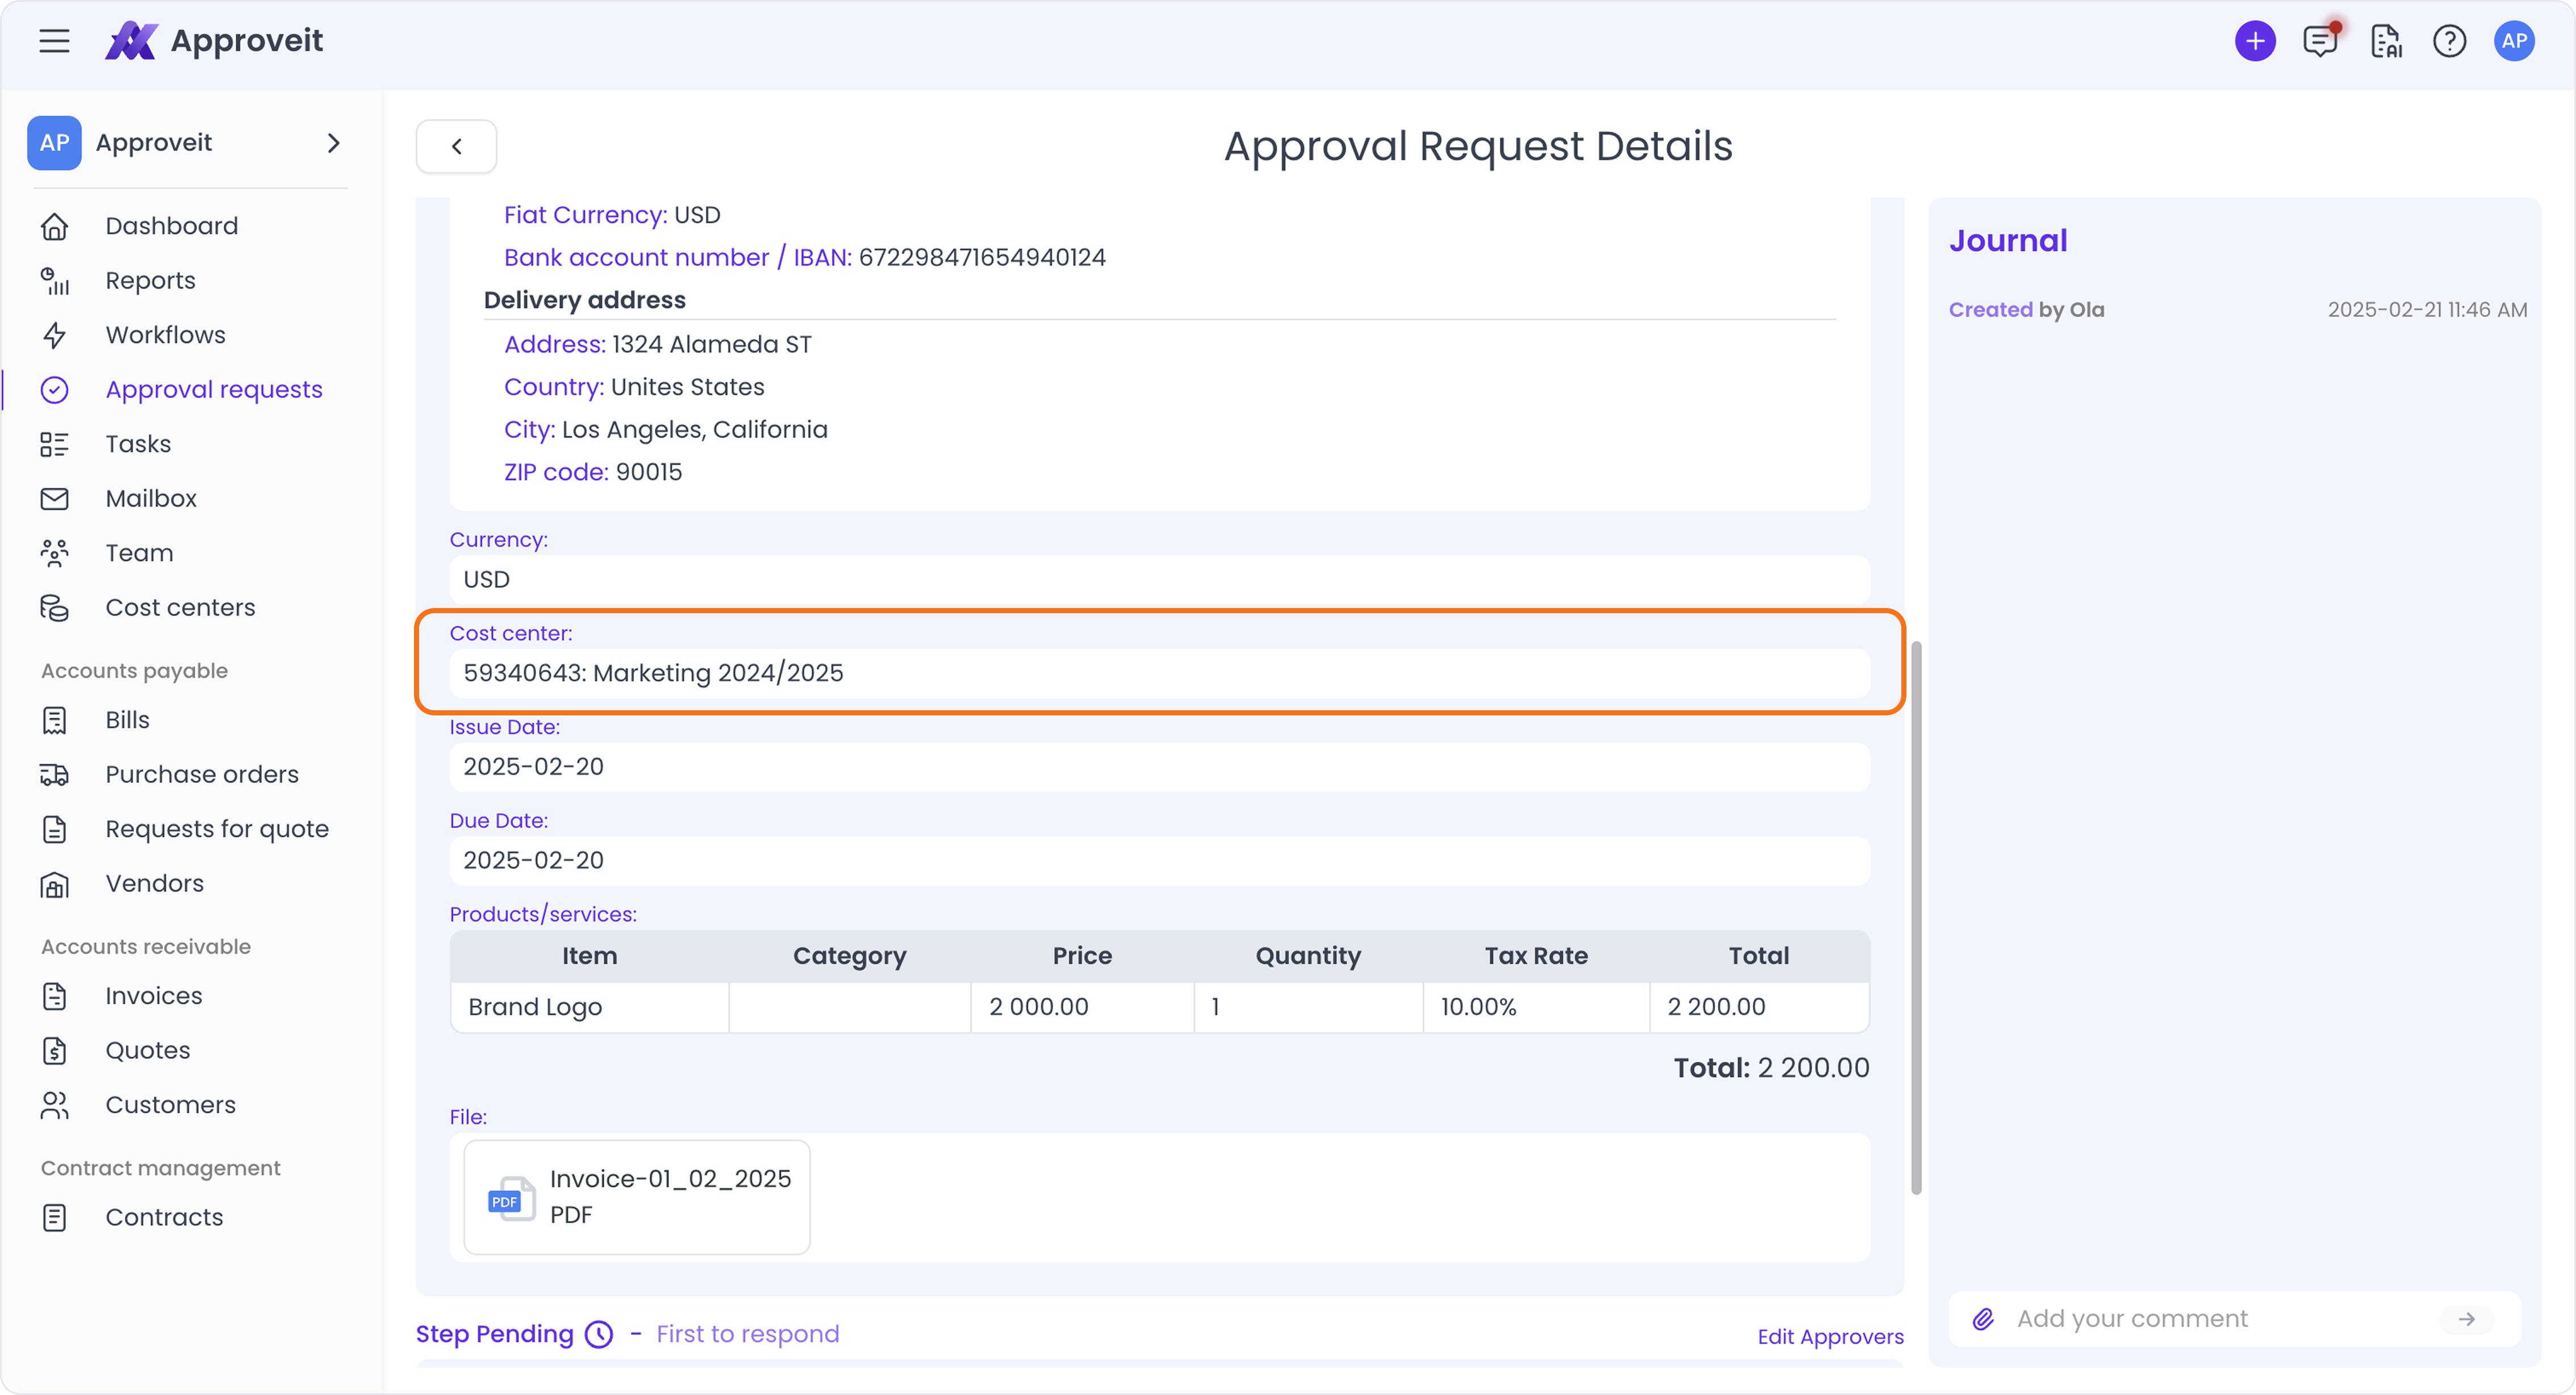
Now, I create a purchase order, and I specify Approveit Marketing cost center in it.
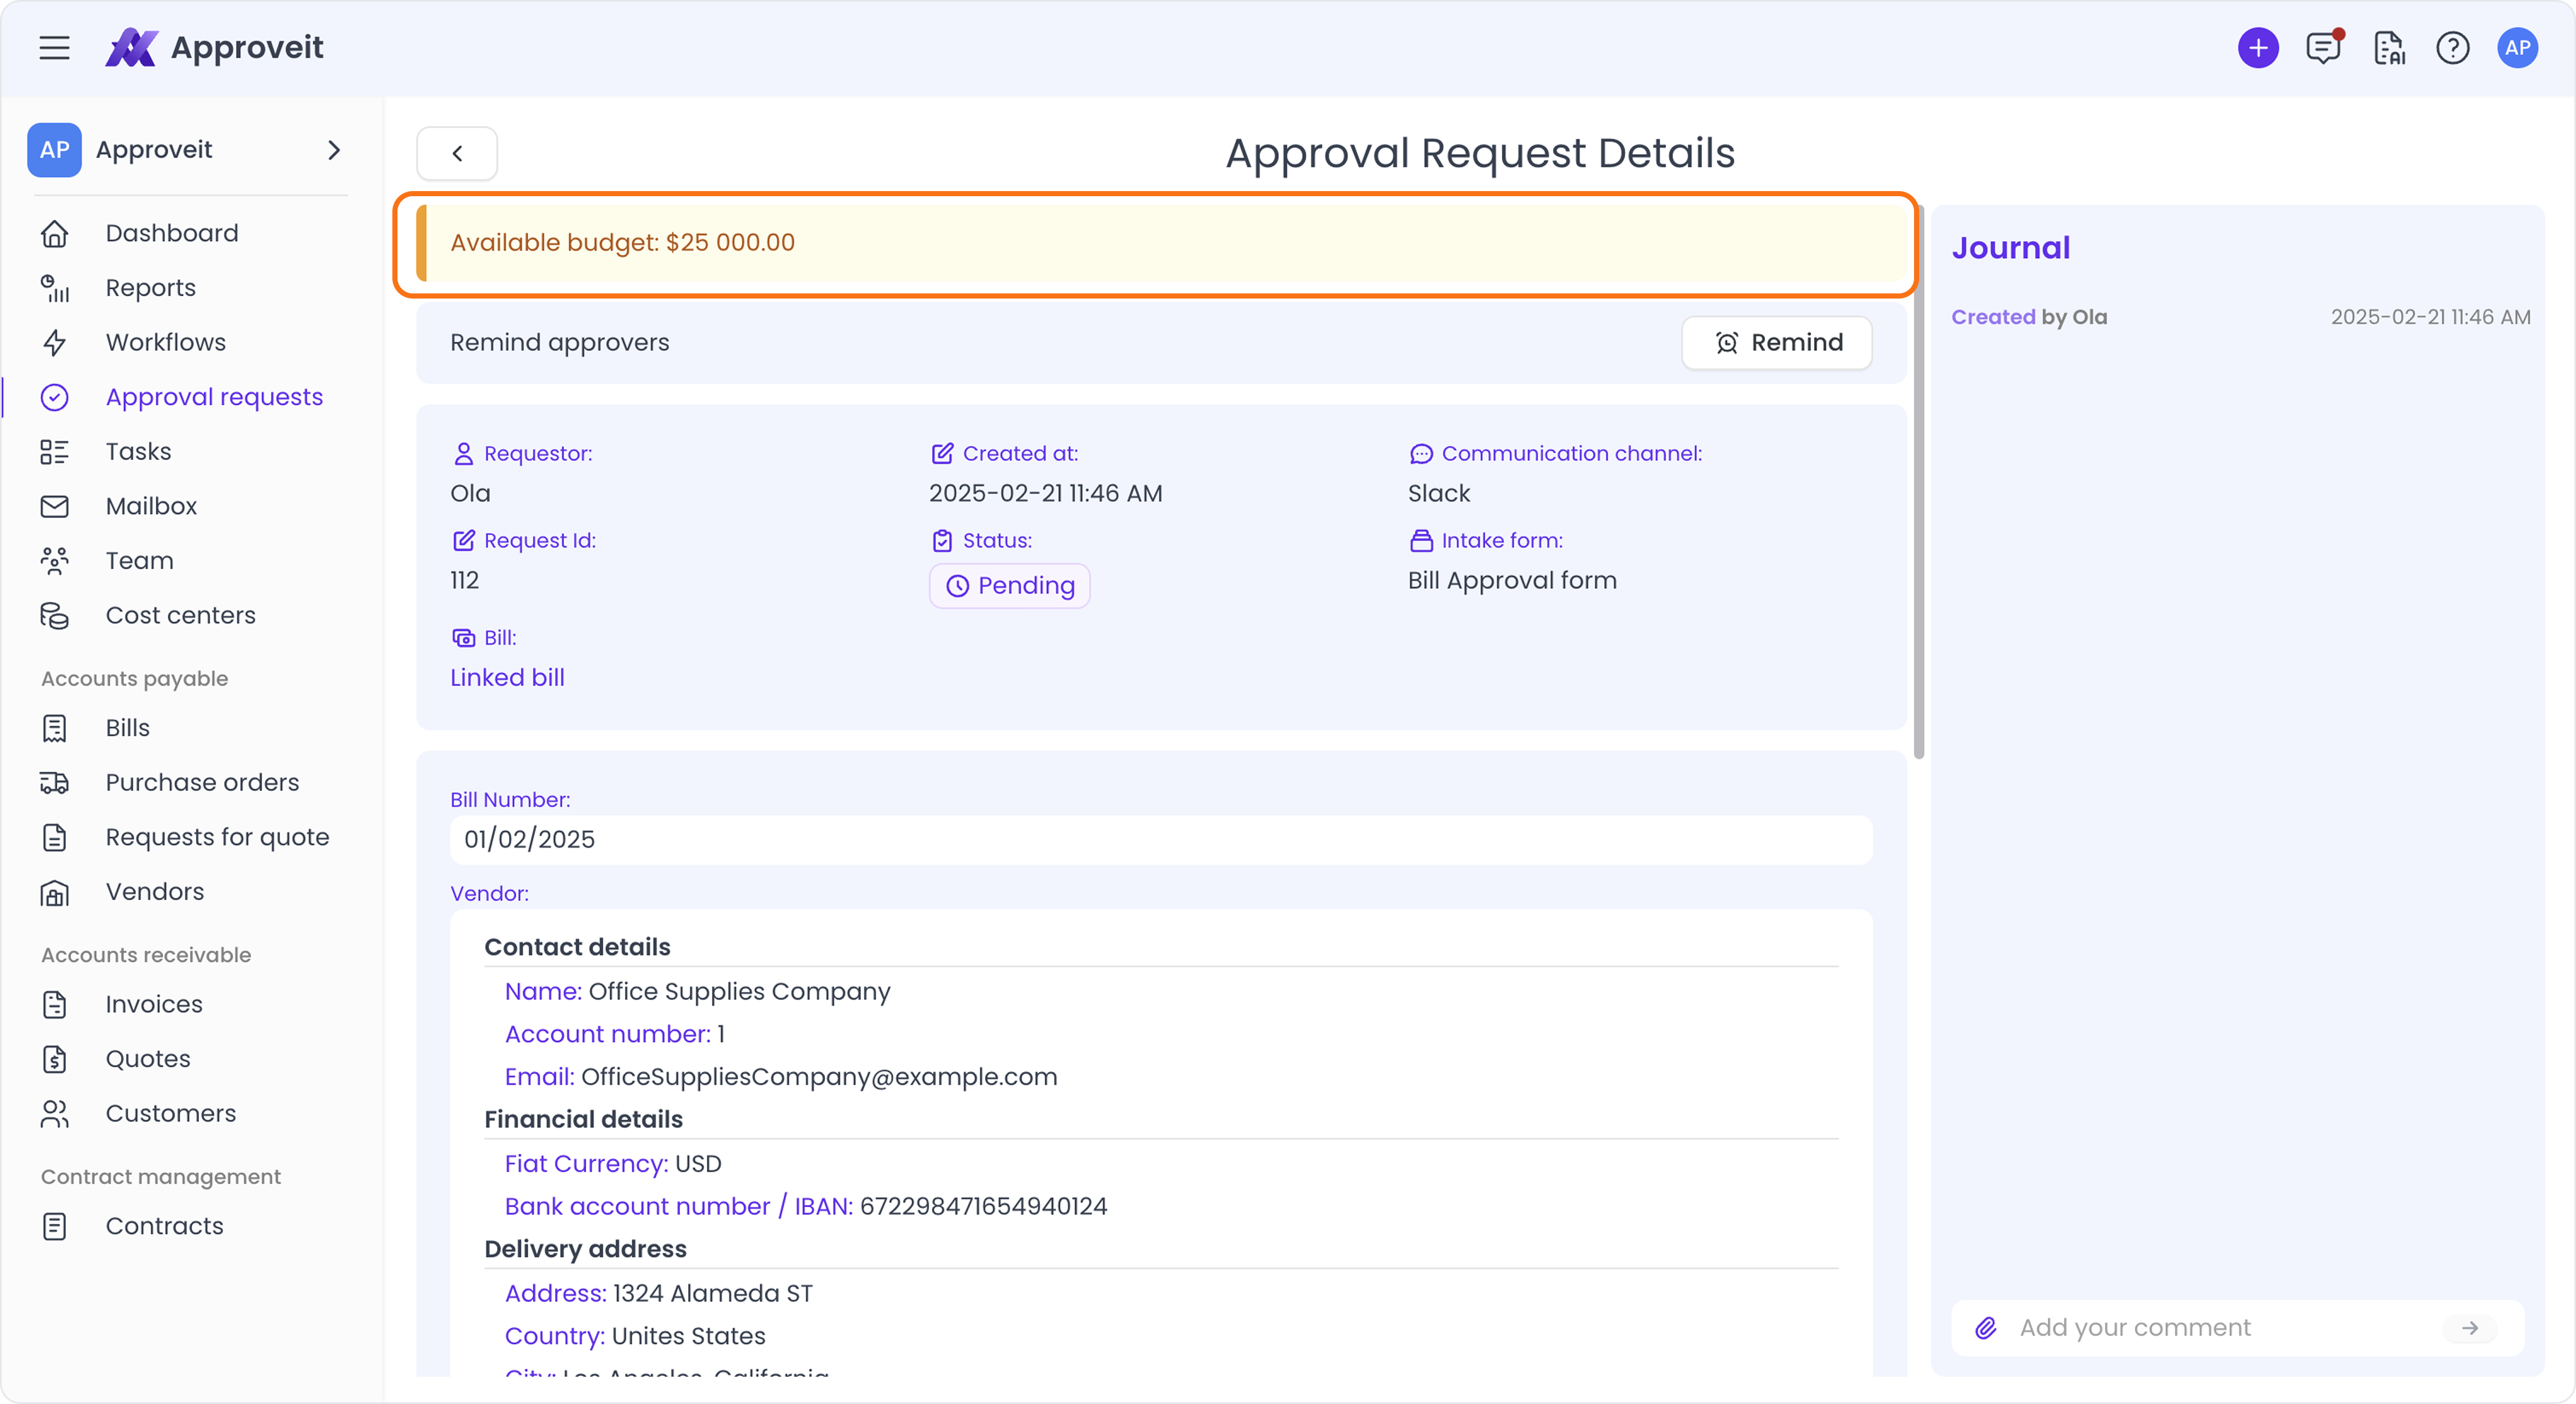
You’ll notice that I can also see available funds in this budget right in the approval request.
Once I create a Purchase Order approval request, the amount of this PO will be locked as “Committed” in my budget
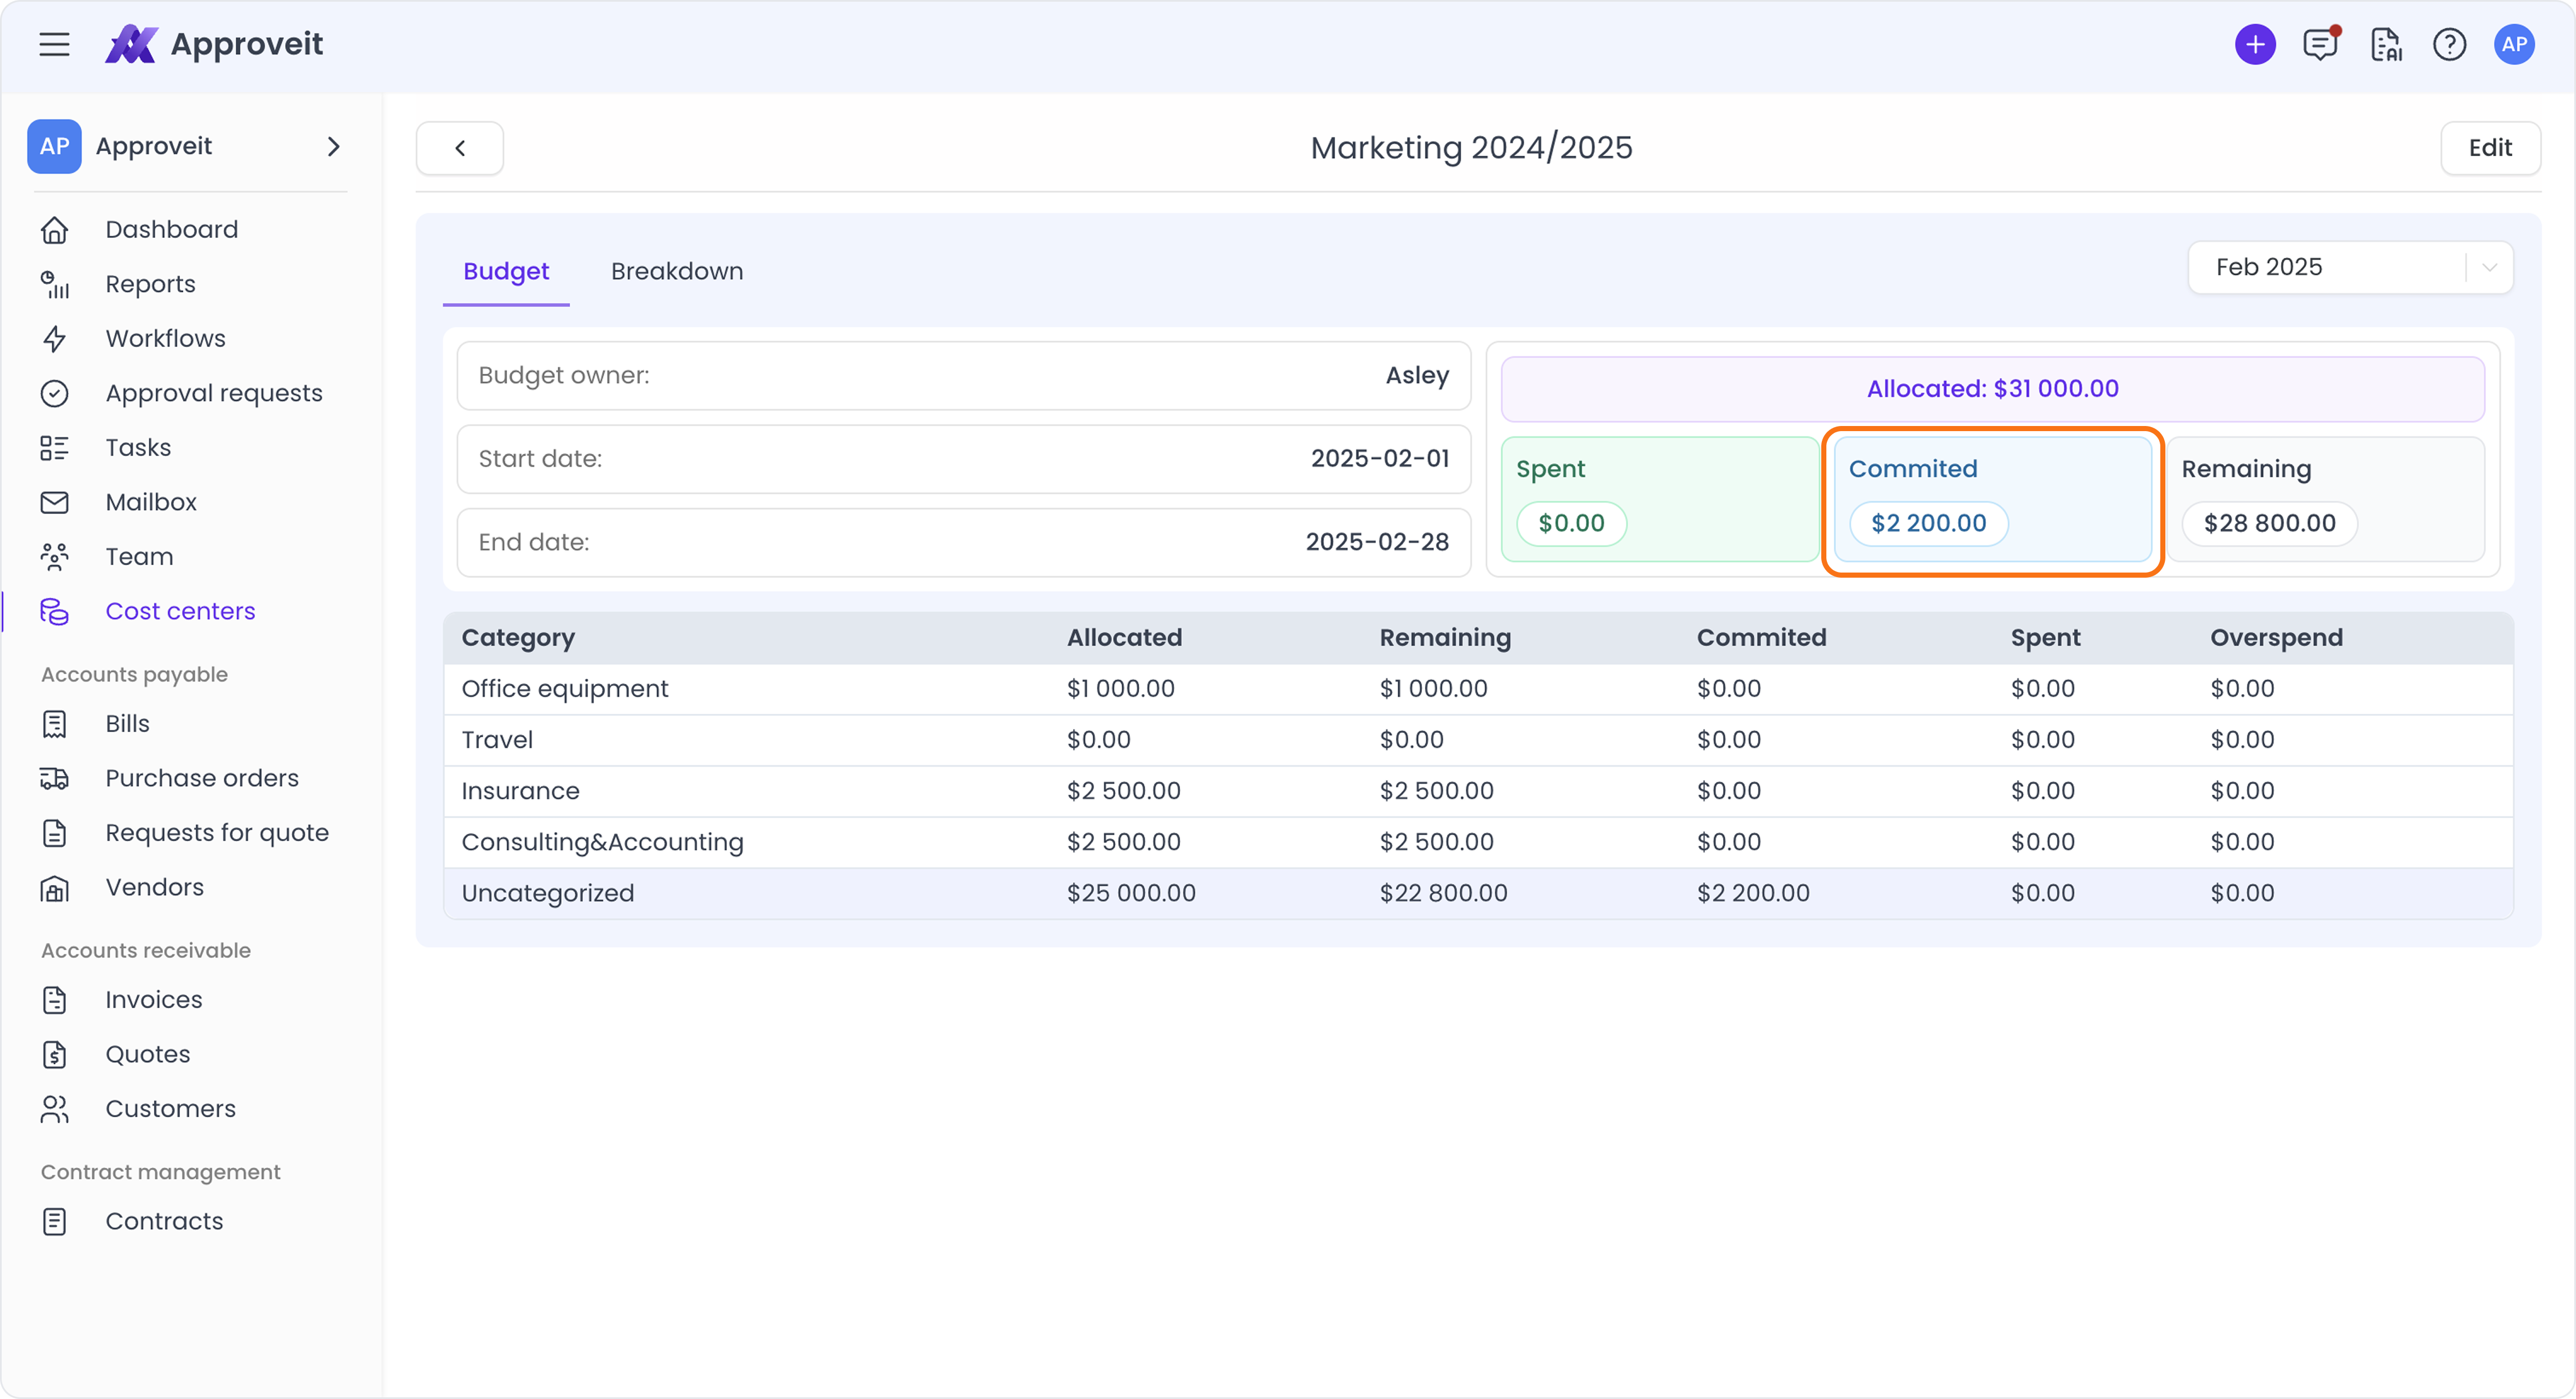
When the PO is approved, the amount of that PO will stay locked in the budget as “Committed”.
If the PO gets rejected, the amount will be unlocked and subtracted from the “Committed” sum.
Once I create a bill based on this PO and approve it, the amount will be transferred to the “Spent” bucket.
If you choose to not use POs and create bills straight up, it’ll look like this:
Upon creation of a bill approval request the amount of it will be locked in “Committed”, and upon approval of the request the amount will migrate to the “Spent” cell.
Note: If while creating a PO or Bill approval request you choose a category that wasn’t budgeted for in that cost center, the amount of the PO or bill will be subtracted from the Uncategorized amount.
If that budget does not have an Uncategorized amount (it equals zero), the PO/Bill amount will still be subtracted from the Uncategorized amount, will appear as a negative value, and will be marked as Overspend.