Approveit Guide: Task Management
Task management features
You can utilize Approveit for project management, creating and managing tasks (tickets) right from Slack or Microsoft Teams.
Approveit provides:
- Manual and automatic task creation
- Separate task boards for different projects or departments
- Deadlines and priority levels
- Task descriptions and attachments
- Comments for better collaboration
- Automatic reminders of pending tasks approaching deadlines
- To-do lists
- Task management in Slack and Microsoft Teams
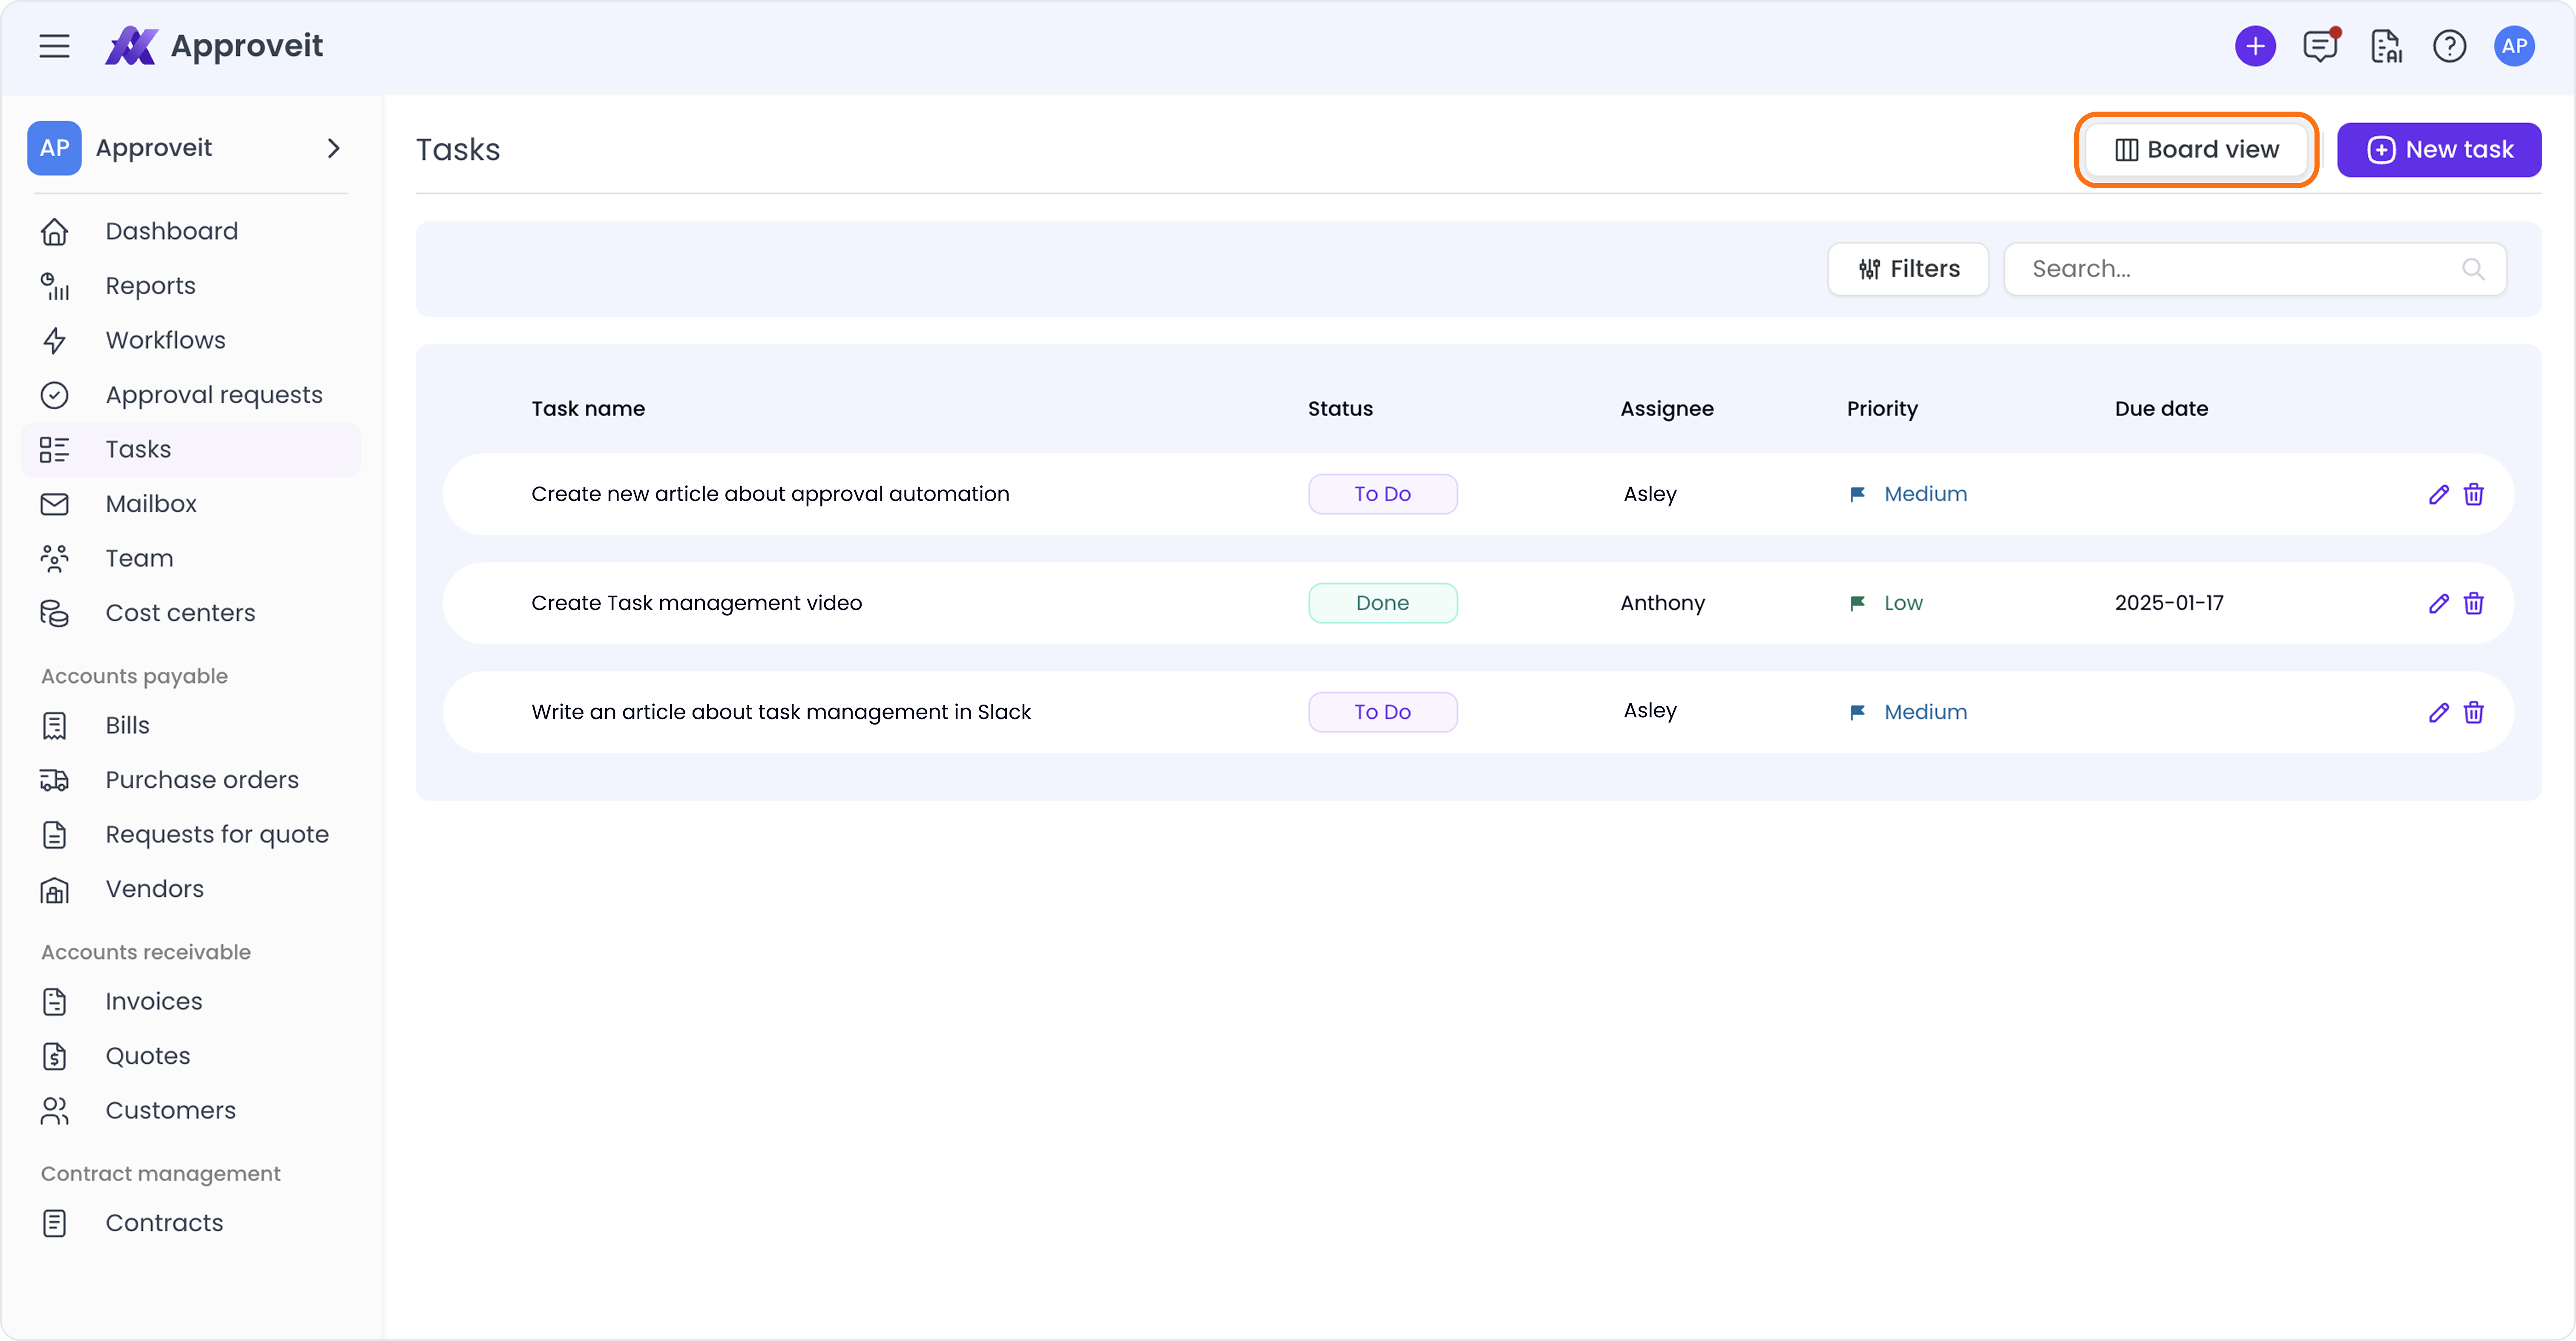
Tasks tab
To access your tasks, go to the Tasks tab on the left-hand menu. By default, you’ll see all the tasks your team has created in the list view. From here, you can review all tasks and their statuses and filter through tasks to find ones you want to review, edit, or remove tasks.
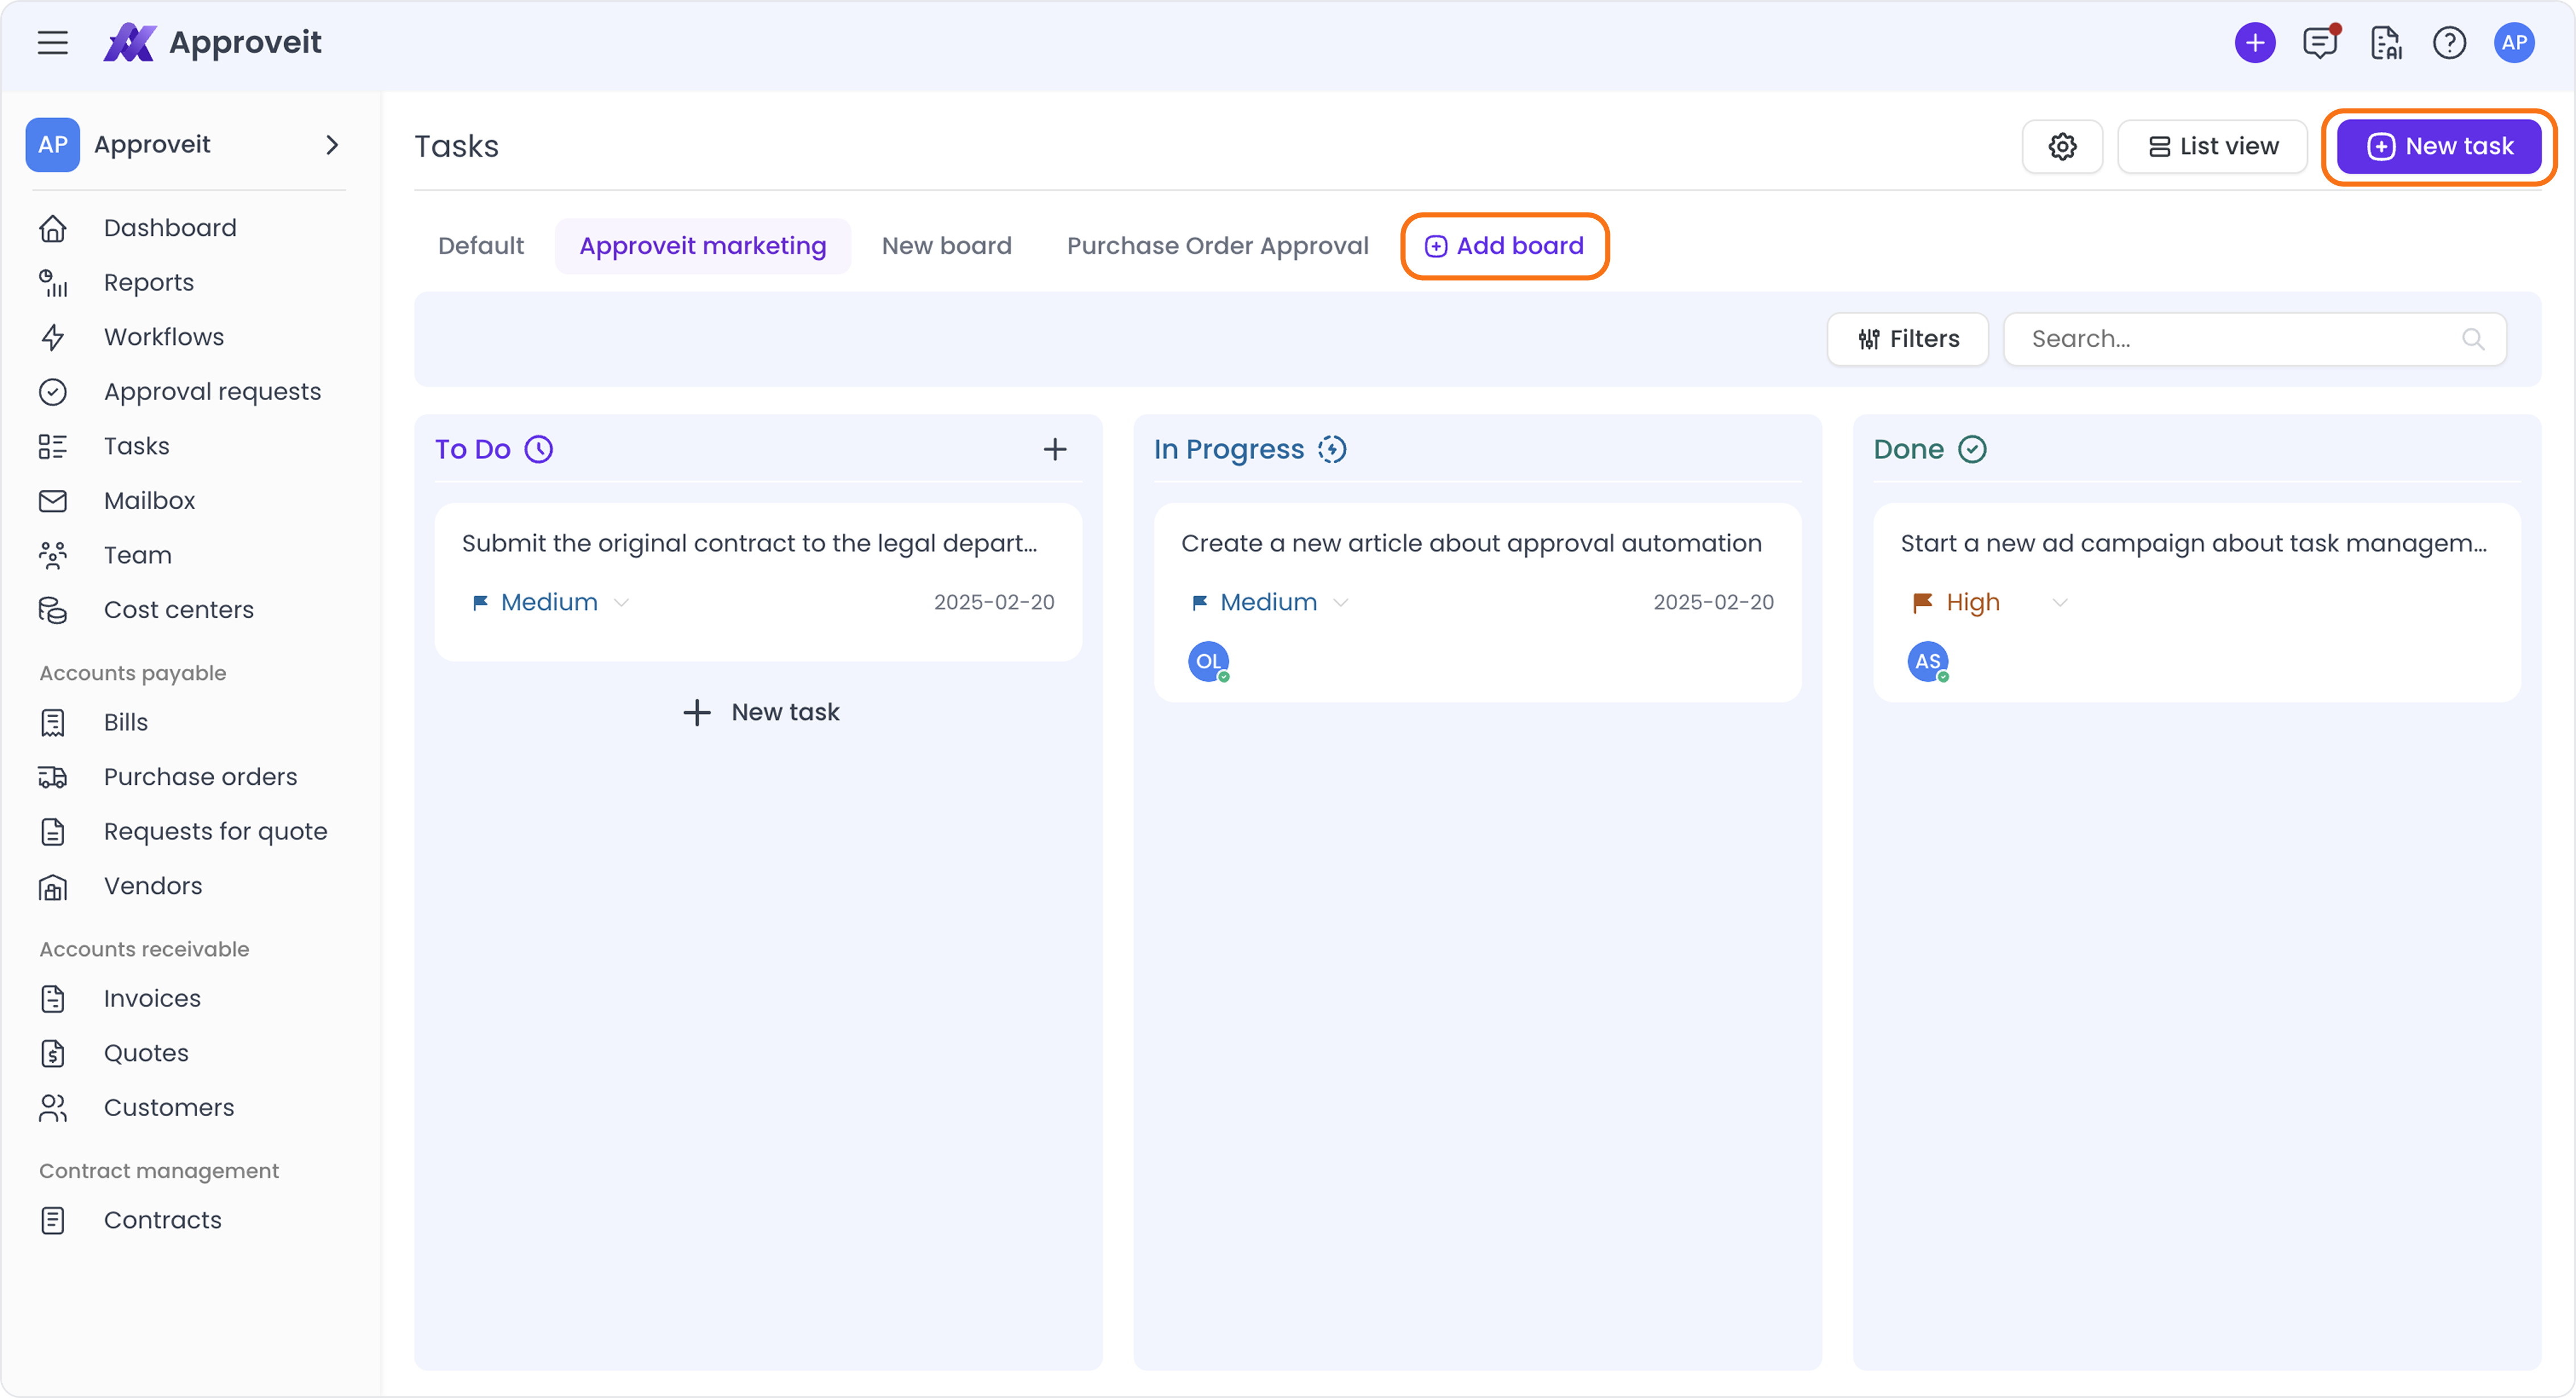
To switch to the board view, use the “Board View” button on the top right.
In the board view, you can create new boards and drag & drop tasks from column to column to change their statuses.
To create a new task board, press “Add Board” next to your task board name.
To create a new task, press the “New Task” button in the top right corner of your screen.
Creating tasks
When creating a new task, you’ll be asked to add
- task name
- description
- due date
- priority
- assignee
- board
- file attachments (if applicable)
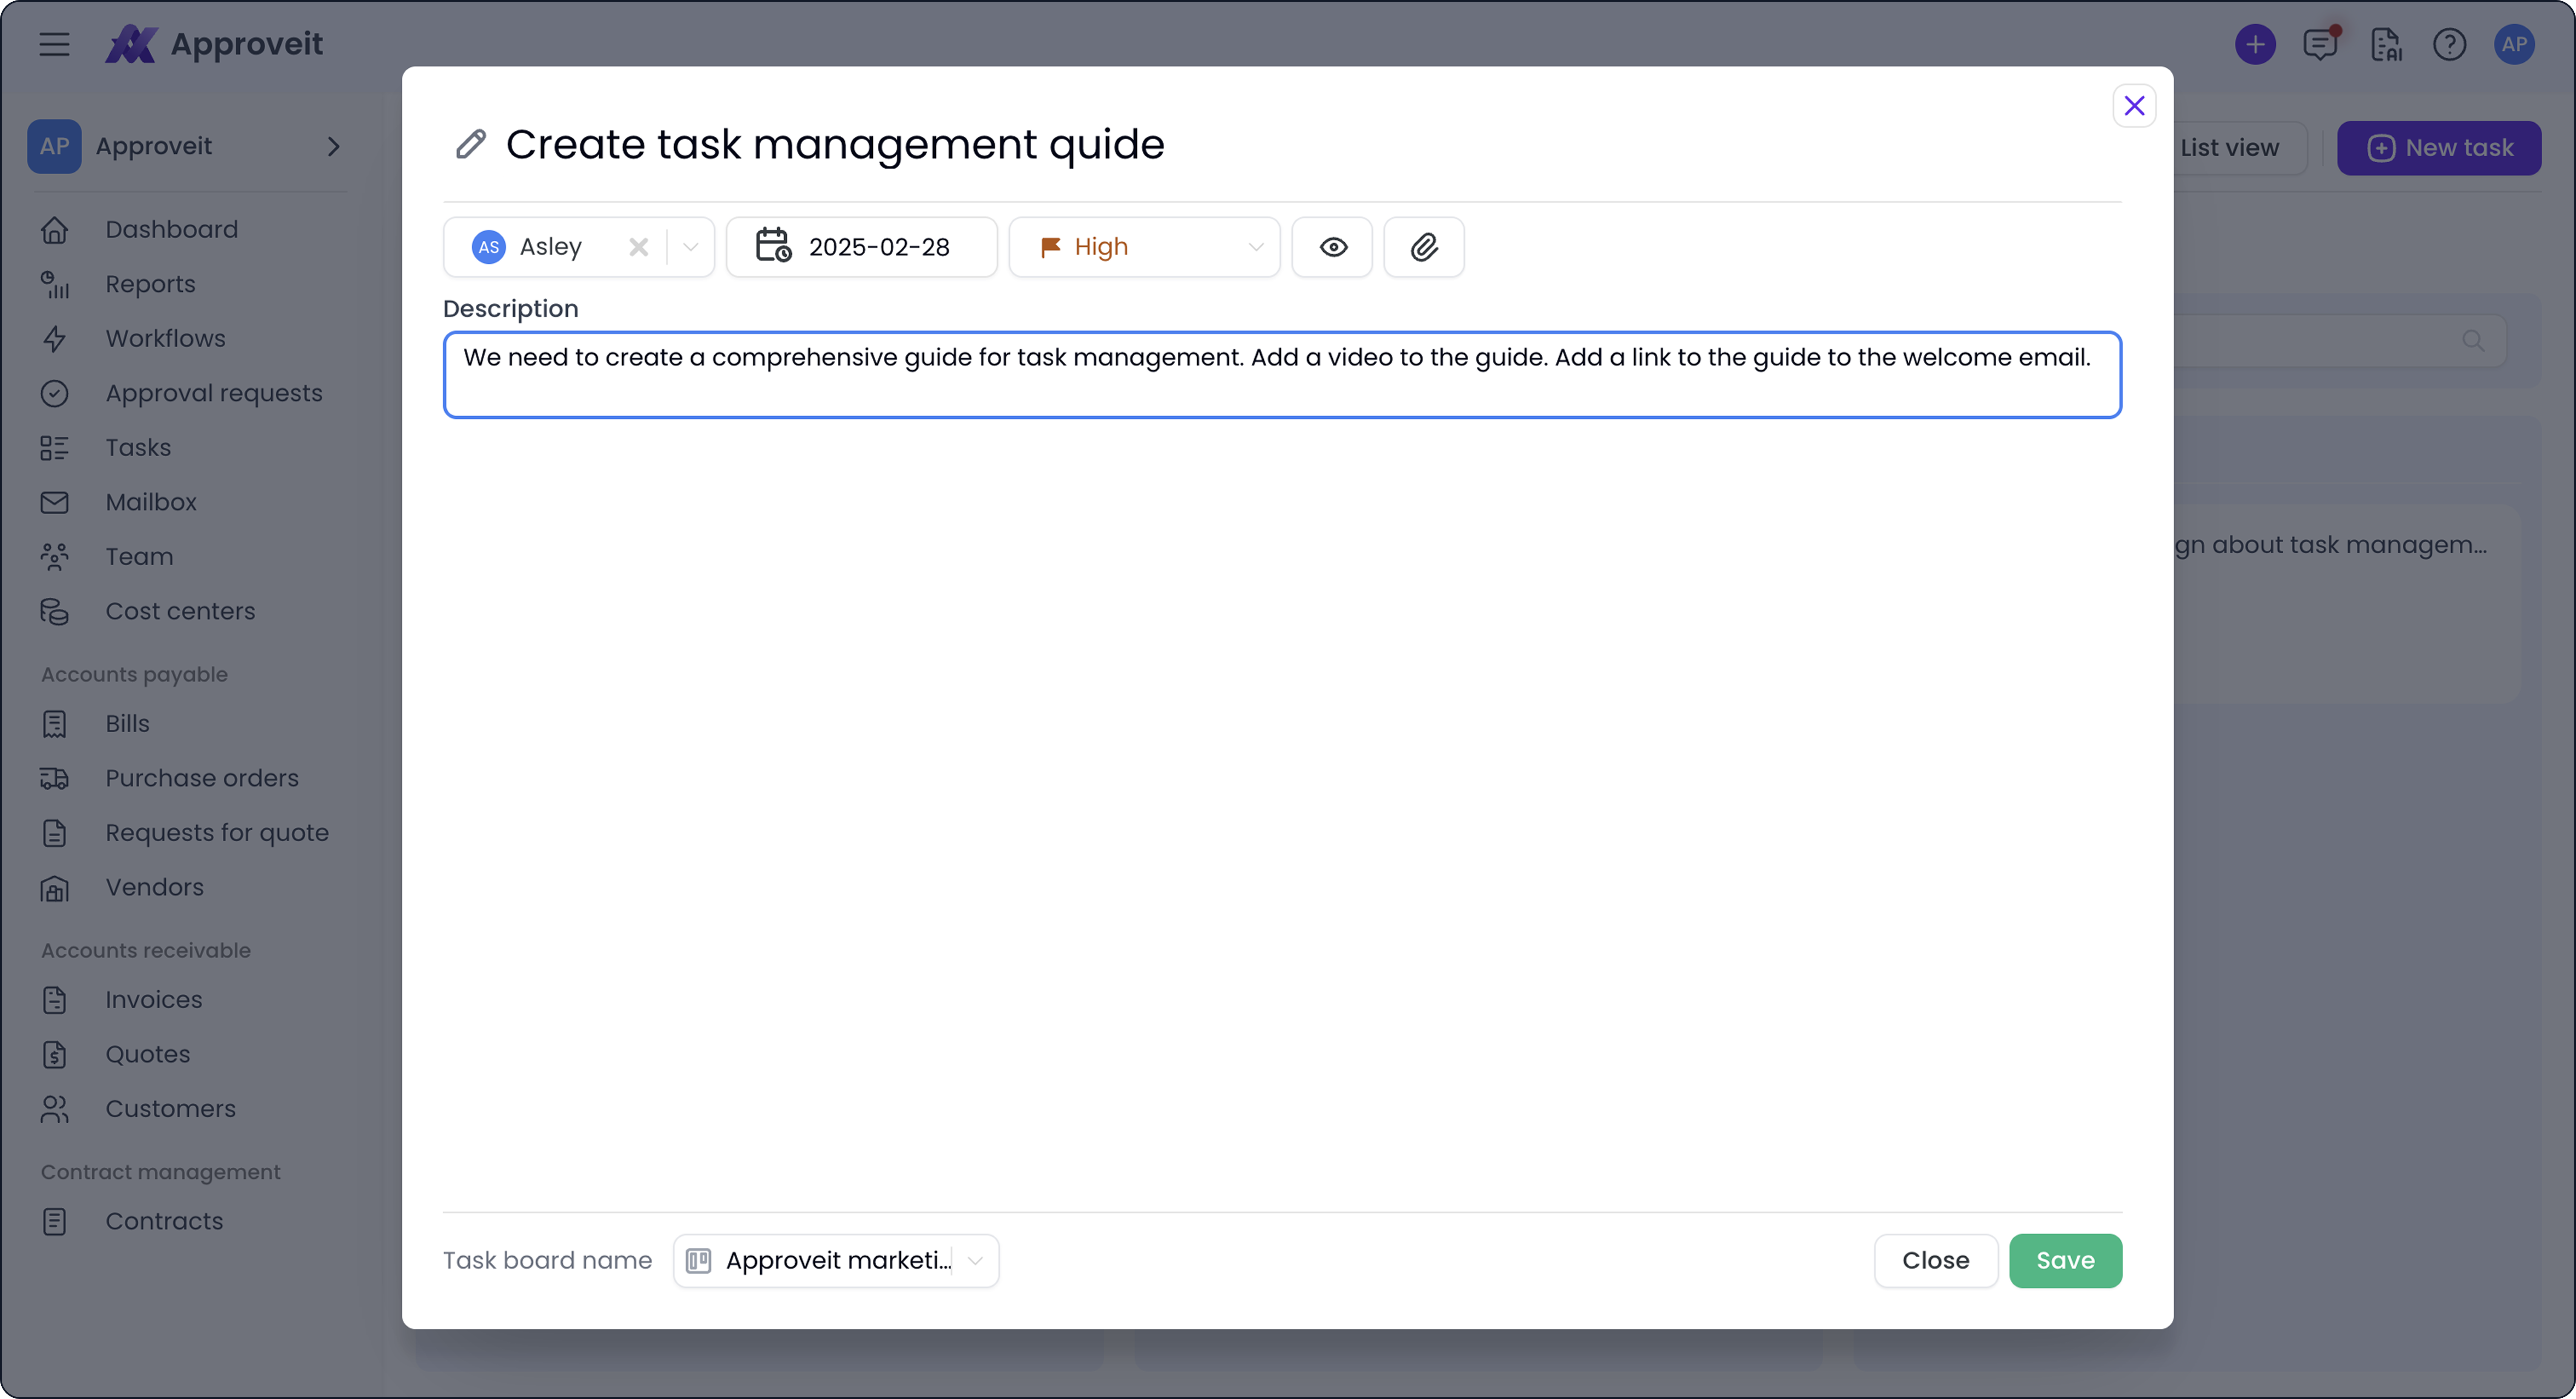
If you select a board for your task, it will appear there.
You can edit tasks that are in “To Do” status and change the board where they are displayed.
Tasks in statuses “Done” and “In Progress” cannot moved to a different board.
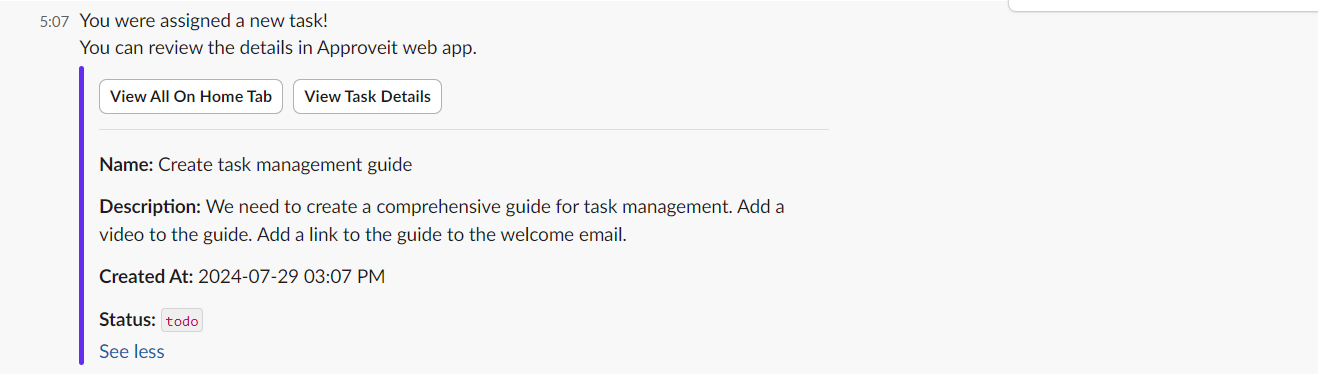
Assignees receive a notification about new tasks via your team’s communication channel (can be found in Settings). Task details can be viewed right in Slack or Microsoft Teams, if one of them serves as your default communication channel.
The notification in Slack looks like this:
Automatically assigned tasks
With Approveit, you don’t have to create repetitive tasks manually if they are a regular part of an existing process.
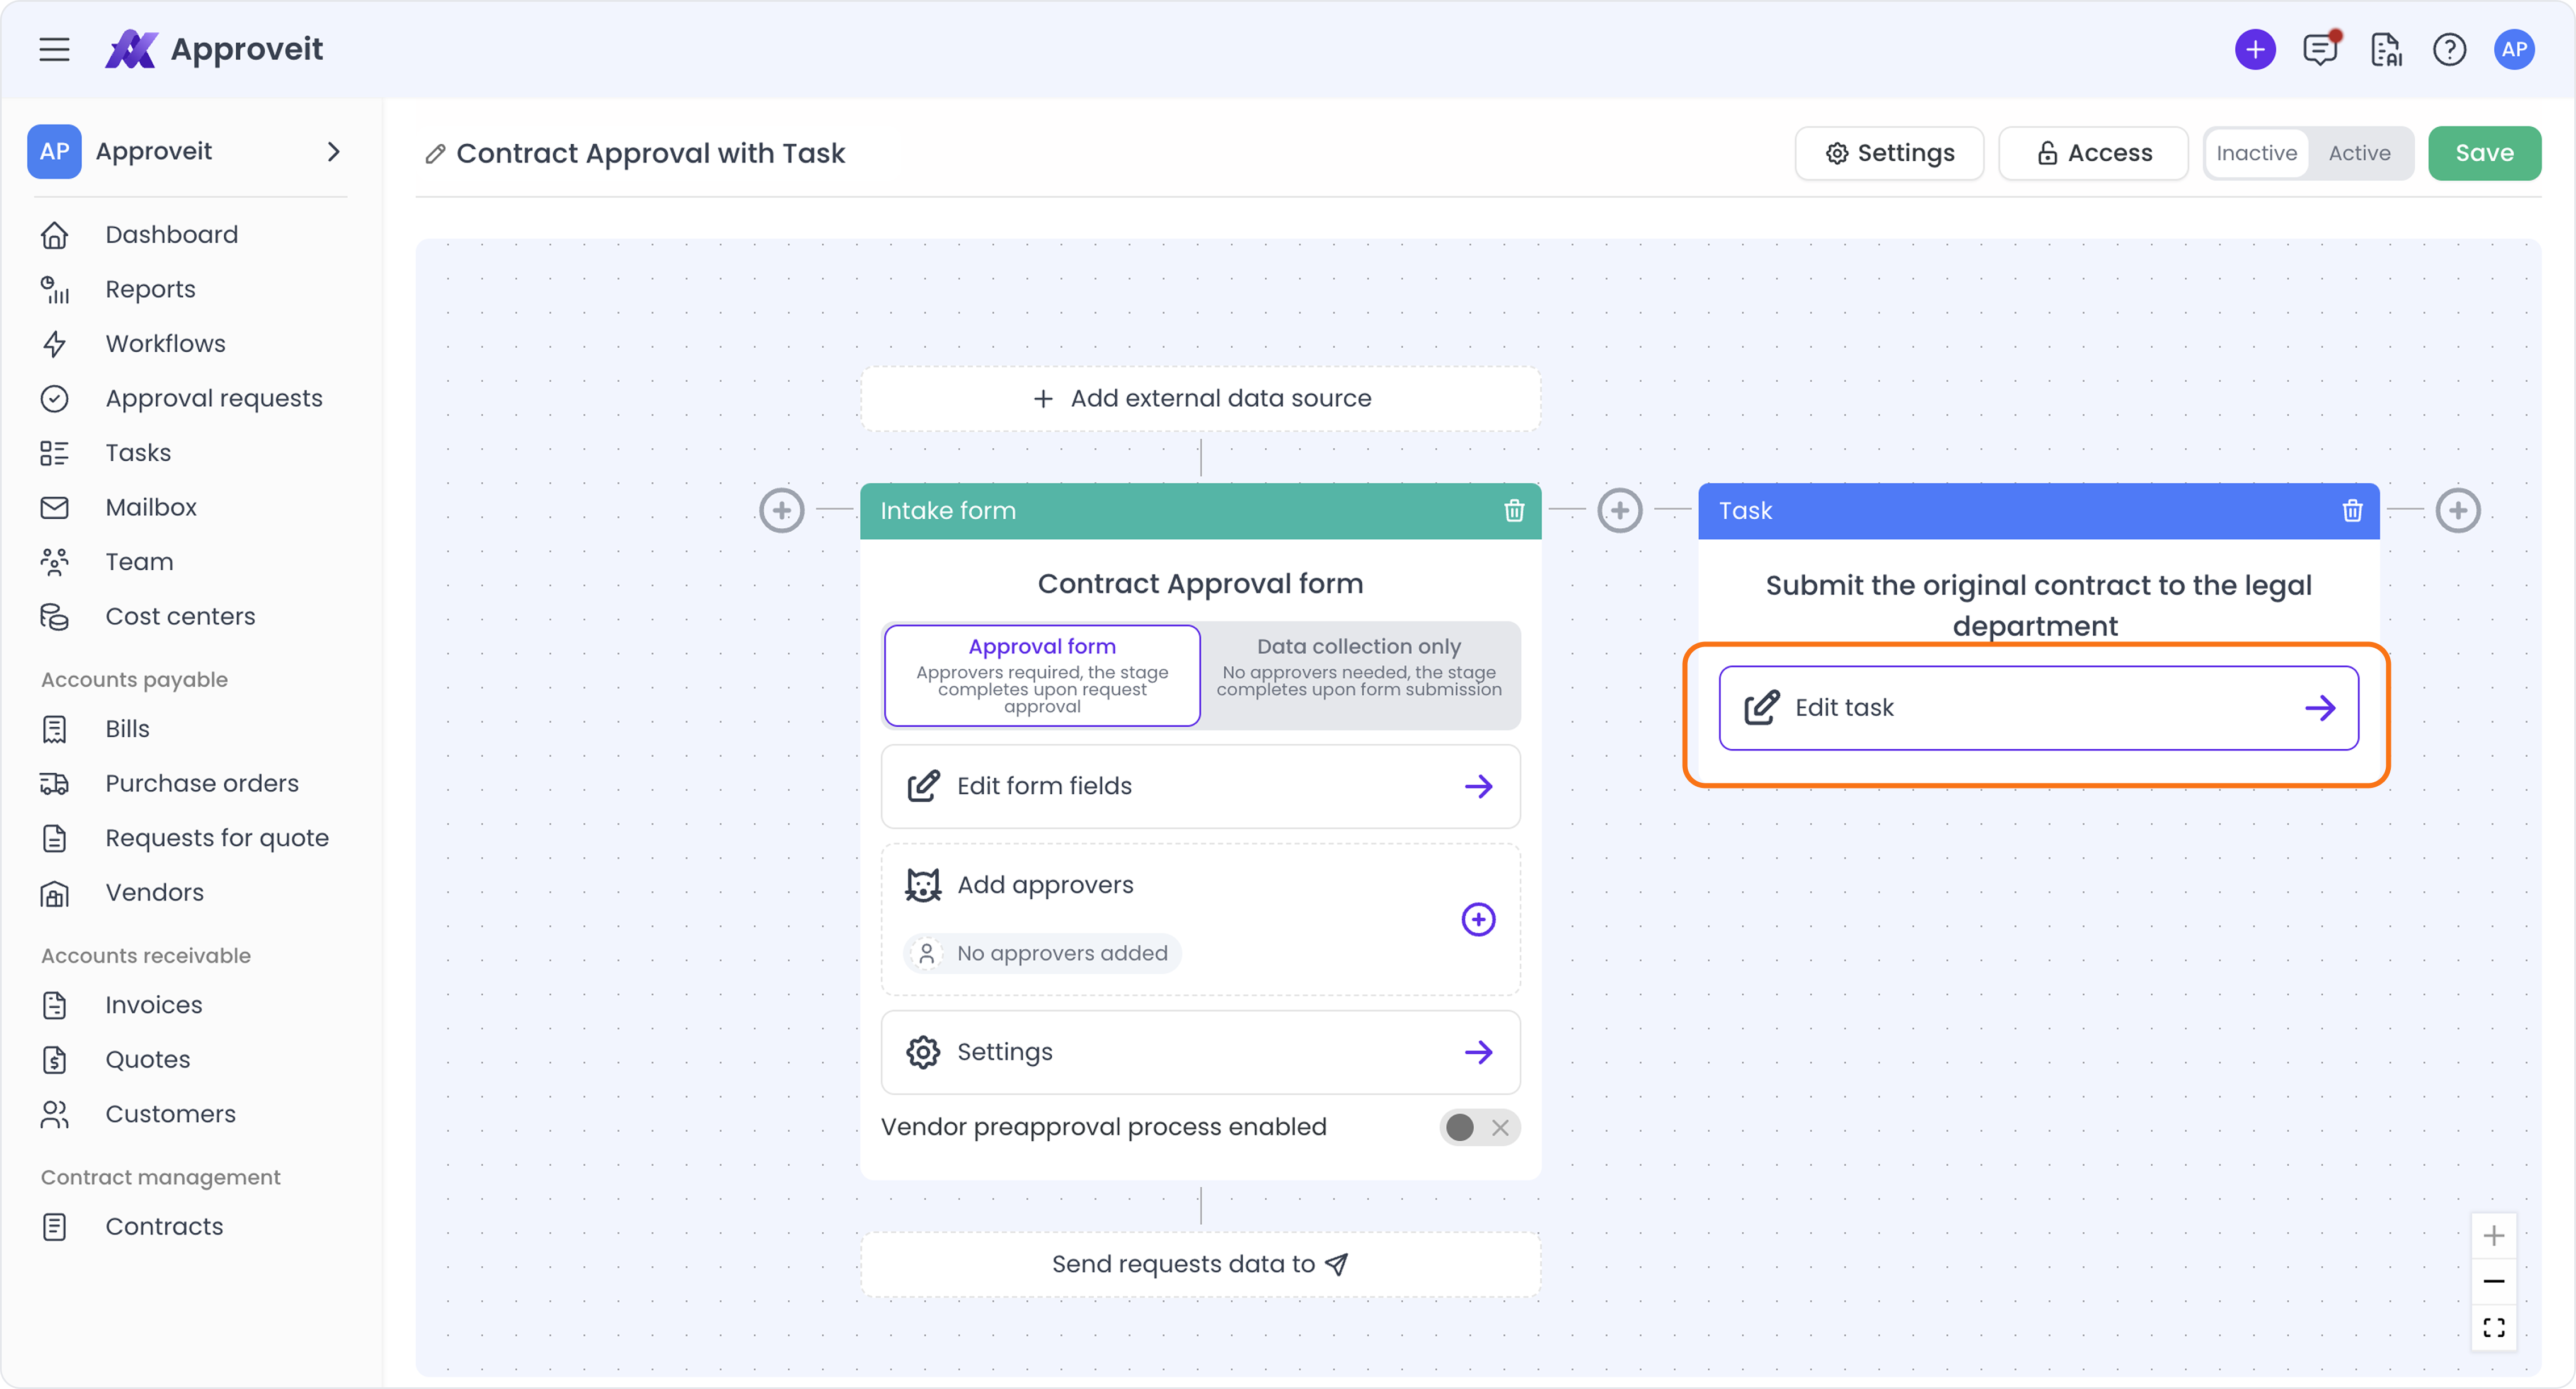
Tasks can be created and assigned automatically as parts of workflows. To add a task creation stage to your workflow, go into your workflow settings and add a task stage with a “+” icon under the existing stage.
In the workflow you see in the screenshot below, the process looks like this:
Submit contract details for approval → approve contract details → create a task to submit the contract to legal department -> complete submission.
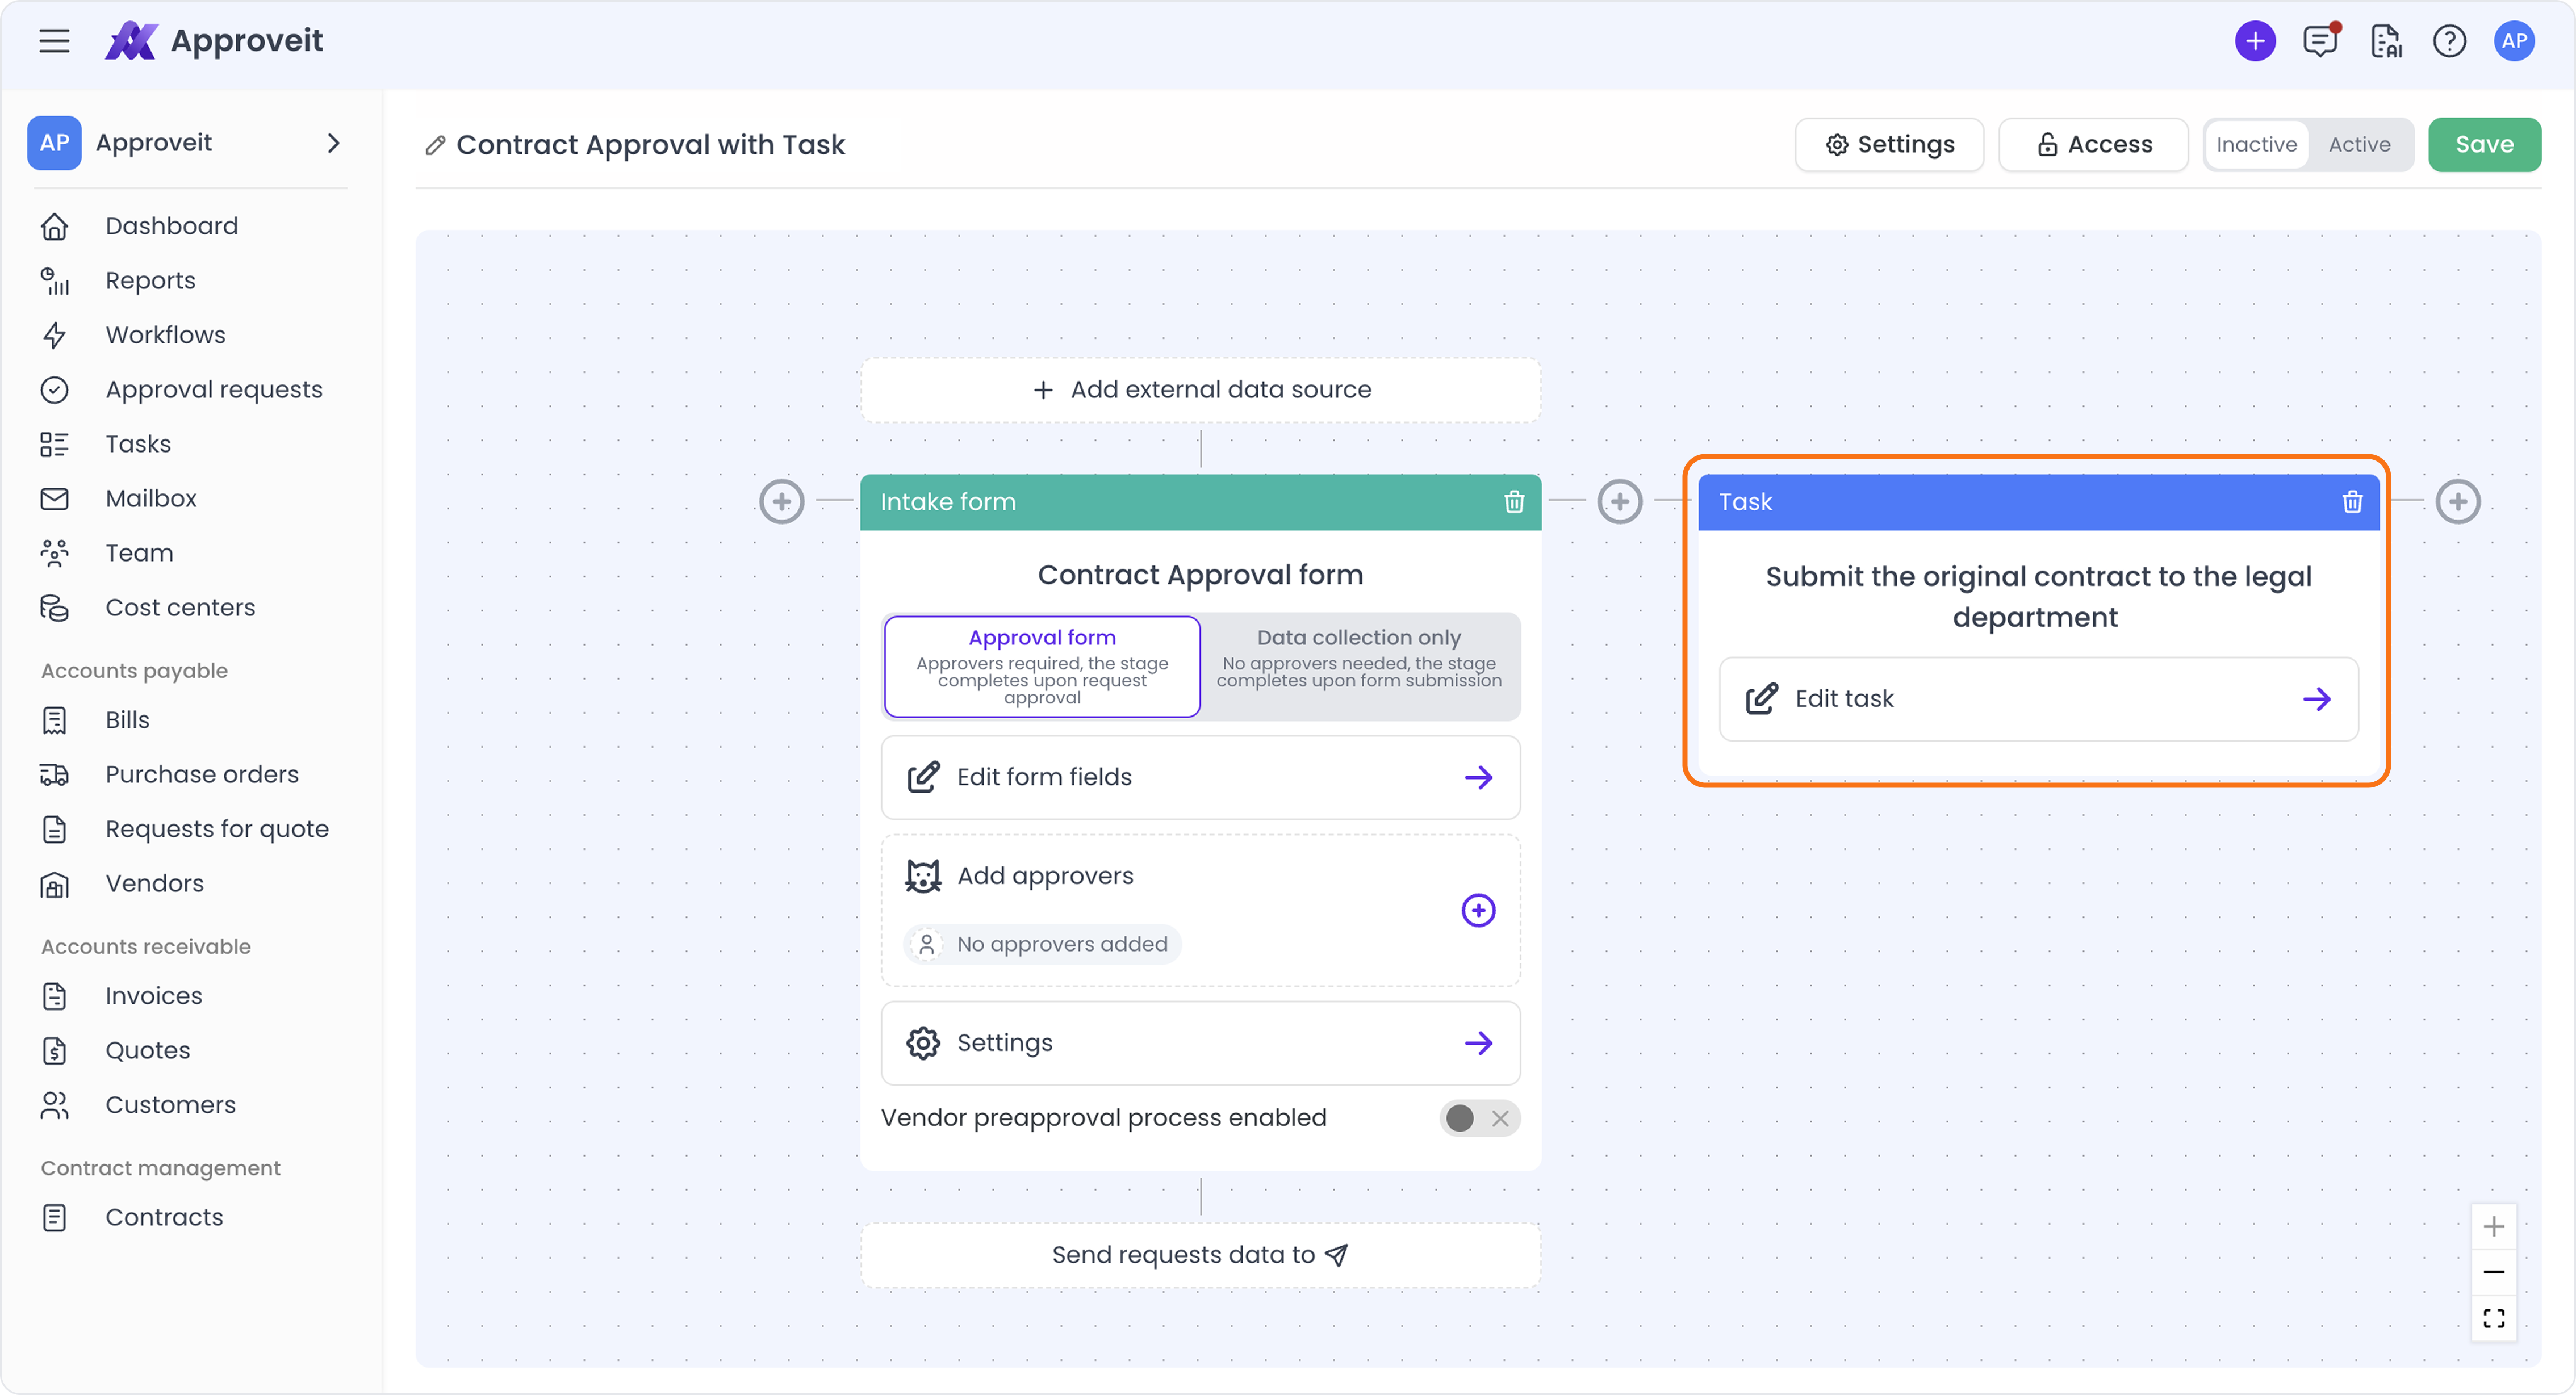
Tasks created automatically have pre-configured properties you set up while creating your workflow. They include task name and description, assignees, and task board. All automatically created tasks are assigned Medium priority by default.
If you choose to leave the Board dropdown blank, the tasks created by this workflow will land on the automatically created board with a name identical to the workflow name.
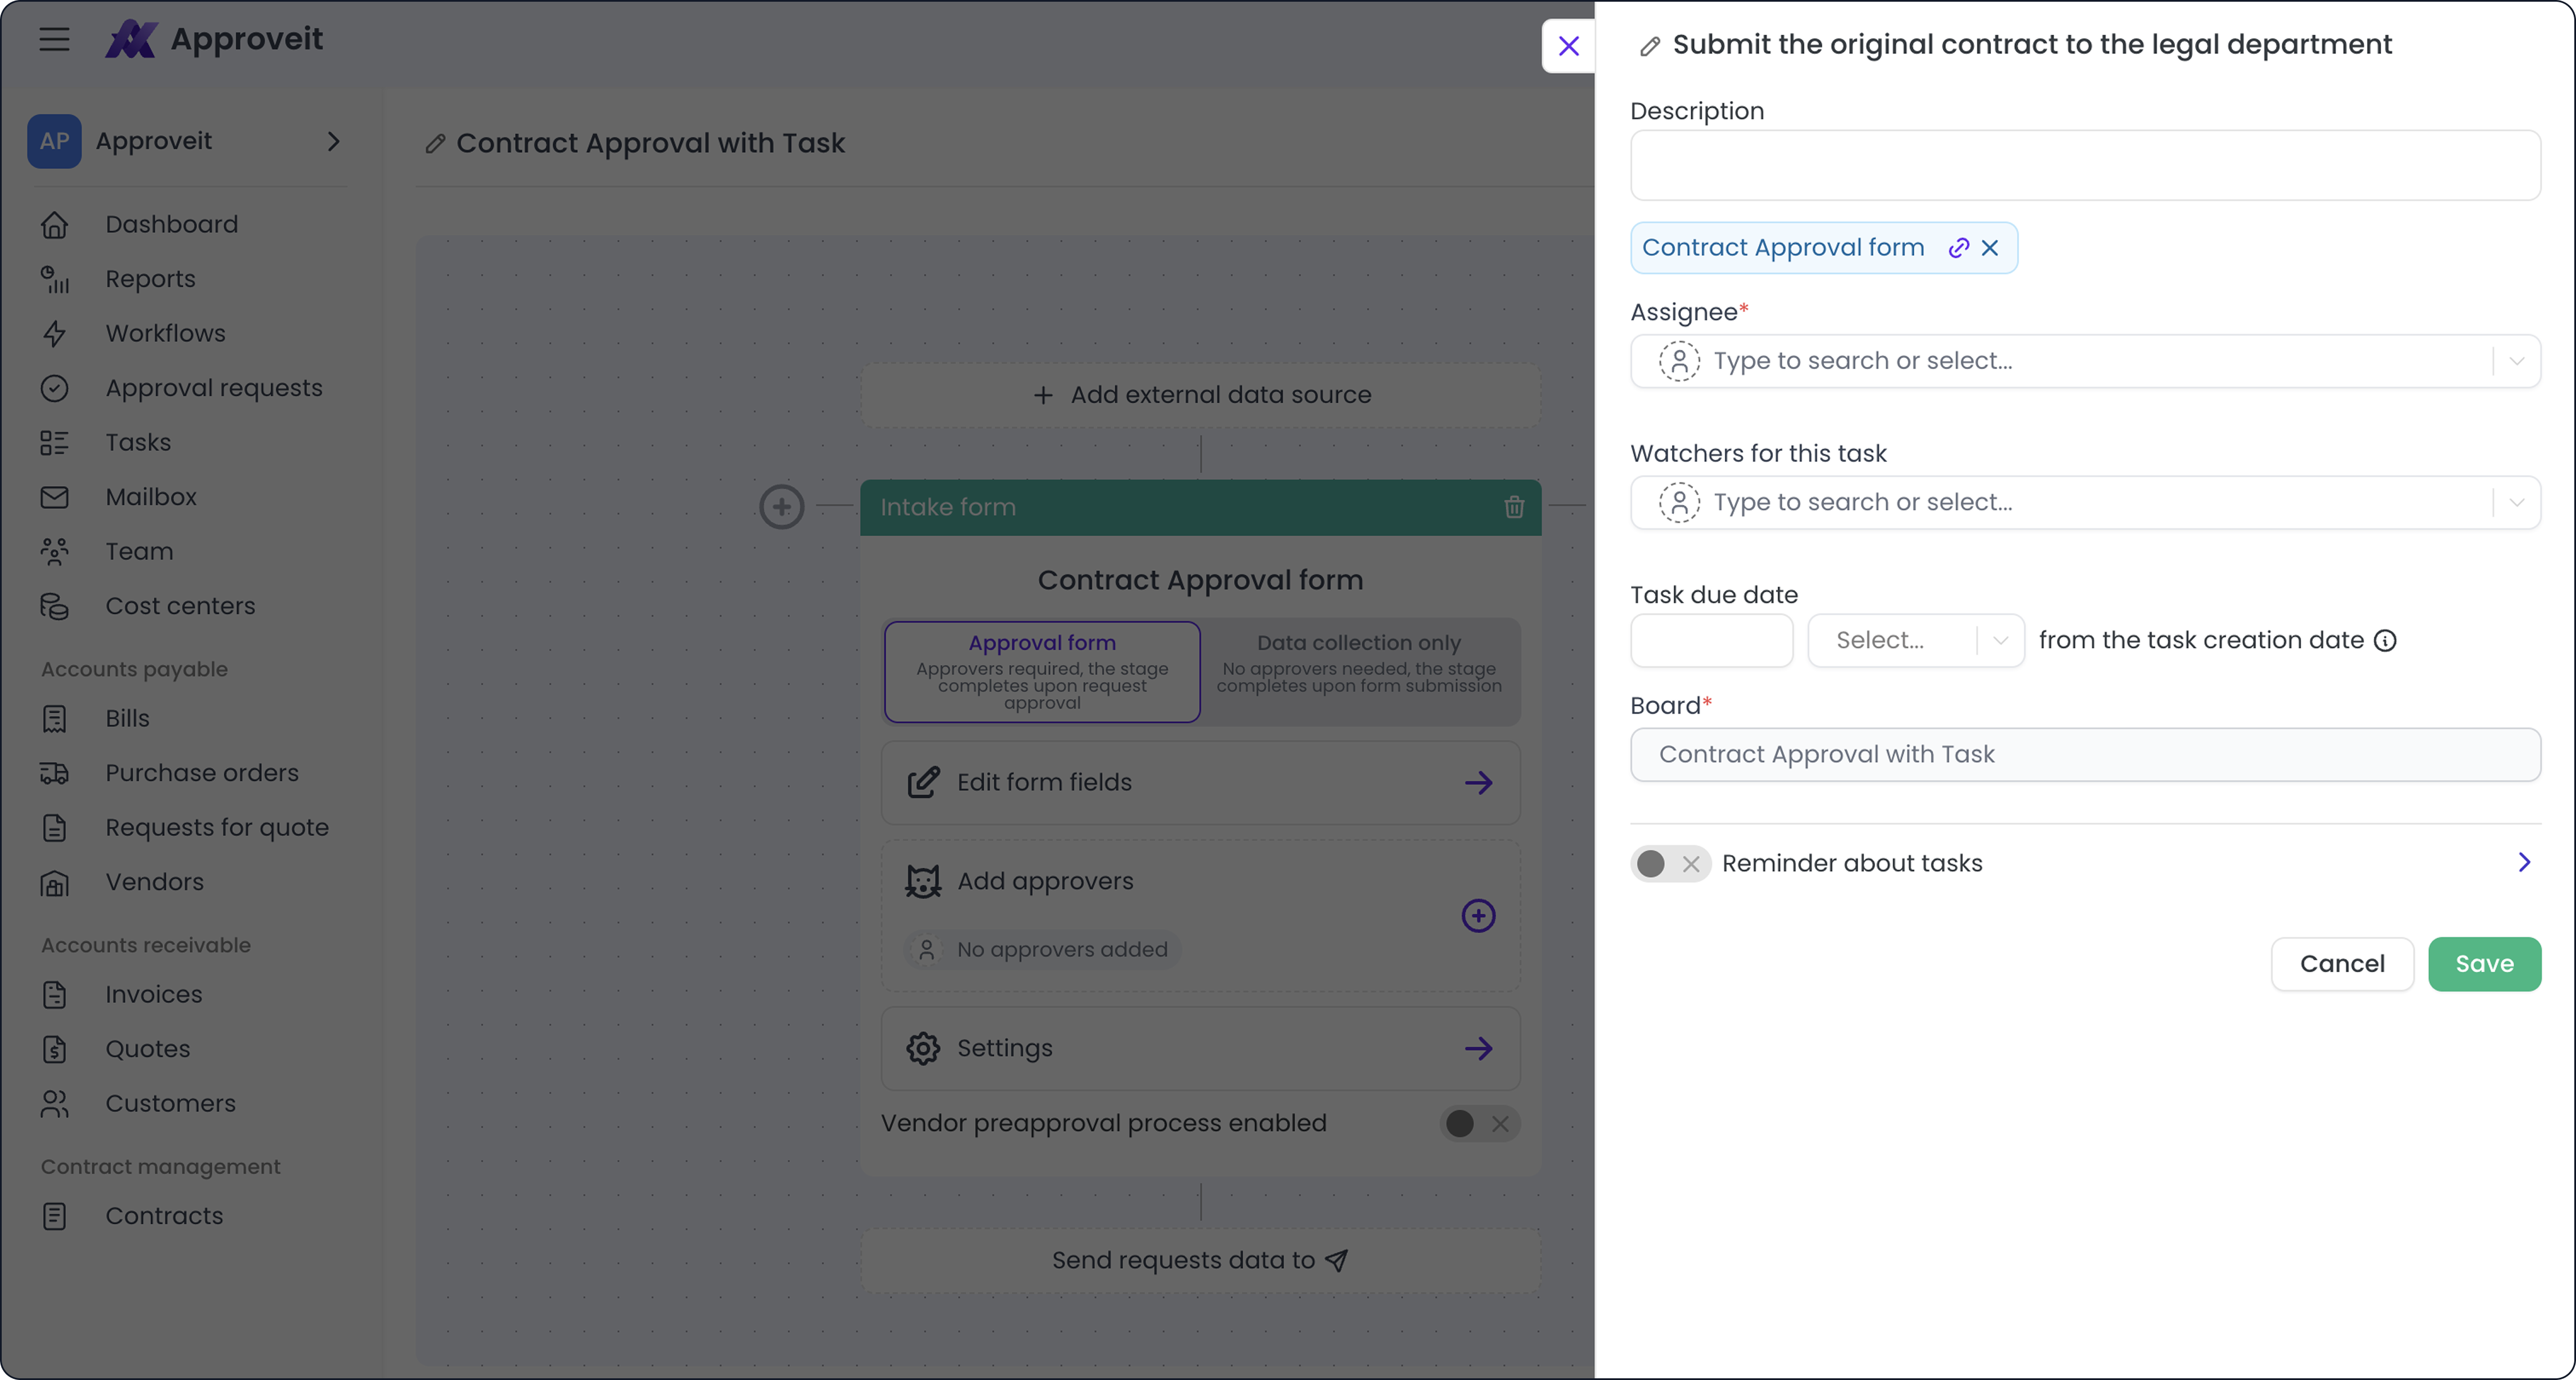
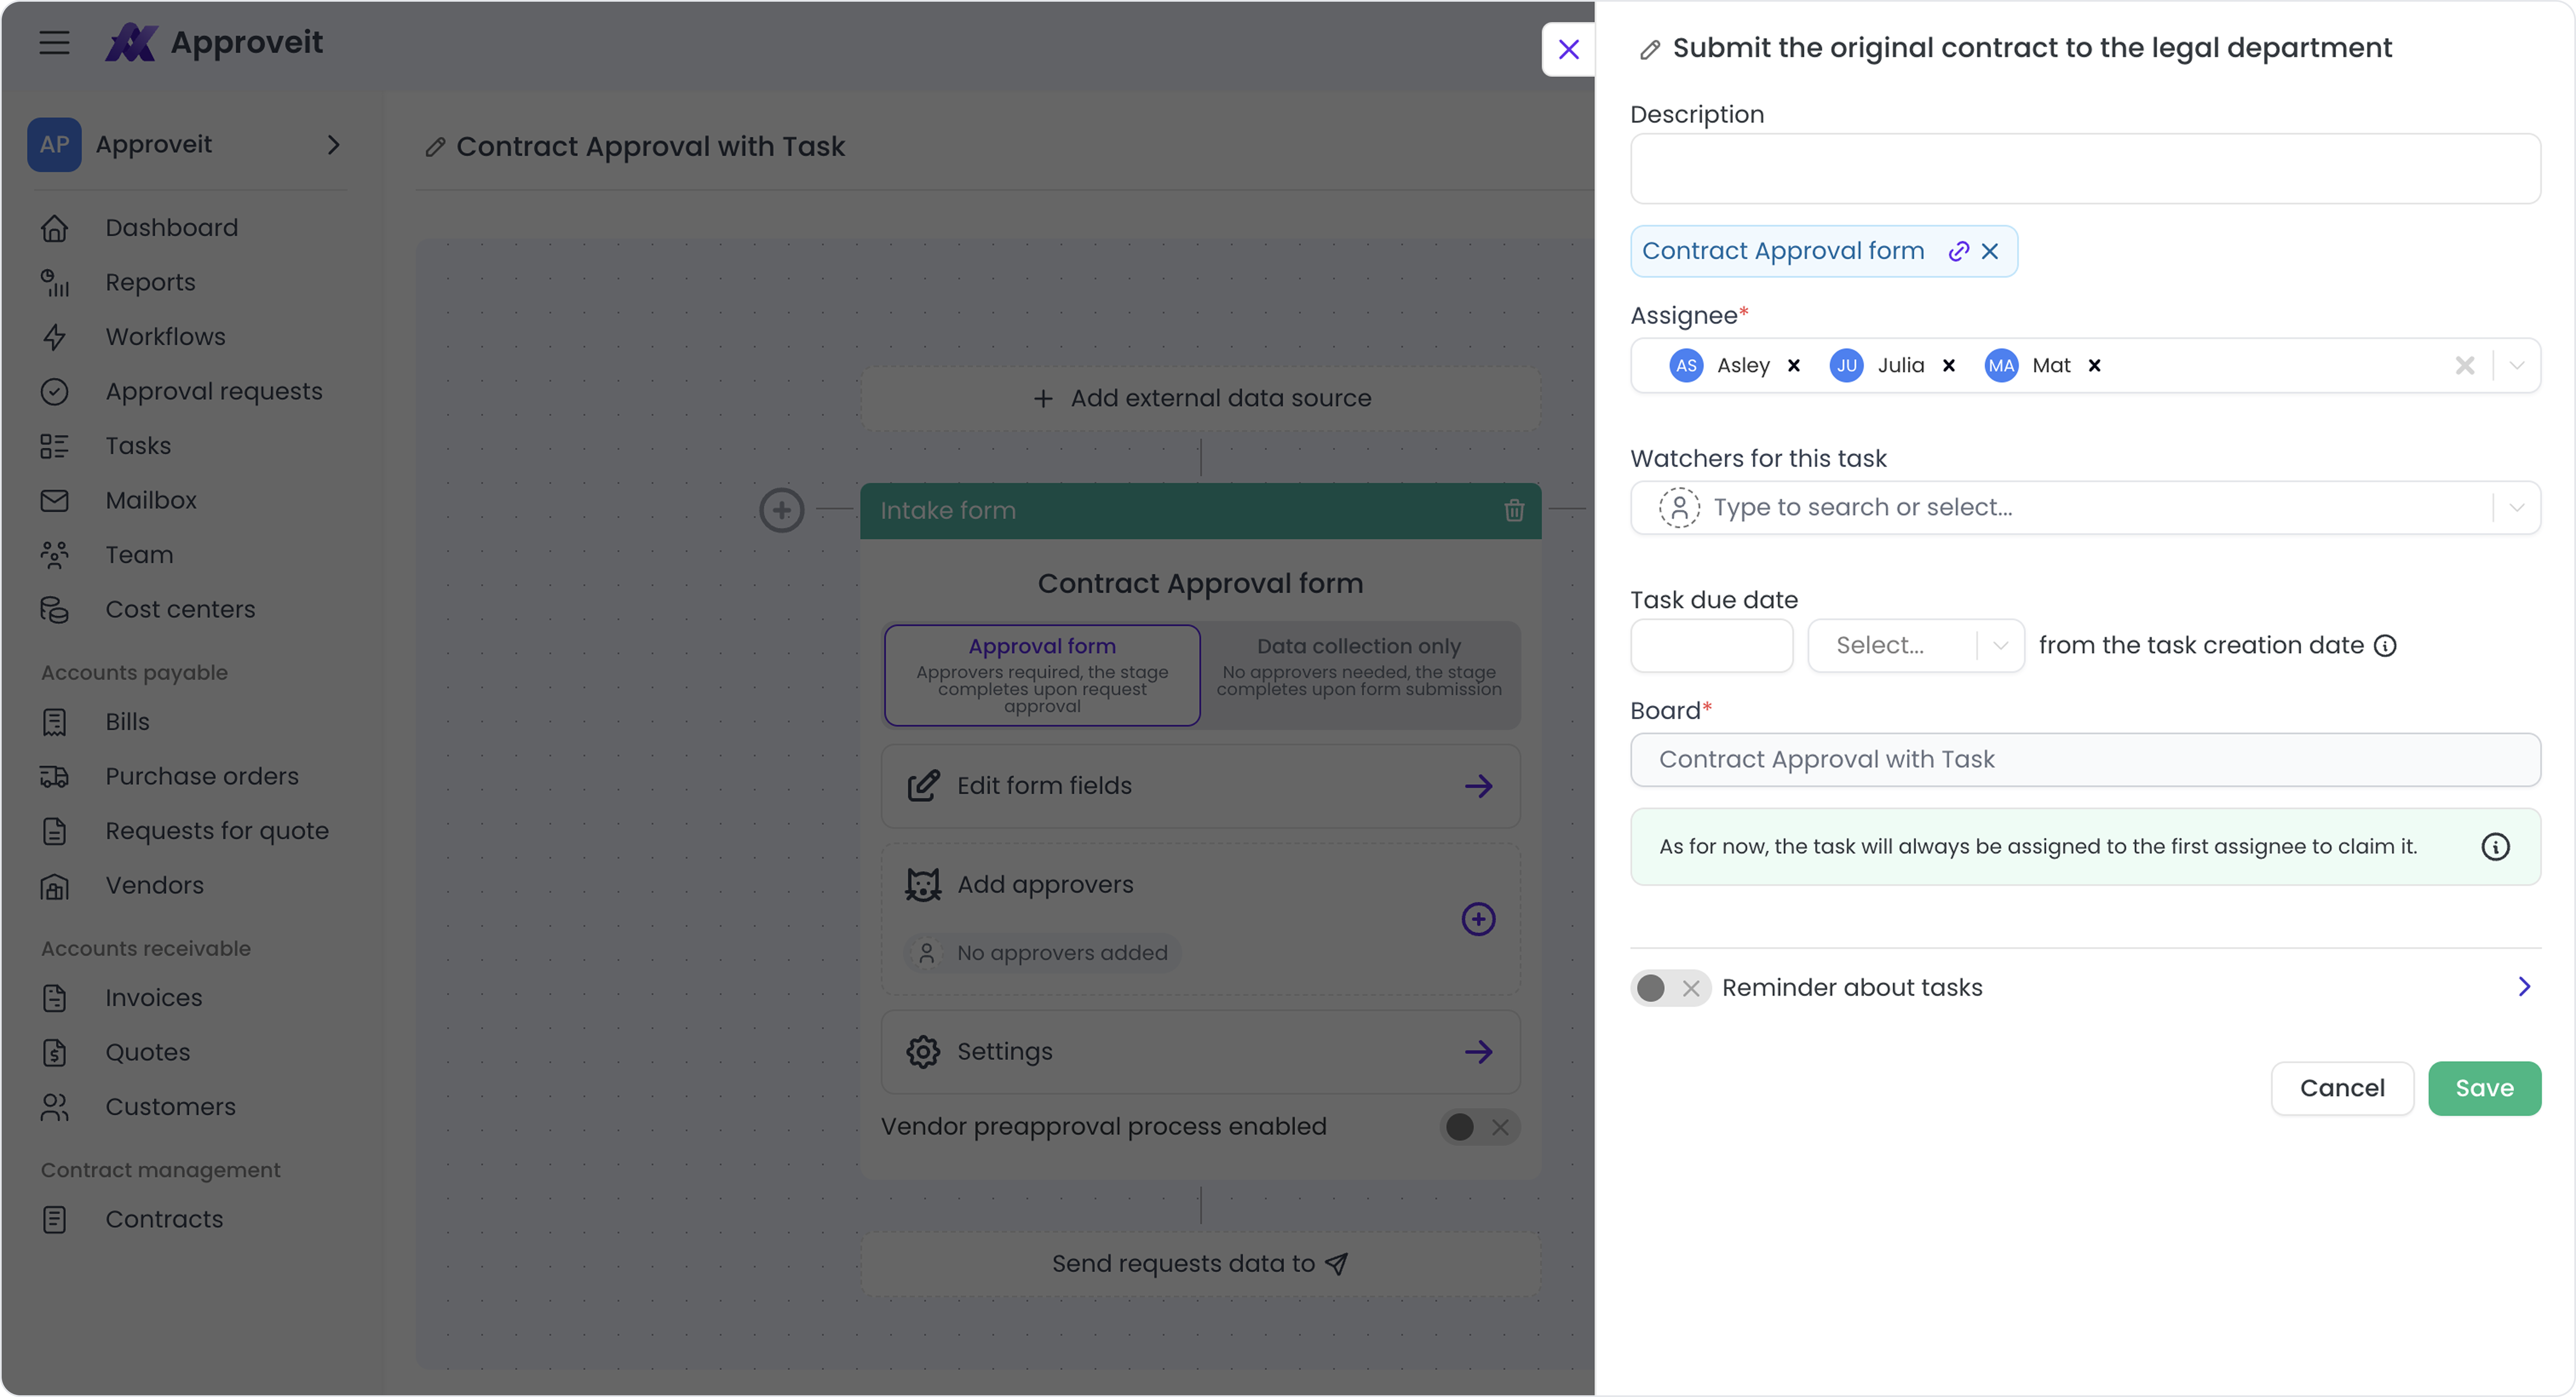
In task stage settings, you can select more than one assignee to get notified upon the task’s creation. In this case, the first assignee to change the status of the task to “In Progress” will be made an owner of the task.
Tasks created automatically through workflows can be later edited or reassigned from the boards.
Assignee view
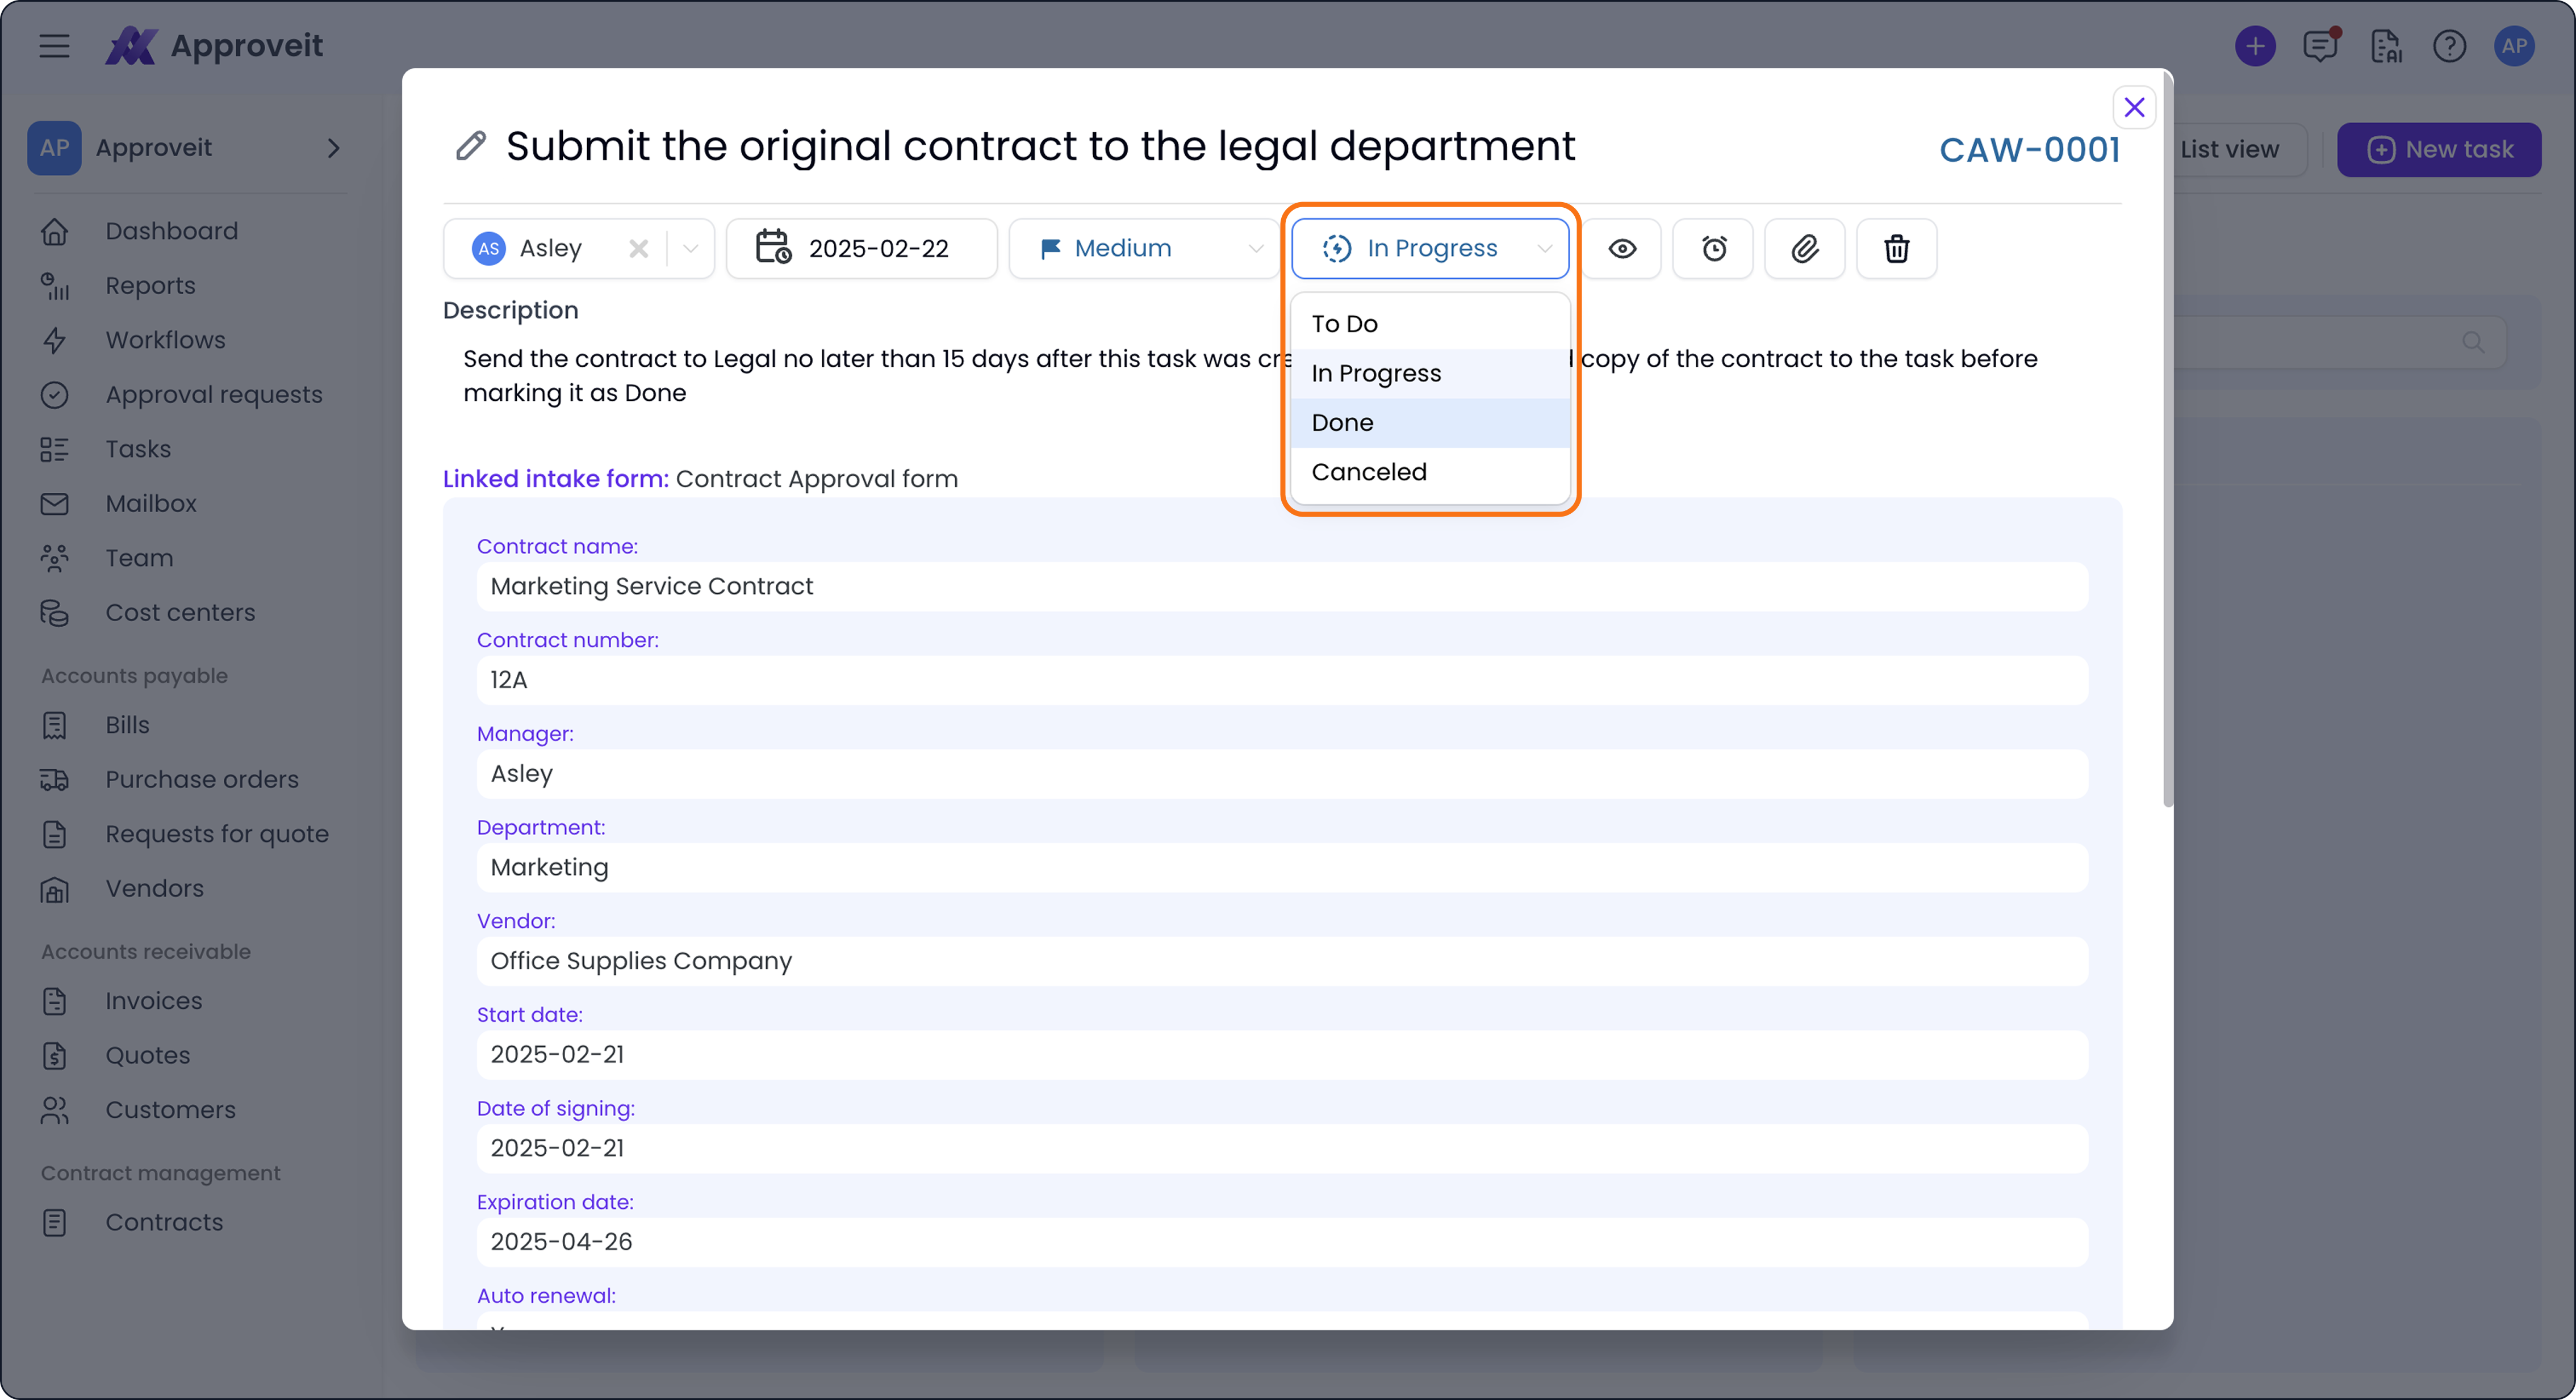
A user is considered to be the assignee of a task once they’ve changed its status to “In Progress”.
Task details can be viewed in the web dashboard by everyone who has the necessary permissions to view it. Task status can be changed by drag&drop from the board where it’s located, or from the dropdown in the detailed view.
You can add comments to tasks in the Journal section on the left. All changes and updates that happen to this task will be displayed there.
If you have any additional questions, contact us right away.