Approveit Guide: How to create and approve requests
If your team has chosen Email as the communication channel for approval requests, you will be creating requests in Approveit web app and getting notifications via email.
To create an approval request in Web App:
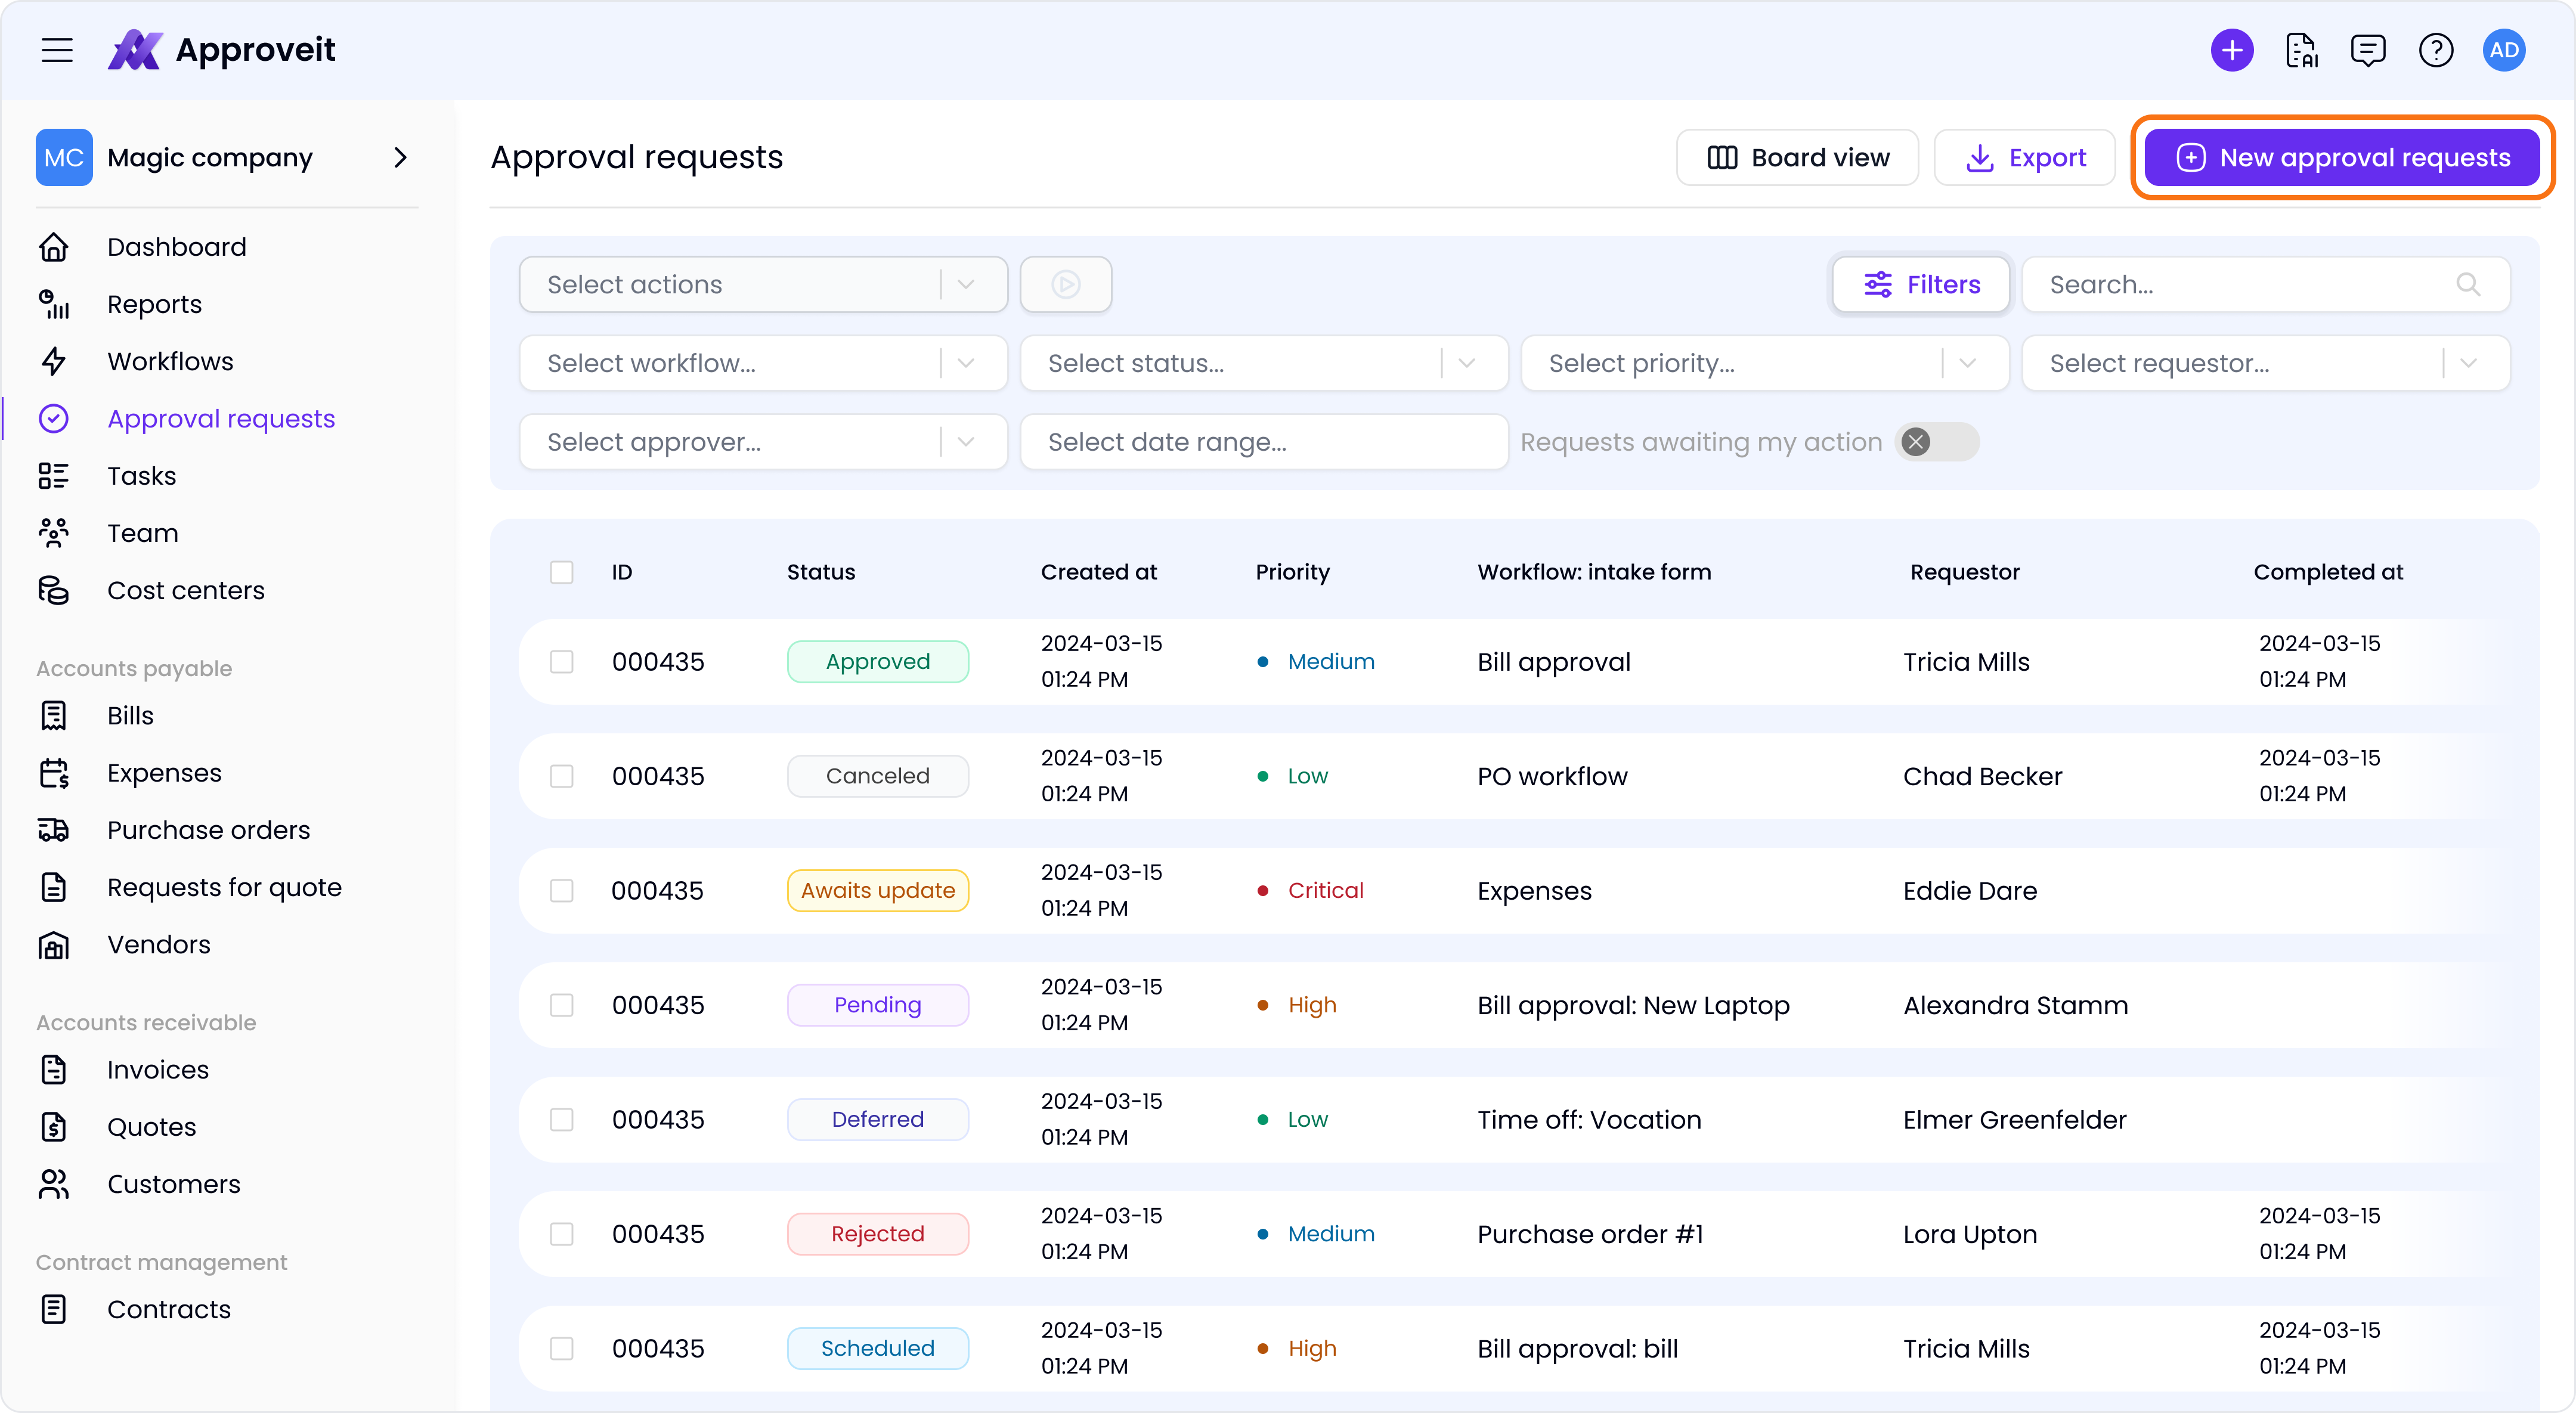
1. Left sidebar → Approval Requests → New approval request:
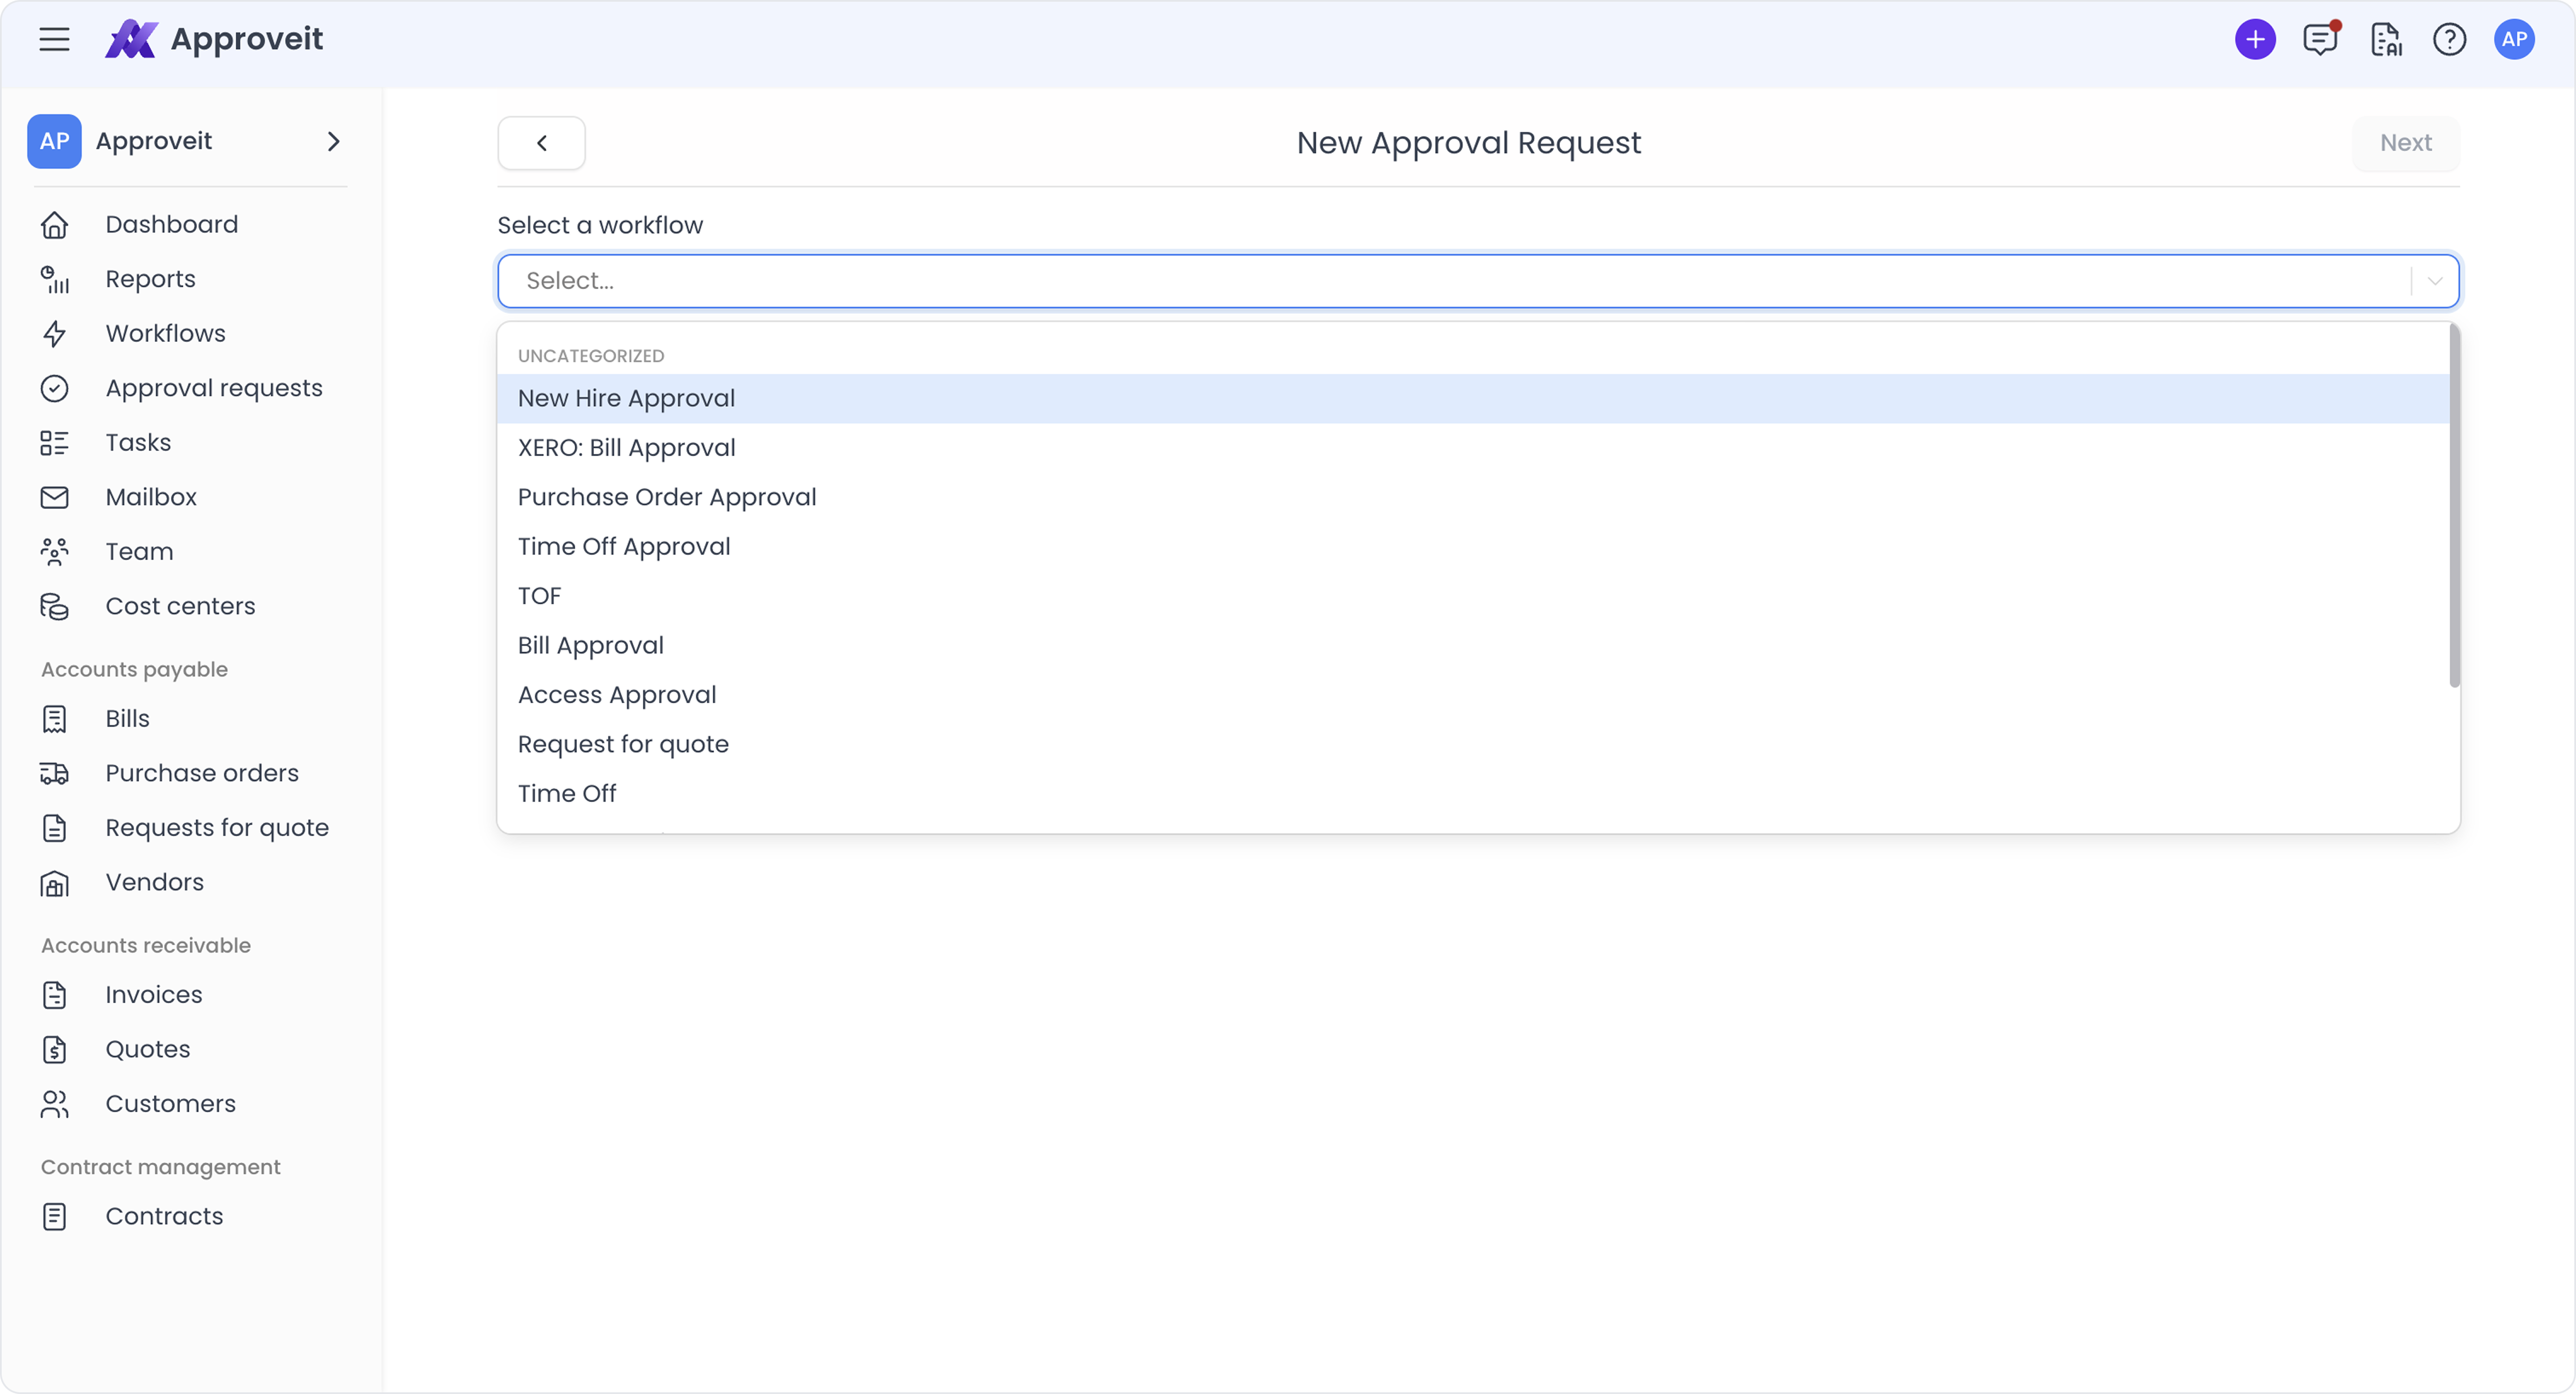
2. Select the workflow you need from the drop-down list:
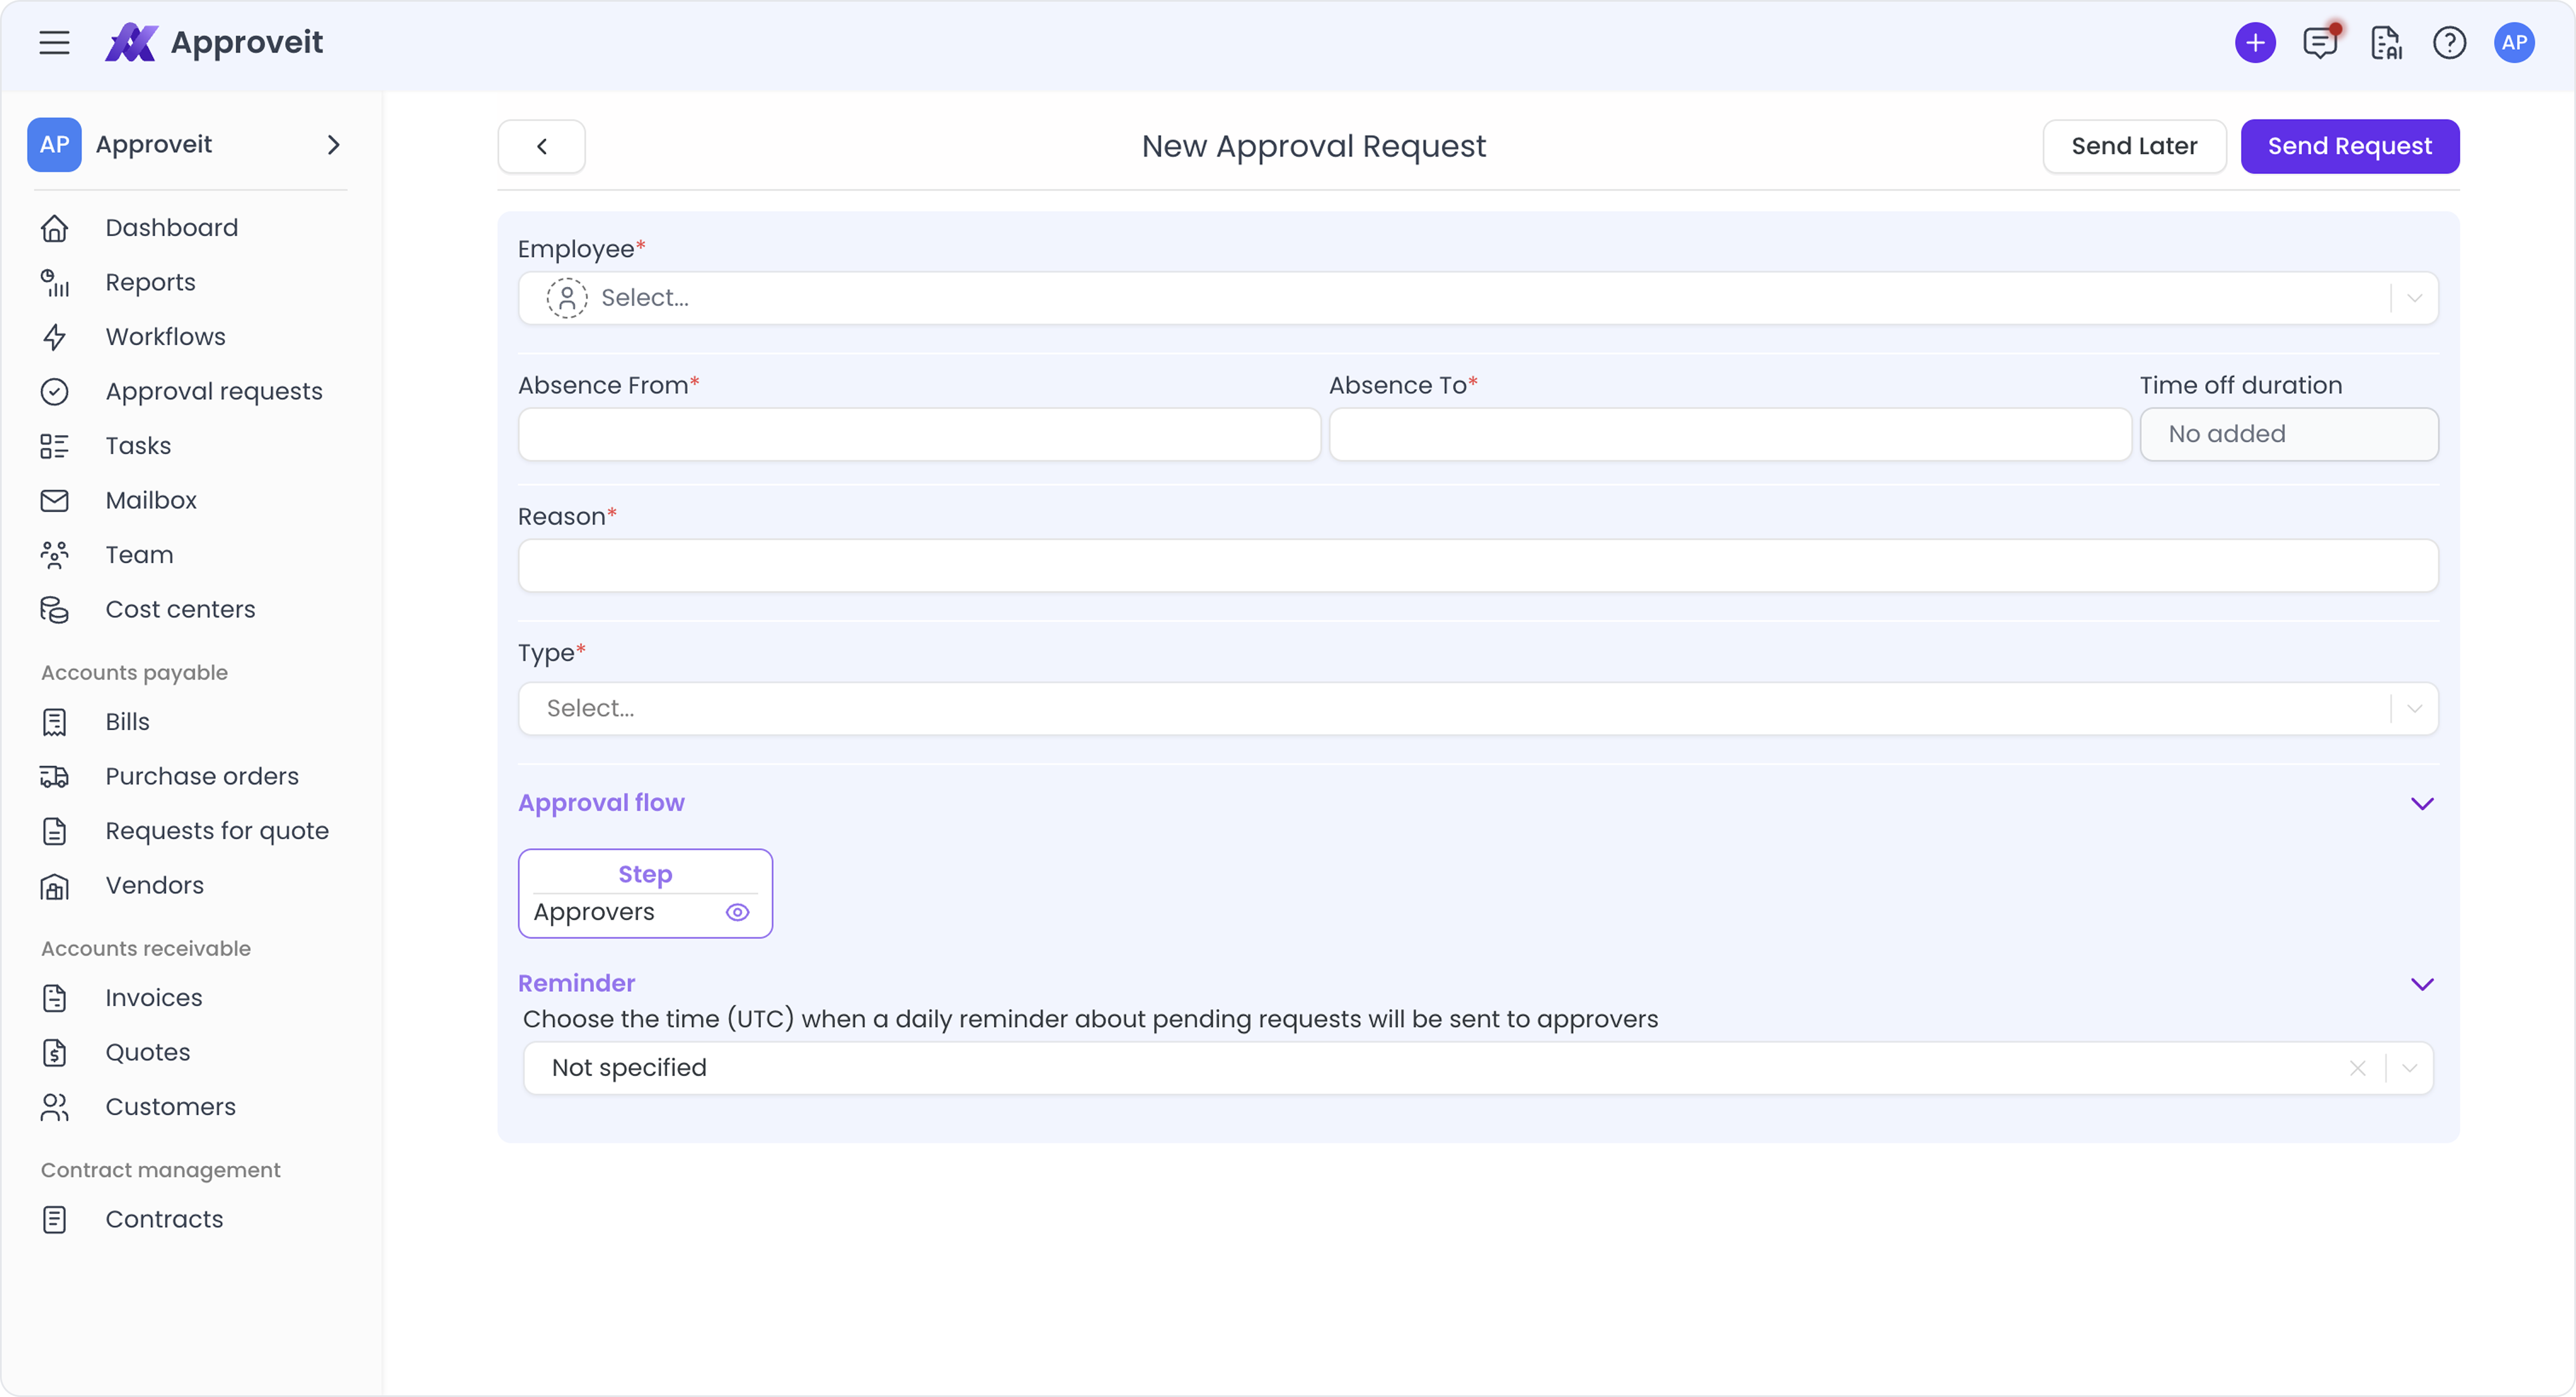
3. Fill in the approval request form and click ‘SEND REQUEST’:
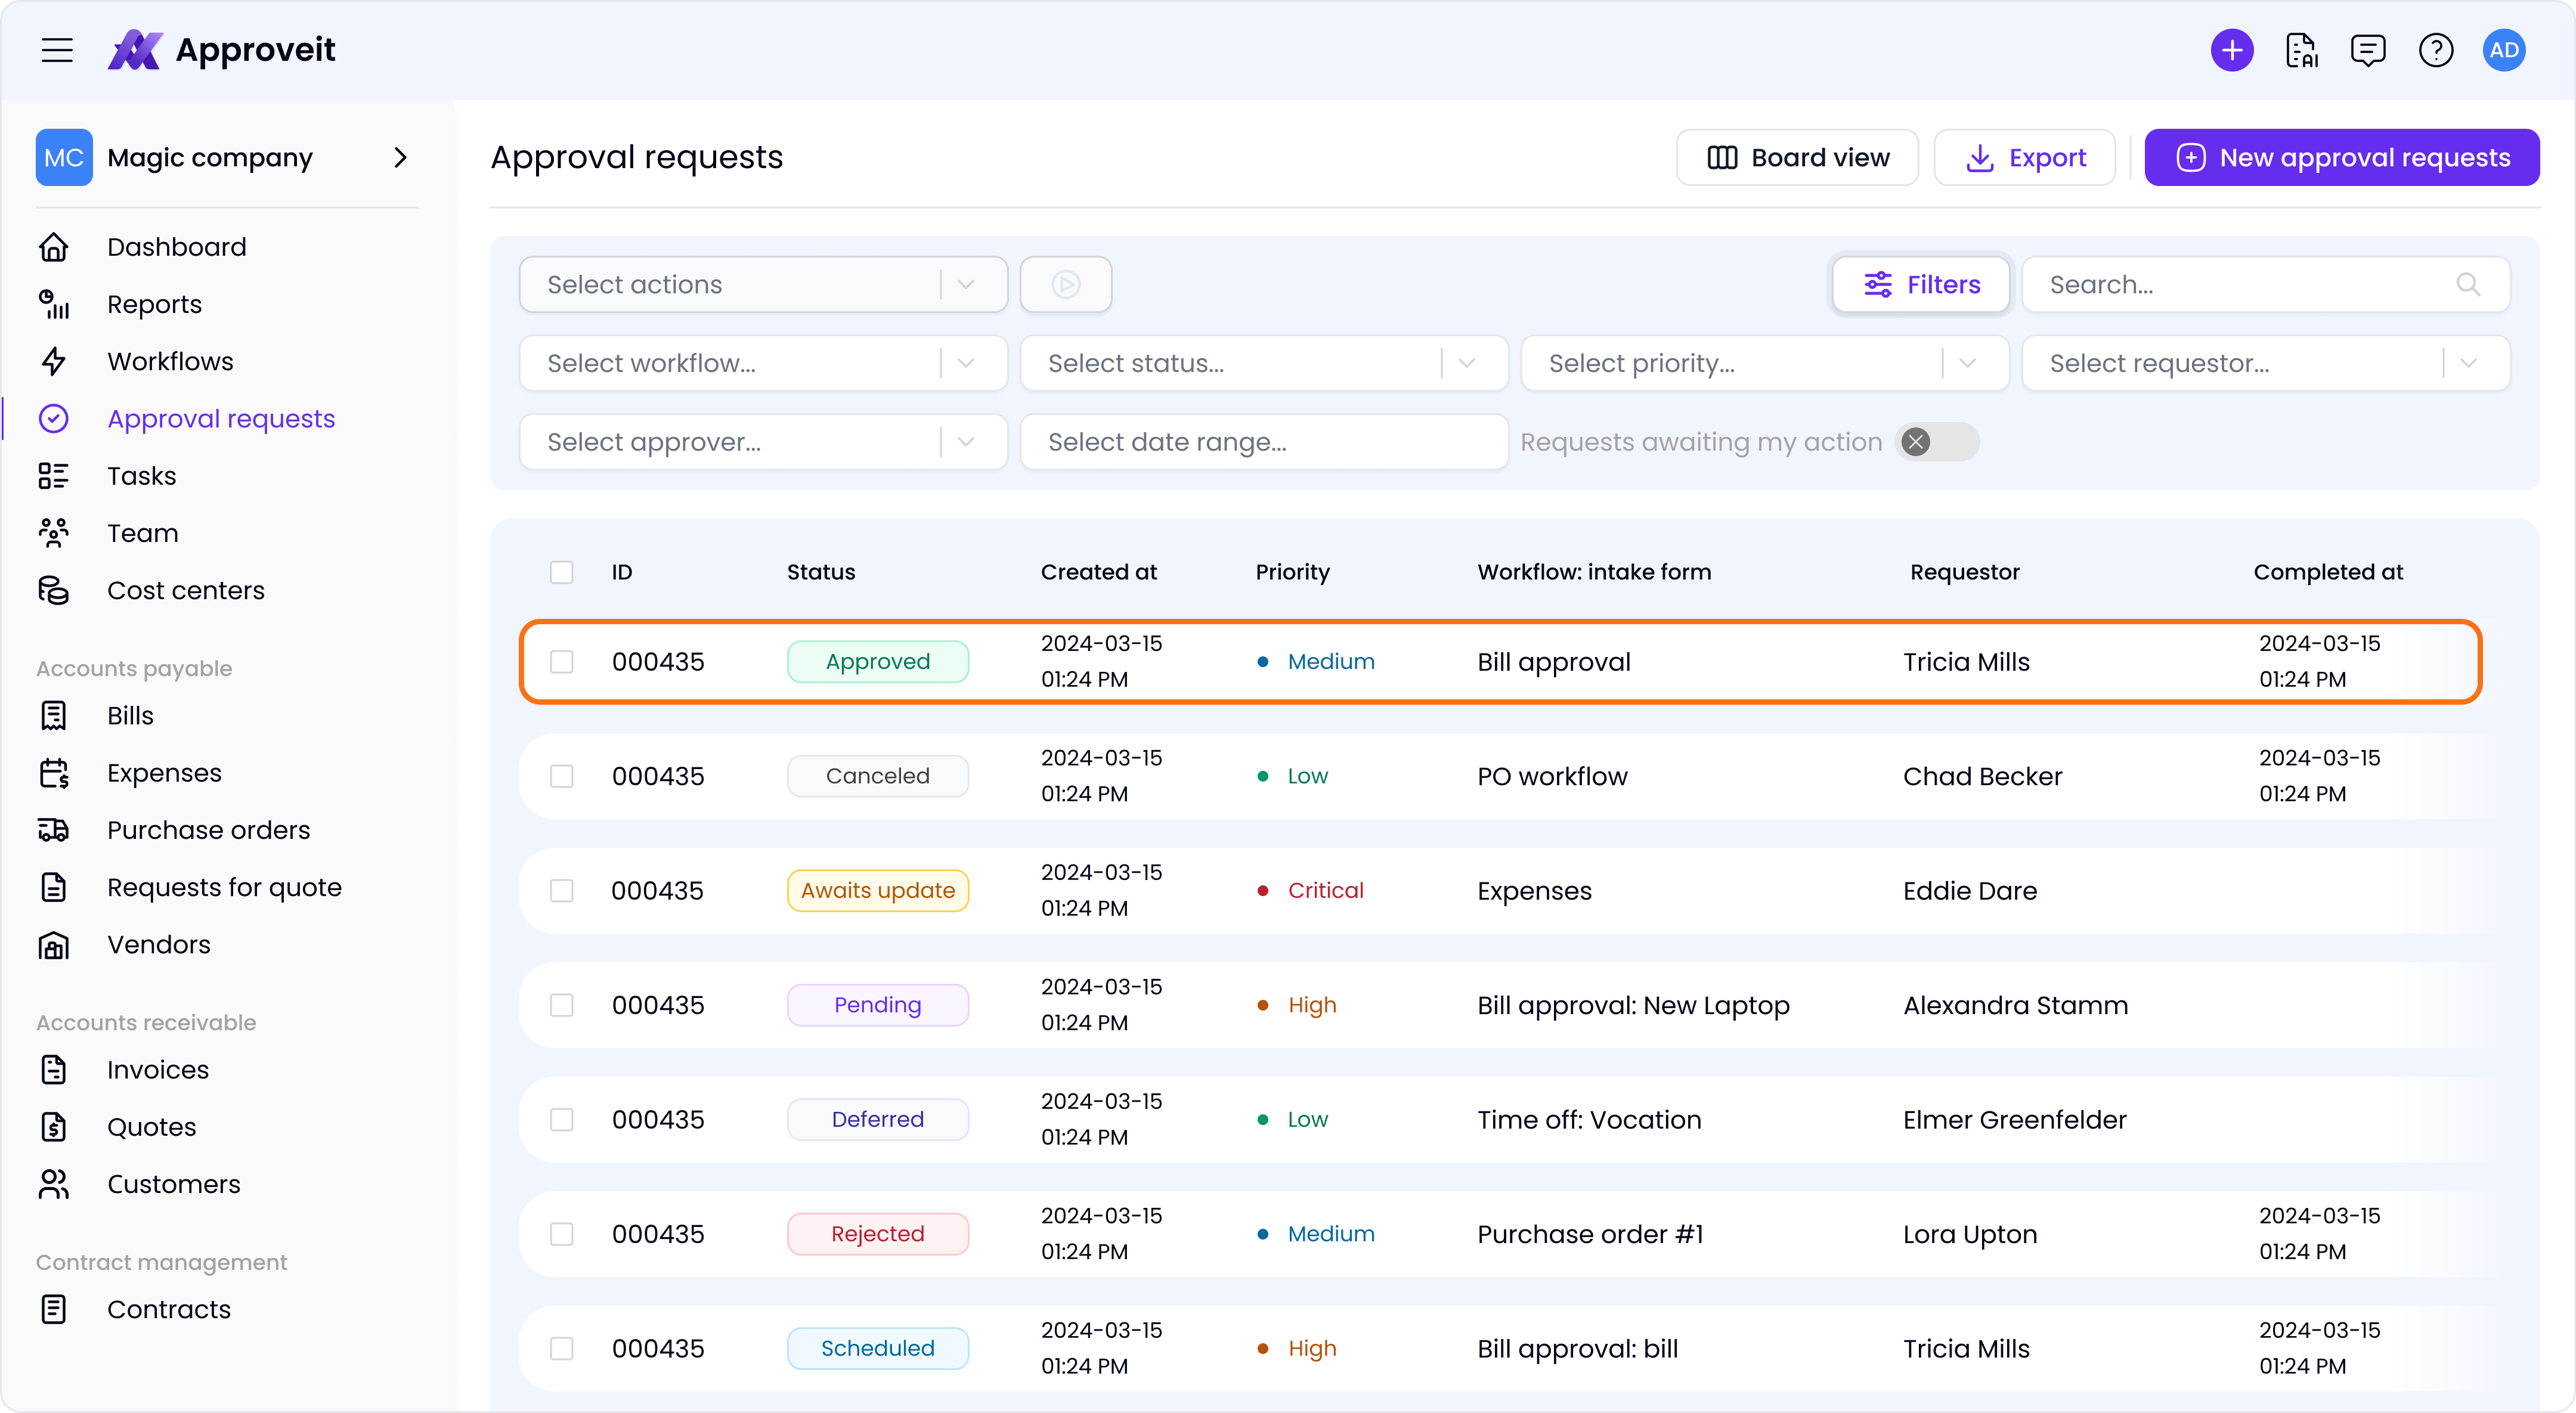
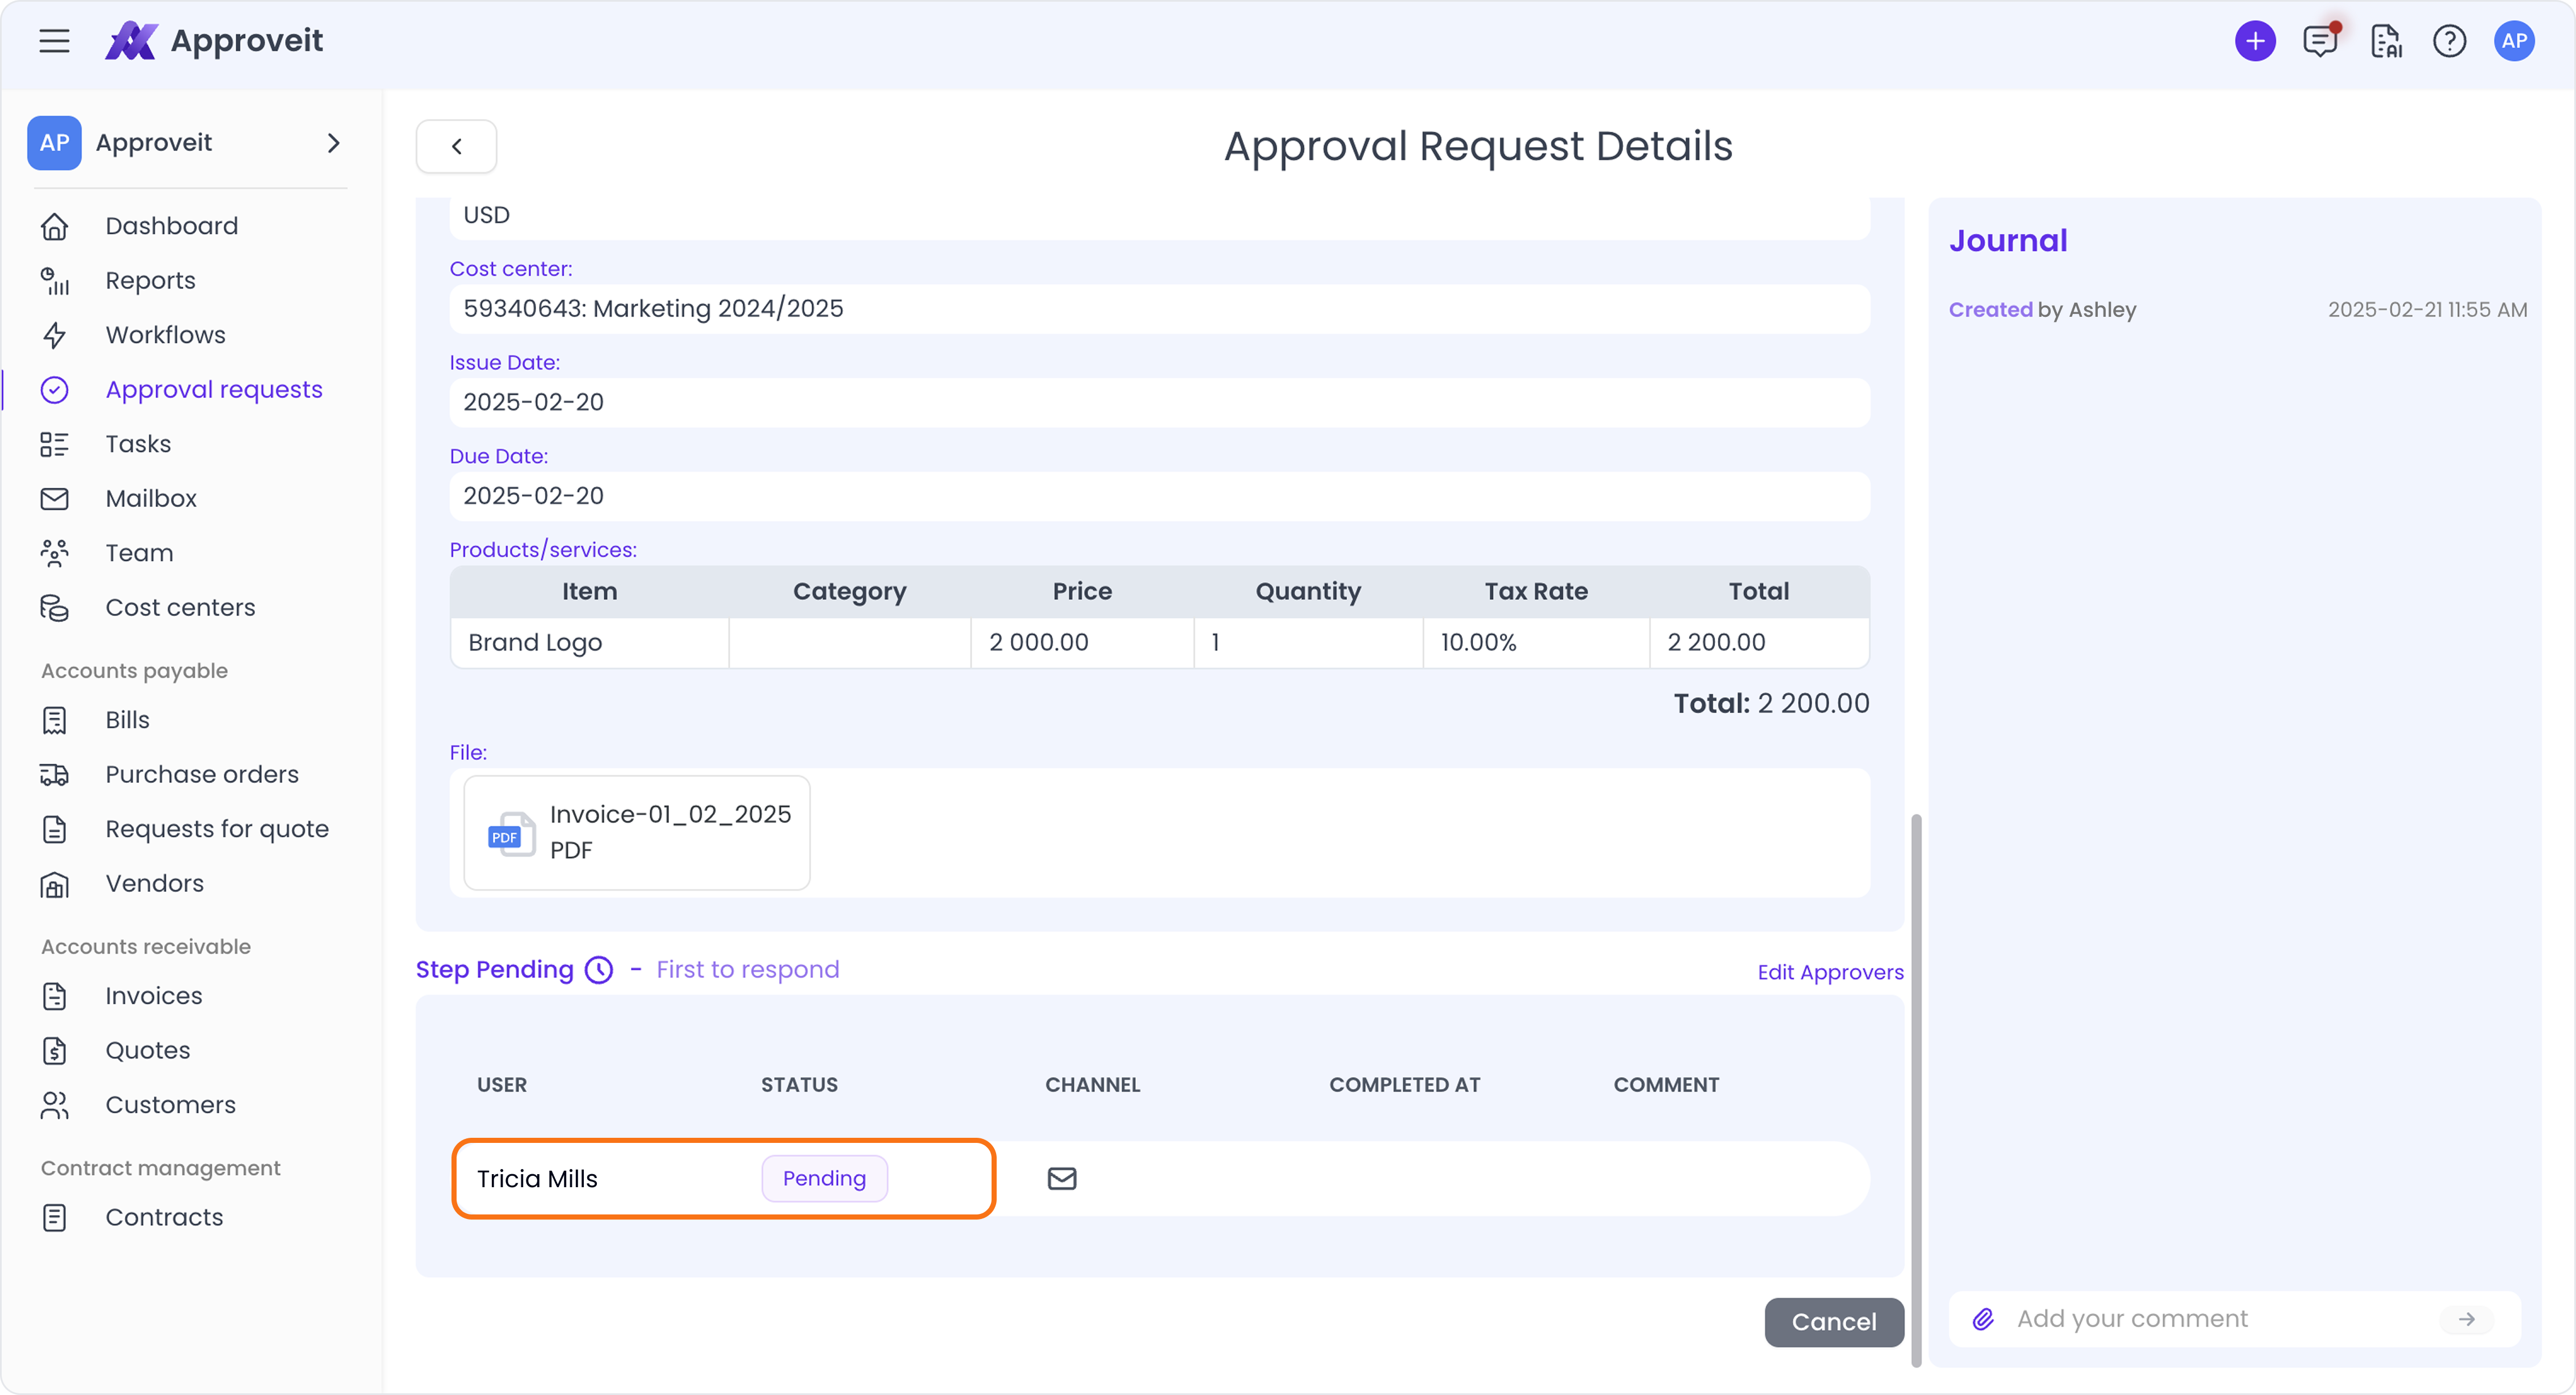
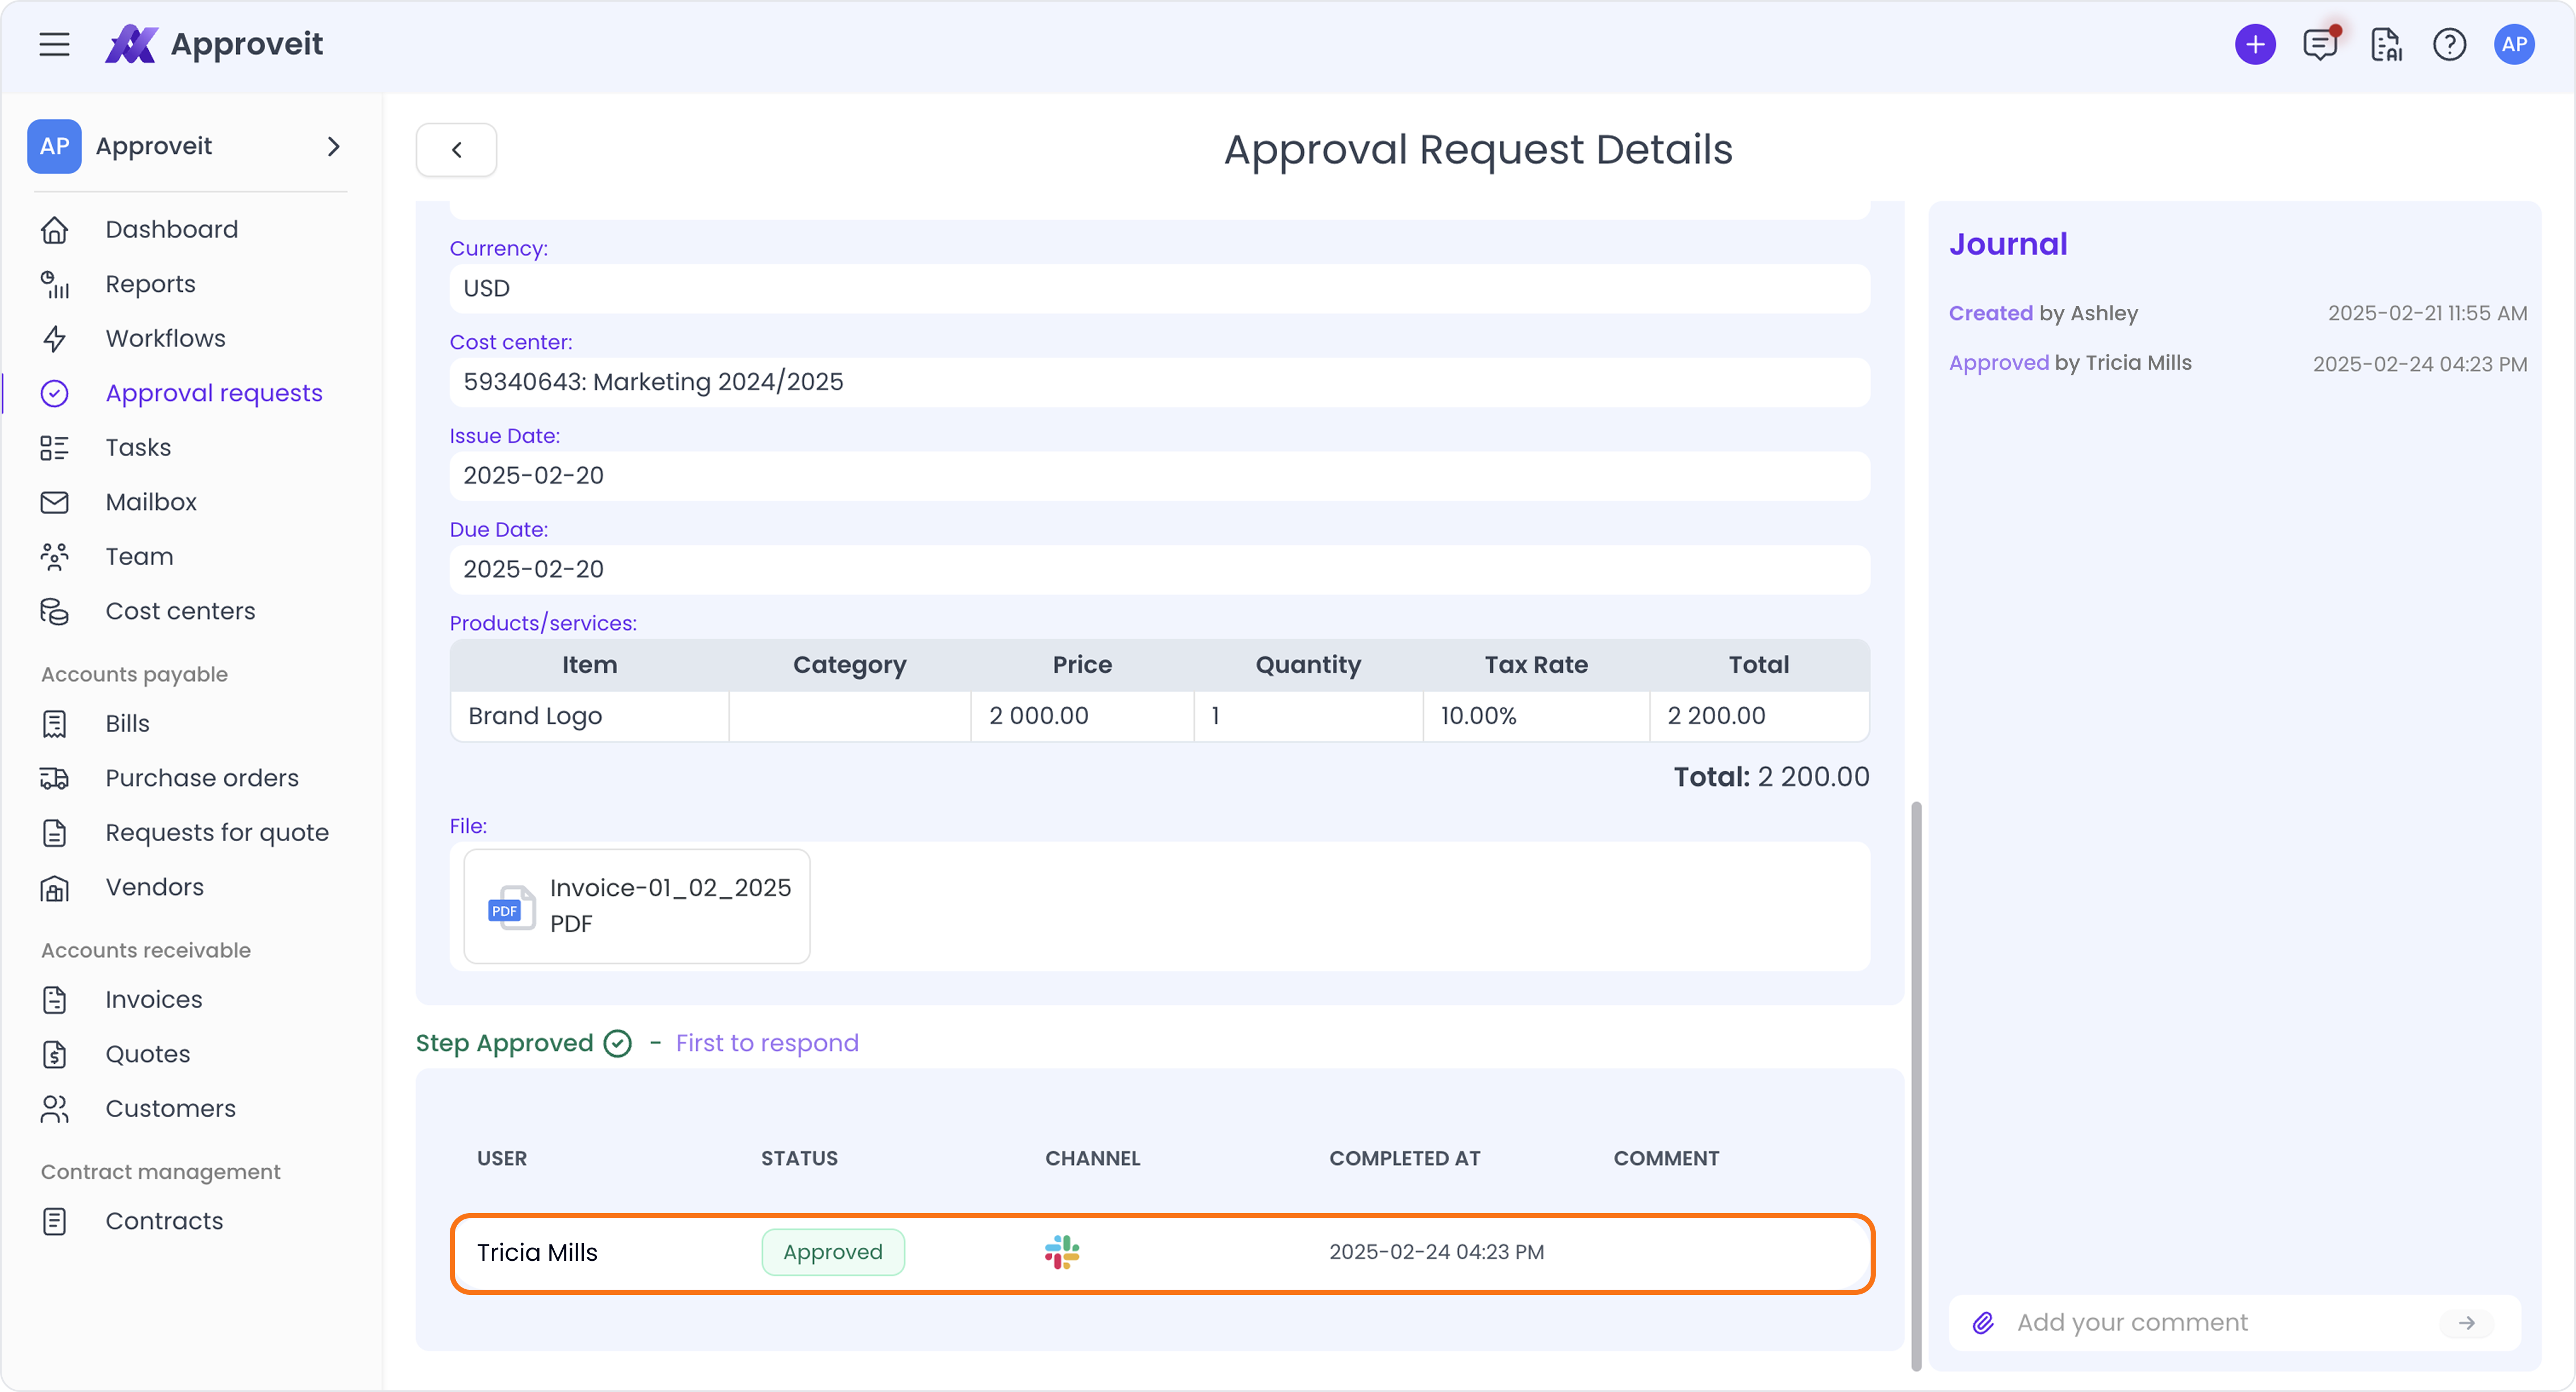
4. You can always check the status of your request by going to ‘Approval Requests’ and clicking on the request:
5. Once your request gets approved or rejected, you will receive a notification via email:
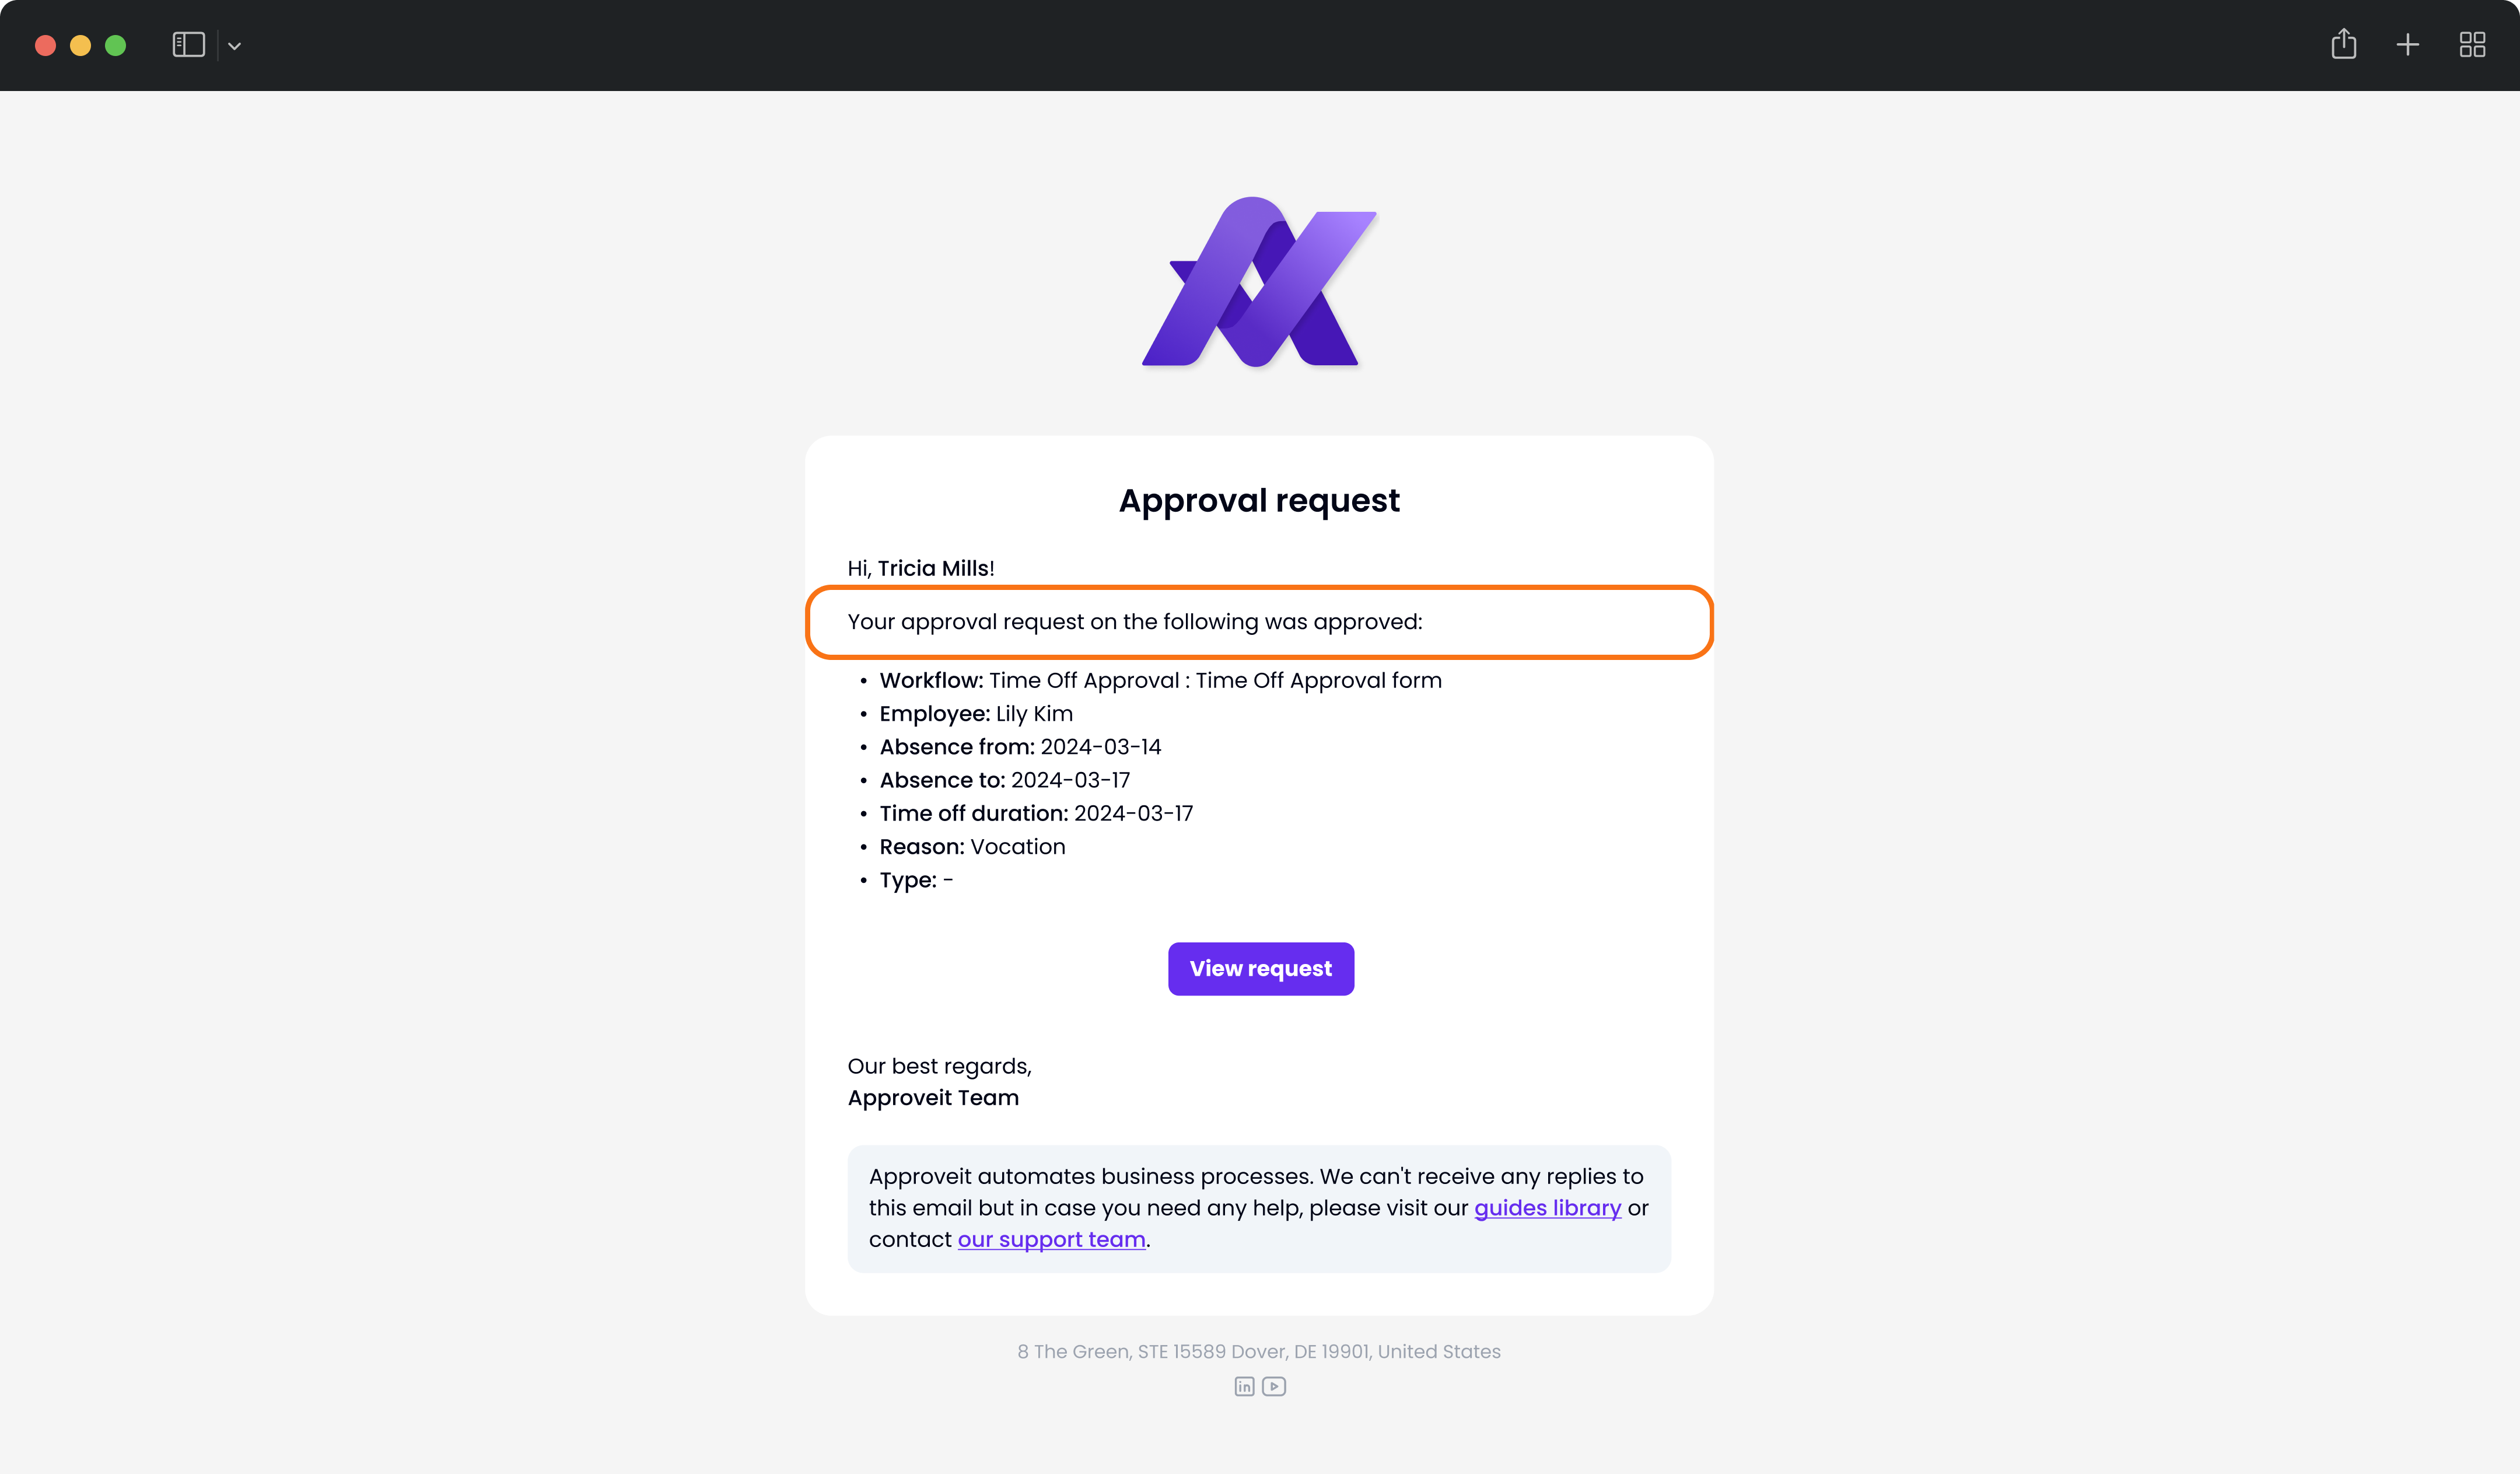
Email notification
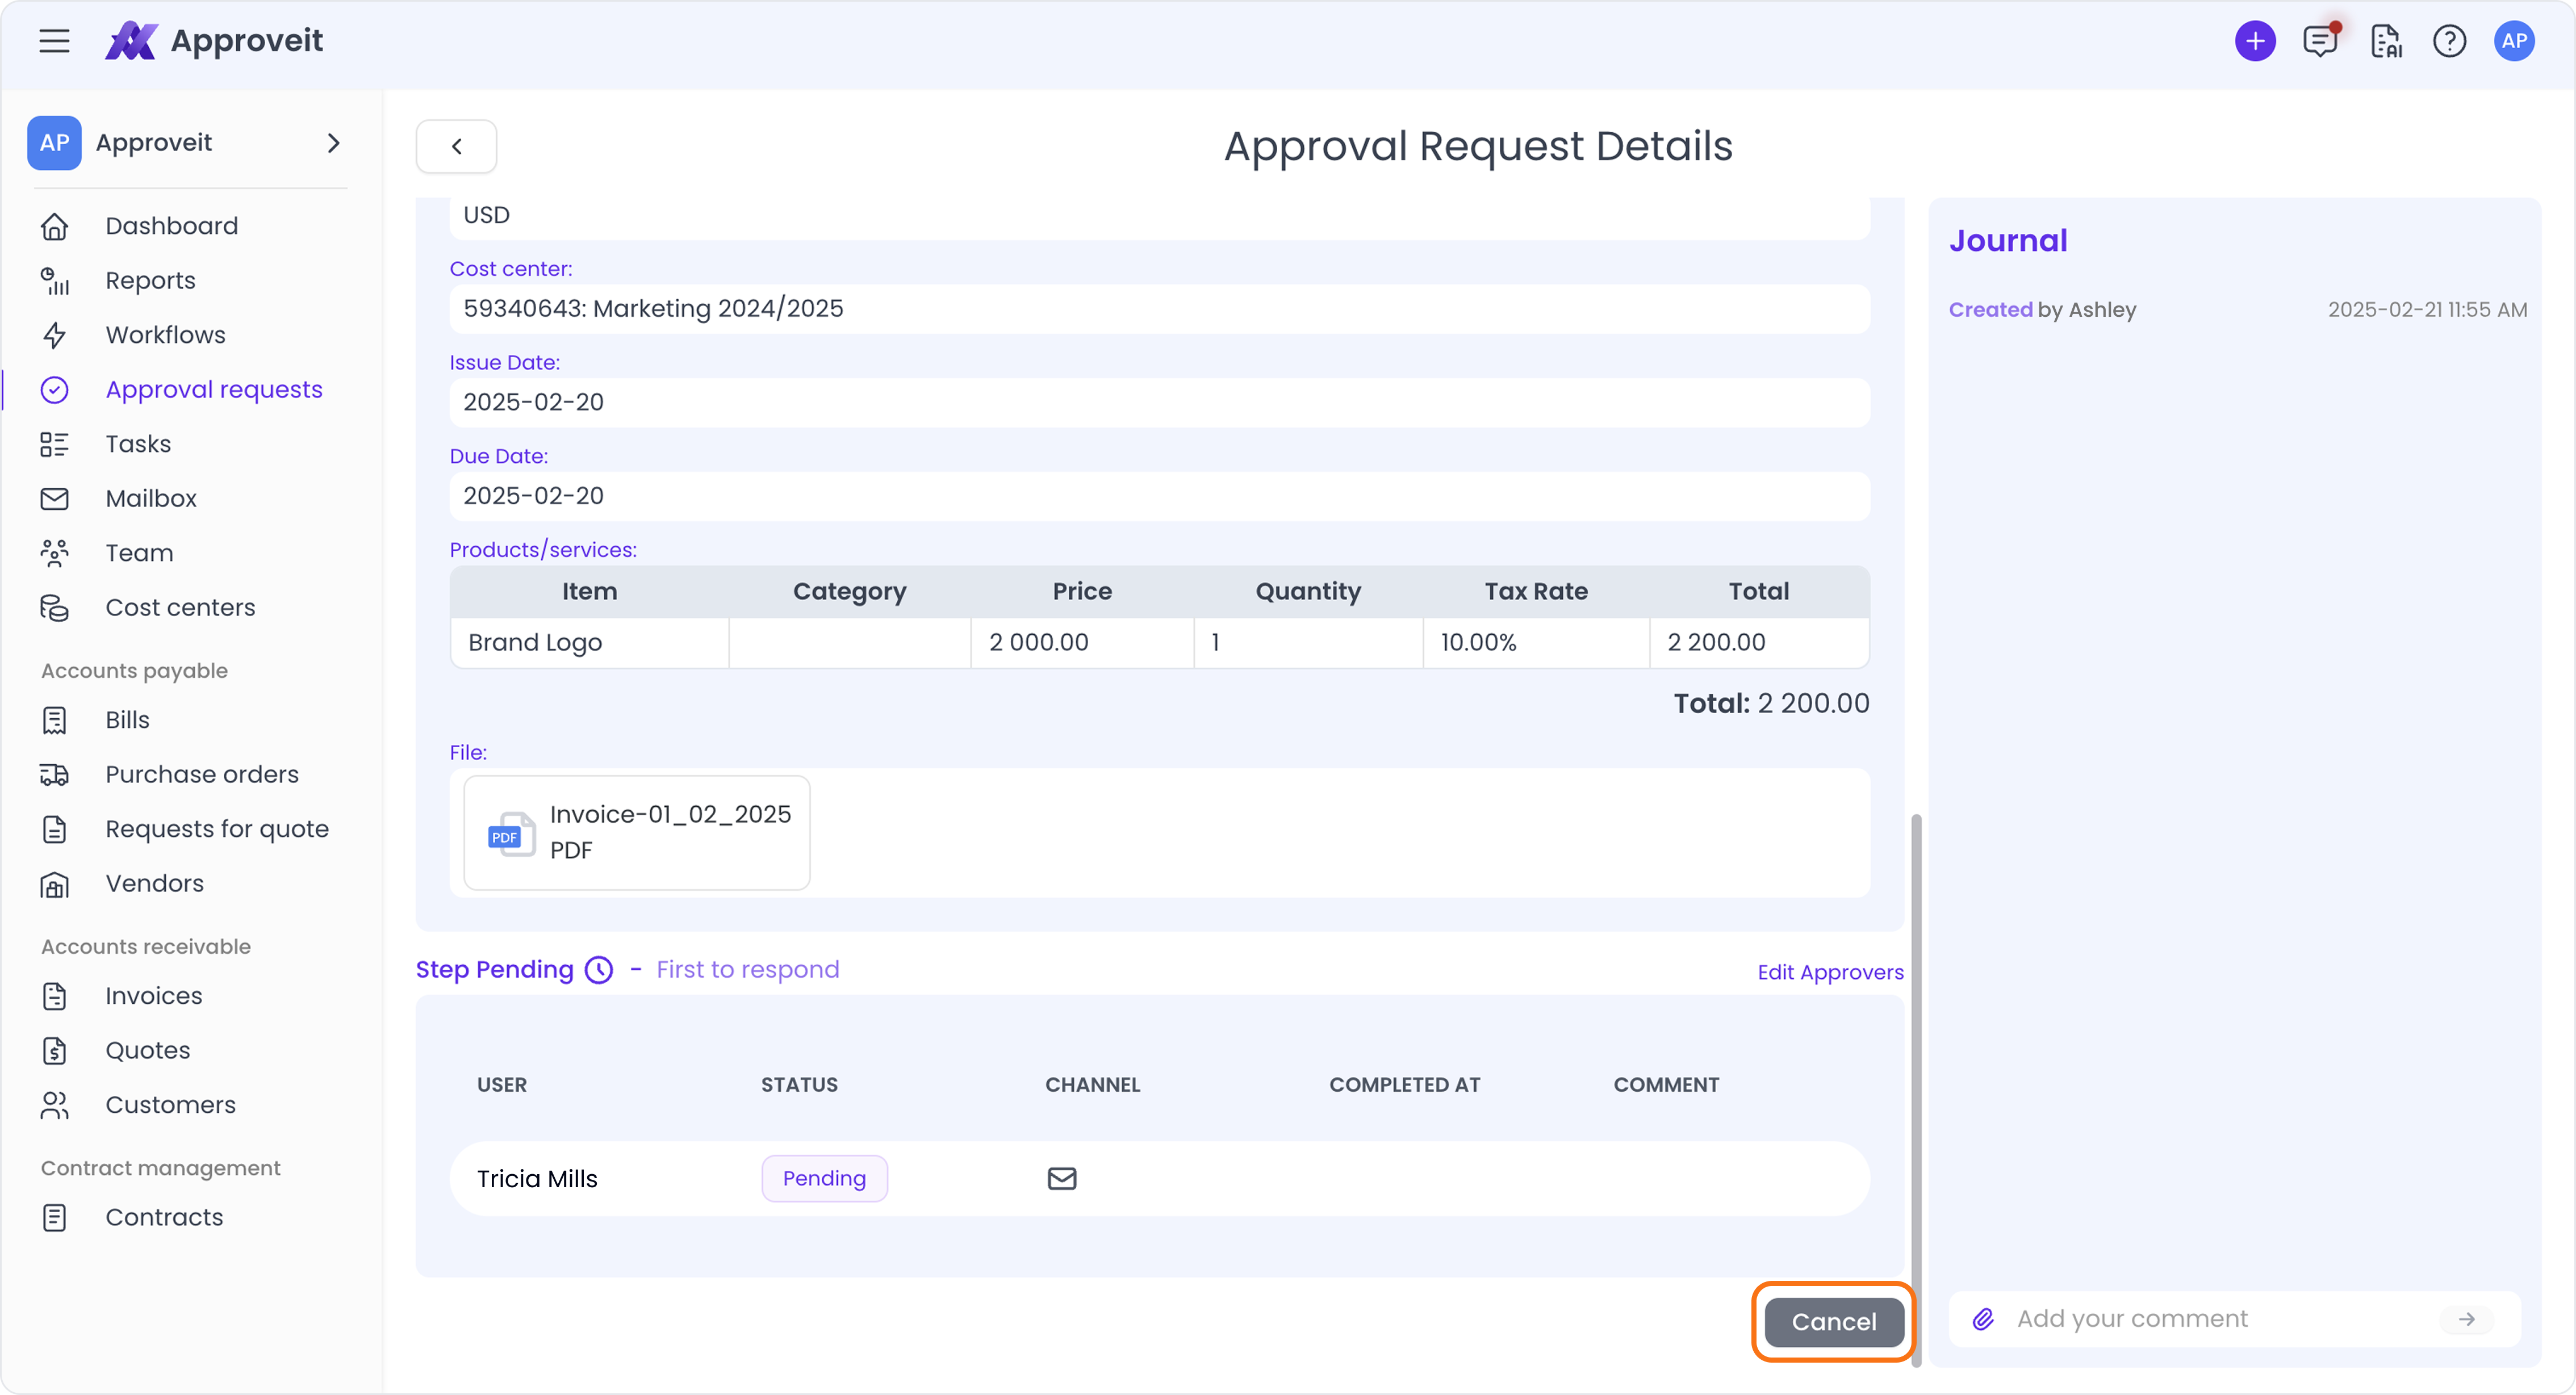
6. Requestors can cancel the request. It can be done only before the request gets approved
To cancel a request:
Left Side Bar → Approval Requests → Choose the request you want to cancel → Cancel
To approve the request in Web App:
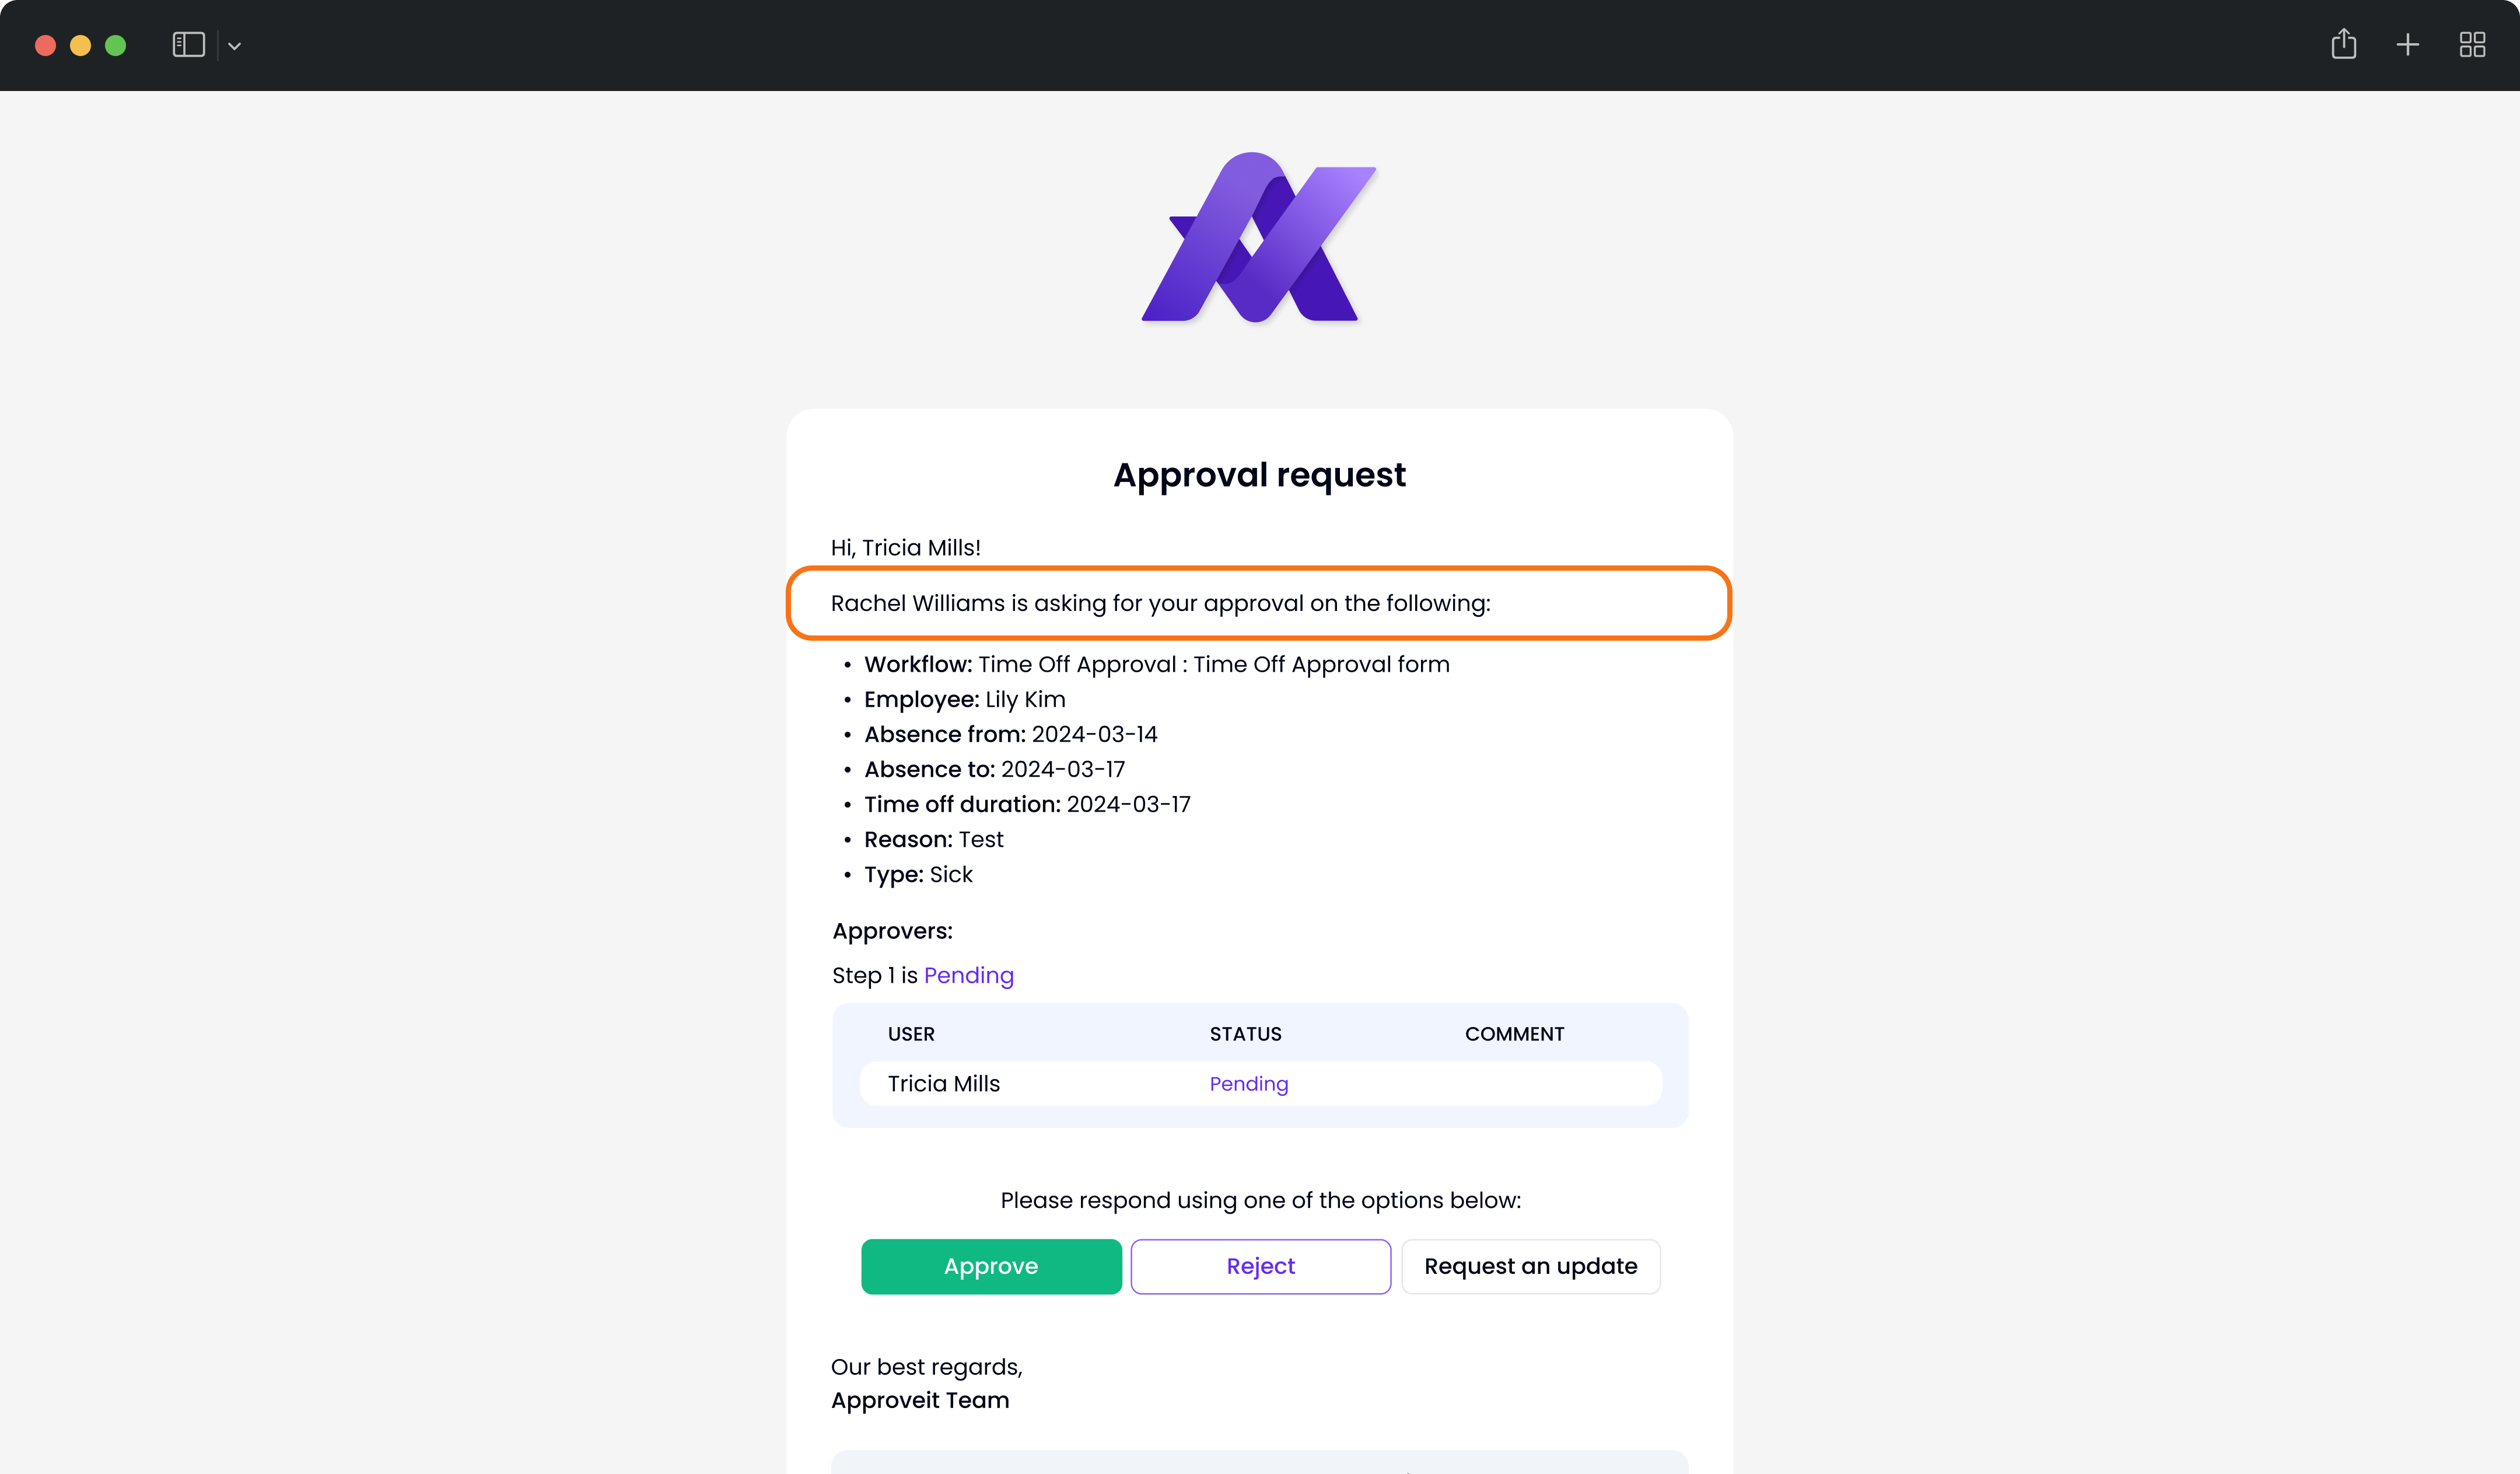
1. You will receive an email notifying you that the request is waiting for your approval. You can ‘APPROVE’ or ‘REJECT’ it right from your email:
2. Once you’ve approved or rejected the request, you will be redirected to the Web App where you can add a comment to it and check the status:
Still have questions? Please open the chat and message us, or book a call using the link