Integration with SoftLedger guide

Integration with SoftLedger guide

Integration with SoftLedger guide

Apr 14, 2025

Integration with SoftLedger guide

How it works:

Bill approval request is created and approved in Approveit 

Approveit–approval–request–details–page–showing–SoftLedger–bill–form–with–vendor–currency–and–cost–center–information

Upon approval, the Bill is automatically synced with SoftLedger

Approveit–bill–summary–table–listing–invoice–numbers–vendors–due–dates–and–statuses–for–global–location
How to set up:

To connect SoftLedger account to Approveit: SettingsIntegrations

Please, request Tenant UUID, Client ID, Client secret, and Audience from SoftLedger 

Approveit–SoftLedger–integration–screen–showing–connected–API–credentials–and–multiple–connection–slots–available

Create a workflow 

Approveit–workflow–dashboard–displaying–active–and–inactive–processes–with–option–to–create–new–workflow.

Select SoftLedger Bill Approval 

Approveit–SoftLedger–bill–approval–workflow–template–for–syncing–vendors–and–accounting–data–integration.

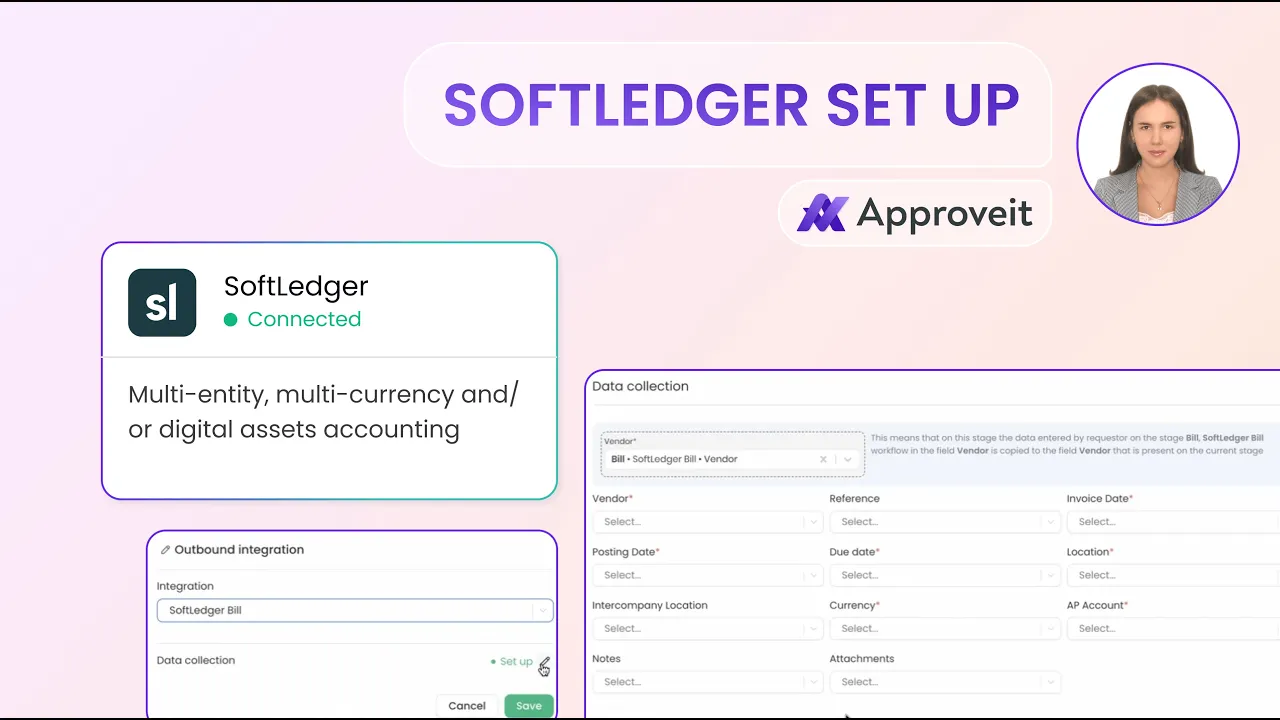
Add Outbound Integration

Approveit–SoftLedger–bill–approval–form–with–outbound–integration–to–Xero–invoice–process–automation

Set up the data collection

Approveit–SoftLedger–bill–integration–setup–form–with–data–collection–configuration–panel–openApproveit–SoftLedger–bill–data–collection–modal–with–vendor–fields–currency–line–items–and–required–inputs–highlighted.

Save the Data Collection and Save the workflow.

Now, approved bills will be automatically transferred to SoftLedger.

If you have any additional questions, contact us right away.